Baby Mitten Crochet Pattern
With this free pattern, you can enjoy making the cutest baby mitten crochet pattern. This is an easy item to crochet, and it’s practical too! Baby mittens not only help to keep the newborn baby’s hands warm in the chilly winter days, but also helps protect babies from scratching themselves when they have longer or scratchy fingernails.

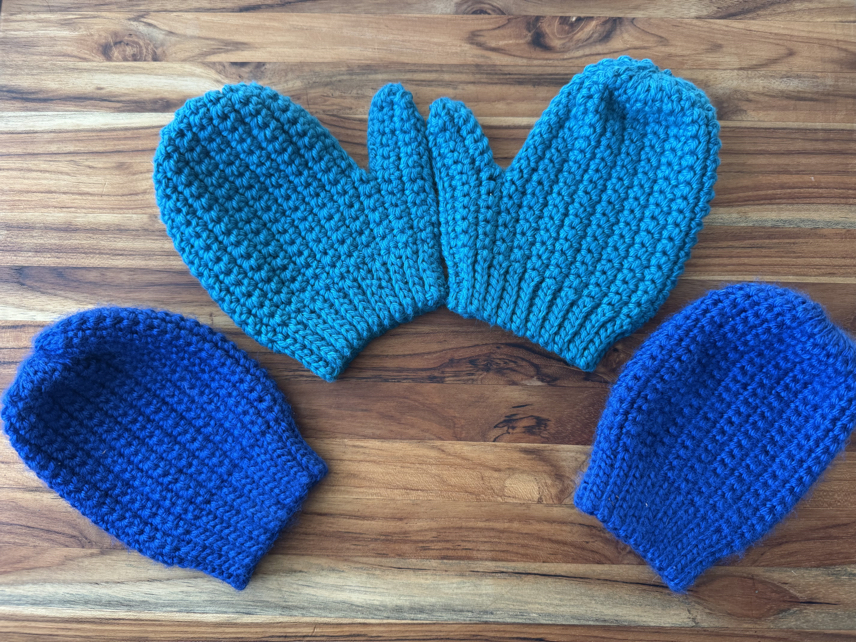
Crochet Newborn Mittens
These crochet baby mitts are not only cute and an easy crochet project to make, but crochet mittens are also practical. A good pair of baby mittens are essential to protect the new baby against the cold, and also keep it from hurting itself by accidentally scratching its face.
These cute little mittens are great to make for your own baby, or for the perfect gift for someone who has a precious new arrival. These little crochet mittens are made with a main mitten body and mitten cuff to help hold it securely on the baby’s hand. The design of these mittens makes them perfect for any new baby.
This mitten pattern is a quick crochet project that you can make in a short amount of time. Plus these baby mittens require you to use only a few basic stitches to make them, by using a simple stitch pattern.
The process of making these mittens is easy. You start at the tip, and create the main part of the mitten, then finish it off by adding the cuff to the infant mittens.
Let’s begin by walking through the step by step instructions to make these cute baby mittens, and follow the photo tutorial included.

Pattern Instructions
Materials
A skein of soft yarn – preferably a soft medium worsted weight yarn
A crochet hook – the size depends on what size baby mittens you want to make
A yarn needle – optional
stitch marker – optional
Abbreviations
ch – chain
sl st – slip stitch
mr – magic ring
sc – single crochet stitches
hdc – half double crochet
sc inc – single crochet increase
sc dec – single crochet decrease
BLO – back loop only
hbhdc – herring bone half double crochet
How to Make the Herringbone Half Double Crochet
To make the Herringbone half double crochet stitch, first yarn over, insert your hook into the next st, yarn over and pull up a loop. There are now three loops on your hook.
Pull the first loop through the second loop, yarn over and pull through the remaining loops on the hook. You have just completed your first herringbone half double crochet stitch. Repeat these steps for each of these stitches throughout the project.
Estimated skill level: Intermediate
Please note that this pattern is written in US crochet terms

Baby Mittens Size 0-3 months (Size E Crochet Hook)
Gauge Size: 6 stitches per inch
Mittens (Make 2)
Round 1: make a mr, in the mr, make 8 hdc sts, join with a sl st.
Round 2: ch 2, work hdc inc in each st around. Join with a sl st.
Round 3: ch 2, make a hbhdc st in each st around. Join with a sl st.
Round 4: ch 2, turn, working inside out in the first st *make 2 hbhdc sts in the same st, make one hbhdc st in the nest st*. Repeat from * to * around. Join with a sl st.


Round 5: ch 2, turn, working right out, make a hbhdc st in each st around. Join with a sl st.
Round 6: ch 2, turn, working inside side out, make a hbhdc st in each st around. Join with a sl st.
Round 7: ch 2, turn, working right out, make a hbhdc st in each st around. Join with a sl st.
Round 8: ch 2, turn, working inside side out, make a hbhdc st in each st around. Join with a sl st.
Round 9: ch 2, turn, working right out, make a hbhdc st in each st around. Join with a sl st.
Round 10: ch 1, work sc dec in the first sts, *sc in the next 3 sts, sc dec in the next sts*, repeat around from * to *. sc in the last 3 sts Join with a sl st.
Round 11: ch 1, sc in each st around. Join with a sl st.
Do not finish off.


Mitten Cuff
At the top of the mitten, it’s time to start the mitten cuff now.
Row 1: ch 8 sts, in the 3rd ch from your hook, make a hdc st. Hdc in each of the remaining 5 ch sts. Join to the base of your mitten with a sl st. Sl st in the next st, turn.
Row 2: working in the BLO make a hdc st in each st across. When you reach the end, ch 2 sts, turn.
Row 3: hdc in each of the sts across until you reach the top of your mitten. Join with a sl st, then sl st in the next st. Turn.
Row 4: working in the BLO make a hdc st in each st across. When you reach the end, ch 2 sts, turn.
Repeat rows 3 and 4 until you meet the first stitches. Turn the mitten inside out and sl st the two sides together. Finish off, and leave a long tail of yarn. Weave in the ends of the yarn, then trim away any access.
Baby Mittens Size 3-6 months (Size E Crochet Hook)
Round 1: make a mr, in the mr, make 10 hdc sts, join with a sl st.
Round 2: ch 2, work hdc inc in each st around. Join with a sl st.
Round 3: ch 2, make a hbhdc st in each st around. Join with a sl st.
Round 4: ch 2, turn, working inside out in the first st *make 2 hbhdc sts in the same st, make one hbhdc st in the nest st*. Repeat from * to * around. Join with a sl st.
Round 5: ch 2, turn, working right out, make a hbhdc st in each st around. Join with a sl st.
Round 6: ch 2, turn, working inside side out, make a hbhdc st in each st around. Join with a sl st.
Round 7: ch 2, turn, working right out, make a hbhdc st in each st around. Join with a sl st.
Round 8: ch 2, turn, working inside side out, make a hbhdc st in each st around. Join with a sl st.
Round 9: ch 2, turn, working right out, make a hbhdc st in each st around. Join with a sl st.
Round 10: ch 1, work sc dec in the first sts, *sc in the next 3 sts, sc dec in the next sts*, repeat around from * to *. sc in the last 3 sts Join with a sl st.
Round 11: ch 1, sc in each st around. Join with a sl st.
Do not finish off.
Mitten Cuff
At the top of the mitten, it’s time to start the mitten cuff now.
Row 1: ch 8 sts, in the 3rd ch from your hook, make a hdc st. Hdc in each of the remaining 5 ch sts. Join to the base of your mitten with a sl st. Sl st in the next st, turn.
Row 2: working in the BLO make a hdc st in each st across. When you reach the end, ch 2 sts, turn.
Row 3: hdc in each of the sts across until you reach the top of your mitten. Join with a sl st, then sl st in the next st. Turn.
Row 4: working in the BLO make a hdc st in each st across. When you reach the end, ch 2 sts, turn.
Repeat rows 3 and 4 until you meet the first stitches. Turn the mitten inside out and sl st the two sides together. Finish off, and leave a long tail of yarn. Weave in the ends of the yarn, then trim away any access.
Join our Mailing List and Receive a…
Baby Mittens Size 6-12 months (Size F Crochet Hook)
Round 1: make a mr, in the mr, make 12 hdc sts, join with a sl st.
Round 2: ch 2, work hdc inc in each st around. Join with a sl st.
Round 3: ch 2, make a hbhdc st in each st around. Join with a sl st.
Round 4: ch 2, turn, working inside out in the first st *make 2 hbhdc sts in the same st, make one hbhdc st in the nest st*. Repeat from * to * around. Join with a sl st.
Round 5: ch 2, turn, working right out, make a hbhdc st in each st around. Join with a sl st.
Round 6: ch 2, turn, working inside side out, make a hbhdc st in each st around. Join with a sl st.
Round 7: ch 2, turn, working right out, make a hbhdc st in each st around. Join with a sl st.
Round 8: ch 2, turn, working inside side out, make a hbhdc st in each st around. Join with a sl st.
Round 9: ch 2, turn, working right out, make a hbhdc st in each st around. Join with a sl st.
Round 10: ch 1, work sc dec in the first sts, *sc in the next 3 sts, sc dec in the next sts*, repeat around from * to *. sc in the last 3 sts Join with a sl st.
Round 11: ch 1, sc in each st around. Join with a sl st.
Do not finish off.
Mitten Cuff
At the top of the mitten, it’s time to start the mitten cuff now.
Row 1: ch 8 sts, in the 3rd ch from your hook, make a hdc st. Hdc in each of the remaining 5 ch sts. Join to the base of your mitten with a sl st. Sl st in the next st, turn.
Row 2: working in the BLO make a hdc st in each st across. When you reach the end, ch 2 sts, turn.
Row 3: hdc in each of the sts across until you reach the top of your mitten. Join with a sl st, then sl st in the next st. Turn.
Row 4: working in the BLO make a hdc st in each st across. When you reach the end, ch 2 sts, turn.
Repeat rows 3 and 4 until you meet the first stitches. Turn the mitten inside out and sl st the two sides together. Finish off, and leave a long tail of yarn. Weave in the ends of the yarn, then trim away any access.

Tips and Tricks
Special Stitches
There are only a few basic crochet stitches you will need to know in order to make these crochet baby mittens. Here are the basic stitches you will want to know how to make.
Single Crochet. A single crochet is one of the basic crochet stitches. To make this stitch, you will insert your hook into the stitch indicated, yarn over and pull up a loop, yarn over and pull through both loops on your hook.
Single Crochet Increase. A single crochet increase is when two single crochet stitches are made in the same stitch. This allows the number of stitches in your round to increase.
Half Double Crochet. A half double crochet stitch is made first by yarning over, then insert your hook into the stitch indicated, yarn over and pull up a loop. Yarn over one last time and pull through all three loops on your hook.
Magic Ring. A magic ring is used as the starting loop for your baby mittens. For a full tutorial on how to make this, be sure to check out my step by step instructions. Learn How To Crochet A Magic Circle (Magic Ring Tutorial)
Back Loop Only. What does the back loop only mean? This is very important when making the cuff on your baby mittens, so that you get the nice ribbed appearance. Basically, what this means is that you will want to work only in the back loops of your previous row, so that you get a textured appearance.
For more details on how to make these basic crochet stitches, be sure to check out my Beginners Guide For Learning How To Crochet.

Yarn Used
When you are making these baby mittens there are a few things you will want to consider when you select your yarn. First, little babies will need warm mittens to keep their hands warm in the cold weather. If this is the primary reason you are making the baby mittens it is best to use medium worsted weight yarn. This way their precious little hands will stay warm in the cold.
However, if your primary reason for making these baby mittens is to protect the baby from scratches, you may select a thinner yarn if you prefer. It’s always best to choose a nice soft yarn for the baby, but the thickness isn’t as important in this case.
You can use acrylic yarn or cotton yarn for this crochet project. Just keep in mind, cotton yarn washes better than acrylic yarn does. Its really a matter of your preference as to the yarn type that is best for this crochet pattern.
Hook Size
The crochet hook size you use will also depend on what yarn you use, and what size of baby mittens you are making. The best way to tell if you are using the right size crochet hook is to make a few sample stitches, and see if they measure of with the stitch gauge size. If they do this will ensure that you end up with the same size finished mittens.
Make it a Cute Baby Set
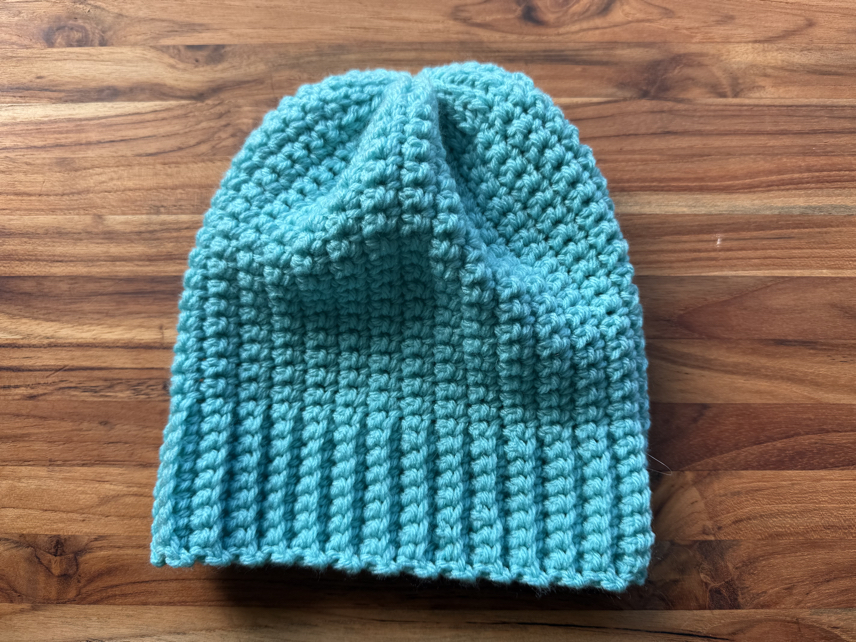
Not only can you enjoy these cute baby mittens, but you can also make a matching hat to go with it and complete the winter style. Here are a few of my favorite baby hat patterns that you might enjoy.


Get the FREE crochet Ribbed Beanie Hat Pattern for Babies so that you can make a matching set!
You might also enjoy these other free crochet patterns for babies!


Baby Mitten Copyright
Please note that this pattern is intended for your personal use only. By copyright, unless otherwise noted, you are not authorized to copy or claim my content as your own. You are, however, more than welcome to sell your finished products made with my patterns. I always appreciate it when you link to my patterns so that others can find them too!
Baby Mittens Crochet Pattern
This free crochet baby mittens pattern is the perfect item to make for any newborn baby. Pulse the free crochet pattern walks you through the step by step process to make these cute baby mittens.
There are a variety of uses for these little mitts. They can help to keep a baby’s hands warm against the cold weather or protect a baby from scratching itself. No matter what your reason for making this free baby mittens crochet pattern, it is the perfect crochet project for new babies.
Thank you so much for stopping by to check out my free baby mitten crochet pattern! I hope you will give it a try, and I hope you will enjoy making this crochet project!
Happy Crocheting!

Find Us Online!
Be sure to follow us online on your favorite social media platform!

Baby Mitten Crochet Pattern
Materials
- A skein of soft yarn – preferably a soft medium worsted weight yarn
- A crochet hook – the size depends on what size baby mittens you want to make
- A yarn needle – optional
- stitch marker – optional
Instructions
- Round 1: make a mr, in the mr, make 8 hdc sts, join with a sl st.
- Round 2: ch 2, work hdc inc in each st around. Join with a sl st.
- Round 3: ch 2, make a hbhdc st in each st around. Join with a sl st.
- Round 4: ch 2, turn, working inside out in the first st *make 2 hbhdc sts in the same st, make one hbhdc st in the nest st*. Repeat from * to * around. Join with a sl st.
- Round 5: ch 2, turn, working right out, make a hbhdc st in each st around. Join with a sl st.
- Round 6: ch 2, turn, working inside side out, make a hbhdc st in each st around. Join with a sl st.
- Round 7: ch 2, turn, working right out, make a hbhdc st in each st around. Join with a sl st.
- Round 8: ch 2, turn, working inside side out, make a hbhdc st in each st around. Join with a sl st.
- Round 9: ch 2, turn, working right out, make a hbhdc st in each st around. Join with a sl st.
- Round 10: ch 1, work sc dec in the first sts, *sc in the next 3 sts, sc dec in the next sts*, repeat around from * to *. sc in the last 3 sts Join with a sl st.
- Round 11: ch 1, sc in each st around. Join with a sl st.
Do not finish off. - Row 1: ch 8 sts, in the 3rd ch from your hook, make a hdc st. Hdc in each of the remaining 5 ch sts. Join to the base of your mitten with a sl st. Sl st in the next st, turn.
- Row 2: working in the BLO make a hdc st in each st across. When you reach the end, ch 2 sts, turn.
- Row 3: hdc in each of the sts across until you reach the top of your mitten. Join with a sl st, then sl st in the next st. Turn.
- Row 4: working in the BLO make a hdc st in each st across. When you reach the end, ch 2 sts, turn.
- Repeat rows 3 and 4 until you meet the first stitches. Turn the mitten inside out and sl st the two sides together. Finish off, and leave a long tail of yarn. Weave in the ends of the yarn, then trim away any access.
Baby Mittens (Make 2)
Mitten Cuff
At the top of the mitten, it’s time to start the mitten cuff now.
PIN It For Later!

