Easy Baby Beanie Crochet Pattern
With this completely free pattern, you can enjoy making an easy baby beanie by following our step-by-step instructions in this crochet pattern. Once you learn how to make this easy baby beanie crochet pattern, you will be hooked on making these cute baby hats. This baby beanie pattern is so addicting to make, plus the finished item is super cute, you just can’t go wrong making these little hats for the new arrival in your life.

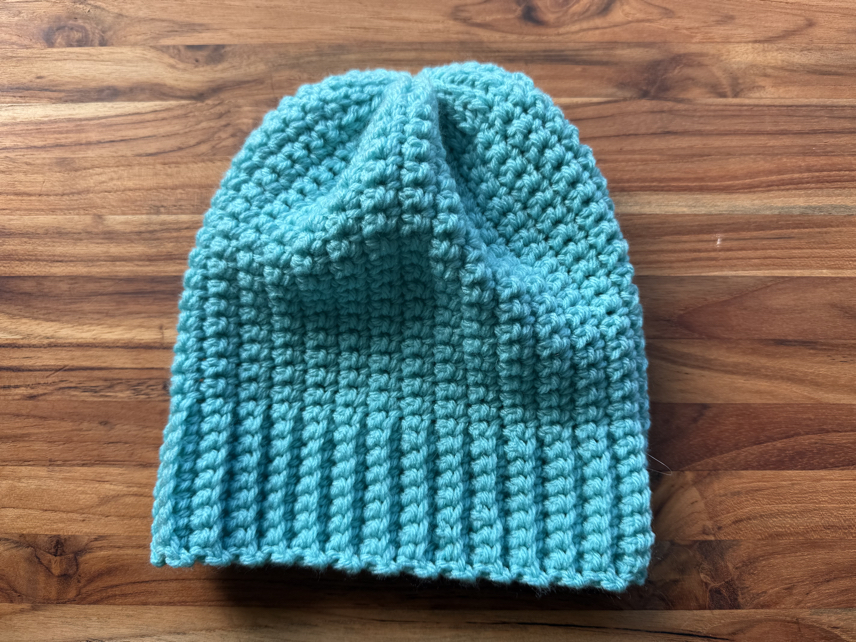
Ribbed Baby Beanie Pattern
In this free crochet hat pattern, you can make the most adorable little baby hats, using basic crochet stitches. These little hats are perfect for a baby shower, if you are looking for a great gift idea, you can use them for your own baby, or donate them to your local hospital.
Another great thing about this free crochet baby hat pattern is that you don’t have to know a lot of special crochet stitches to make this newborn hat. You only need a few basic stitches, making this the perfect crochet pattern for new crocheters to start with.
Let’s jump right into the crochet pattern, by first looking at what materials you will need.

Easy Crochet Baby Hat Pattern
Materials:
1 skein of baby yarn or worsted weight yarn
1 tapestry needle
A crochet hook – Size E crochet hook is recommended
Abbreviations:
sl st – slip stitch
sc – single crochet
hdc – half double crochet
ch – chain
BLO – back loop only
Please note that this pattern is written is US terms
Skill level: Beginner
How to Crochet an Easy Baby Beanie
Row 1: create your foundation chain until it measures to your desired length, according to the size chart below.


Row 2: in the 3rd ch st from your hook, make a hdc st, hdc in each st across. Turn
Row 3: ch 2, working in the BLO make a hdc st in each st across, turn. Repeat row until the crochet fabric measures to your desired width according to the size chart below.


Assembling the Beanie
When your crochet baby beanie cloth has been created to your desired size, based on the baby beanie size chart below, finish off, but leave a long tail of yarn for sewing.
Now to shape the crochet rectangle into a beanie, you will first fold the beanie in half, so that the two ends meet. Thread your yarn needle onto the yarn tail that was left, and sew up the ends of the hat.


You now have a tube shape. To close the top of the beanie, you will want to stitch around the entire top side of the hat, and then pull it tight. As you tighten the top side of the hat it will begin to pull shut.
On the inside of the hat, use the remaining yarn to stitch the cinched top securely together, so that it is closed nicely before turning the hat right side out.
Adding a Pom Pom
If you want to finish off your baby’s beanie with a pom pom on top, this is a fun and easy way to add a bit of character. There are two ways you can do this, you can buy a pom pom from your local craft store, or you can make your own.
How to Make a Pom Pom
To make your own pom pom, you can use leftover yarn of the same color, or a different color if you prefer. I like to find a kitchen utensil like a large fork or spatula, whatever is handy, to make my pom poms on.
To do this, you will simply start by wrapping the yarn around your item. Continue wrapping it until you have a thick bit of yarn. The more yarn you wrap, the more body your pom pom will have.


When you are finished, tie a piece of yarn securely the opposite way across your wrapped yarn. It’s a good idea to wrap it and tie it a few times so that the yarn doesn’t come off.
After the yarn is secured in place, take a pair of scissors, and cut the yarn at both ends. This will create the pom pom effect. Use the scissors to trim the pom pom into a nice circle shape if desired.
Finishing
Finish the baby beanie out by sewing the pom pom securely to the top of the crochet baby beanie. Make sure to sew it very well so that it doesn’t fall off. Now your crochet baby beanie is finished and ready to enjoy!
Join our Mailing List and Receive a…
Baby Beanie Sizes
There are many different sizes of babies. The most common size breakdown includes preemie, 0-3 months, 3-6 months, 6-9 months, and 9-12 months. To get the best size for your baby, you can easily measure the baby’s head circumference, then add a little to it when you make your crochet baby ribbed beanie.

However, if you don’t have the exact head measurement of your baby, here is a size chart that will help you estimate the approximate size of the beanie you should create. You can follow this estimated size chart as a great place to get you started. Remember, if in doubt, it’s always better to go a little too big, than too small. The baby can always grow into it in a short time if needed.

Tips and Tricks
What size crochet hook should I use?
Before you can begin making your easy crochet baby beanie, you will need to select a crochet hook to use. I like to use a size E or F crochet hook for this pattern. This is the same as a 3.50 mm hook or a 3.75 mm hook.
Keep in mind though, the exact crochet hook that is best for your project will not only depend on what yarn you use, but also your stitching tendency. For this crochet pattern, you will want to select a crochet hook that will make nice and tight stitches, without holes.
This pattern doesn’t have a gauge like other patterns do, and that is because you can measure your crochet fabric using a ruler. That way no matter how tight your stitches are, you can still get the right size hat.
What yarn is the best yarn for this pattern?
To make this little hat, I like to use a baby yarn. Baby yarns are my favorite yarns to use because they are nice and soft, on your baby’s head. However, you can also use a soft medium weight yarn if you prefer to work with a little bit thicker of a yarn. Just make sure that it is a soft yarn, before you get started on your project.
Can I use this pattern to make a toddler hat?
Yes! One of the great things about this crochet pattern is that you can easily make this crochet pattern into any size hat you want, including a toddler hat. You will simply want to make your crochet rectangle a bit larger in both directions before finishing out the hat.
Easy Baby Beanie Crochet Pattern Copyright
By copyright, unless otherwise noted, you are not authorized to copy or claim my content as your own. You are, however, more than welcome to sell your finished products made with my patterns. I always appreciate it when you link to my patterns so that others can find them too!

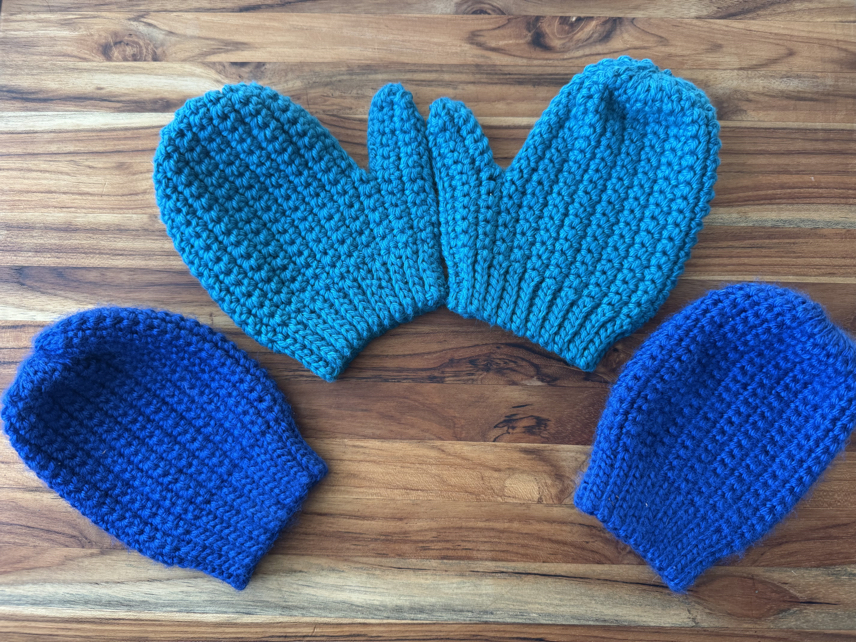
Make it into a set by following our crochet mitten pattern for babies!
Easy Baby Crochet Hat
This easy crochet baby hat pattern is the perfect crochet pattern to make for the new arrival in your life. I love to make this cute beanie pattern for my little guy! I hope that you will enjoy making this hat pattern for your little one, or remember, these baby beanies are the perfect gift for any little one in your life.
You don’t have to be a crochet expert, all you need to know are a few simple stitches, to make this simple baby hat crochet pattern. Making this pattern ideal for beginner crocheters.
Thank you so much for stopping by, to check out my easy baby beanie crochet pattern! I hope that you will enjoy this pattern, and give it a try!
Happy Crocheting!
More Free Crochet Patterns
Be sure to check out more of our free crochet patterns! There are many free ideas of crochet items you can make for babies and toddlers.

Find Us Online!
Be sure to follow us online on your favorite social media platform!

Easy Baby Beanie Crochet Pattern
Materials
- 1 skein of baby yarn or worsted weight yarn
- 1 tapestry needle
- A crochet hook – Size E crochet hook is recommended
Instructions
How To Crochet an Easy Baby Beanie
- Row 1: create your foundation chain until it measures to your desired length, according to the size chart below.
- Row 2: in the 3rd ch st from your hook, make a hdc st, hdc in each st across. Turn
- Row 3: ch 2, working in the BLO make a hdc st in each st across, turn. Repeat row until the crochet fabric measures to your desired width according to the size chart below.
Assembling the Beanie
- When your crochet baby beanie cloth has been created to your desired size, based on the baby beanie size chart below, finish off, but leave a long tail of yarn for sewing.
- Now to shape the crochet rectangle into a beanie, you will first fold the beanie in half, so that the two ends meet. Thread your yarn needle onto the yarn tail that was left, and sew up the ends of the hat.
- You now have a tube shape. To close the top of the beanie, you will want to stitch around the entire top side of the hat, and then pull it tight. As you tighten the top side of the hat it will begin to pull shut.
- On the inside of the hat, use the remaining yarn to stitch the cinched top securely together, so that it is closed nicely before turning the hat right side out.
How to Make a Pom Pom
- To make your own pom pom, you can use leftover yarn of the same color, or a different color if you prefer. I like to find a kitchen utensil like a large fork or spatula, whatever is handy, to make my pom poms on.
- To do this, you will simply start by wrapping the yarn around your item. Continue wrapping it until you have a thick bit of yarn. The more yarn you wrap, the more body your pom pom will have.
- When you are finished, tie a piece of yarn securely the opposite way across your wrapped yarn. It’s a good idea to wrap it and tie it a few times so that the yarn doesn’t come off.
- After the yarn is secured in place, take a pair of scissors, and cut the yarn at both ends. This will create the pom pom effect. Use the scissors to trim the pom pom into a nice circle shape if desired.
Finishing
Finish the baby beanie out by sewing the pom pom securely to the top of the crochet baby beanie. Make sure to sew it very well so that it doesn’t fall off. Now your crochet baby beanie is finished and ready to enjoy!
PIN for Later!

