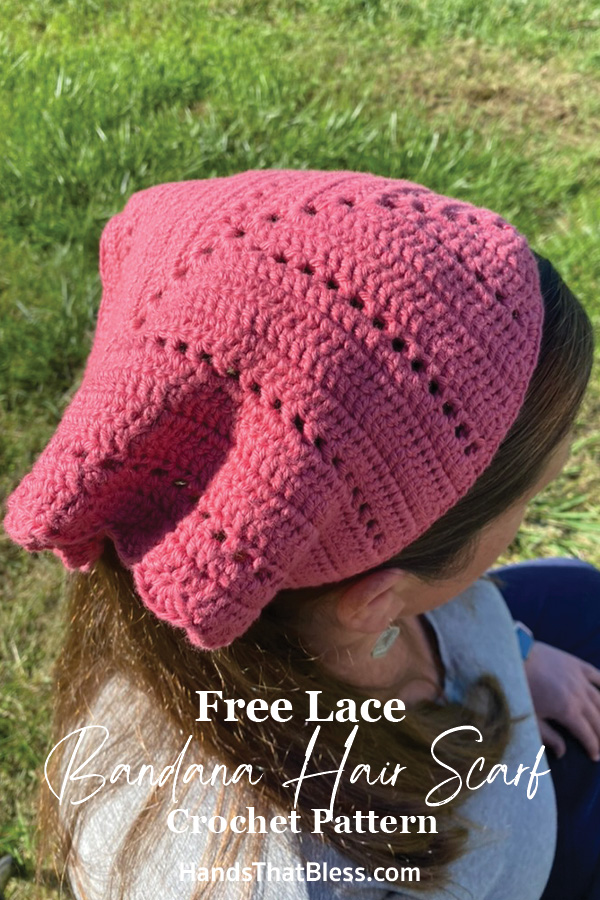
Crochet Bandana Pattern
In this free crochet pattern, you get to learn how to make your own lacey crochet bandana pattern, by following a few basic step-by-step instructions. These are an easy project to make, and they are so beautiful when finished, that you then get to wear your work or give these beautiful bandanas away as a gorgeous handmade gift.
This pattern for a crochet bandana has been designed a little differently than most of the patterns available. I am excited to show you how to make this pattern because it is not only cute but the lacey element of the bandana will give your style its own feminine feeling.
Crochet Head Kerchief
By making your own handmade crochet bandana, you get to create the perfect accessory to wear no matter the season. This is a simple pattern that will walk you through the step-by-step process involved in creating this fun project.
If you are looking for a quick and easy crochet project to make or an idea on how to change up your style a little bit, then this free pattern for a lacey crochet bandana is a great option for you. This crochet head scarf provides a unique boho-chic vibe, that you can enjoy wearing every day, add to your summer outfit, or on special occasions. You really can’t go wrong with this lovely lace bandana.
Join our Mailing List and Receive a…
The Basic Crochet Stitches Used
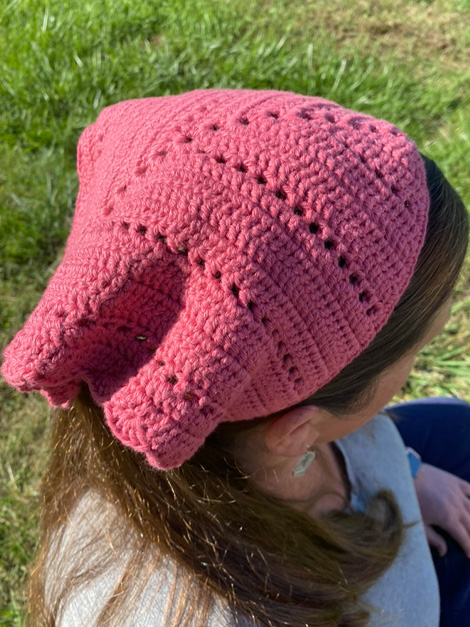
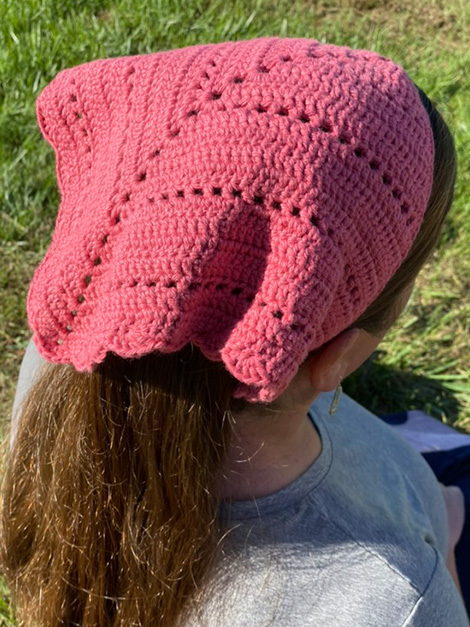
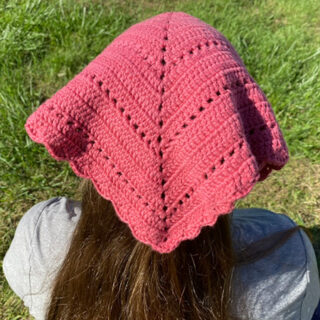
When you look at the pictures of my finished crochet lace bandana, you might be a little bit intimidated by the different stitches used. Fear not, there really are just a few basic stitches that you will need to know in order to make this lace bandana.
A lot of bandana patterns out there will use granny clusters, or the popular crochet granny stitch to make up the entire bandana. This pattern is a little different, in that it still uses half of the granny square concept to make the shape, but the shell stitch, or what is sometimes called the fan stitch is what is used to create this delicate design.
In order to make this pattern, you will want to know how to make a chain, slip stitch, single crochet, and double crochet stitch. These basic crochet stitches are then combined in different ways to make up the lacey bandana pattern. If you would like to learn more about how to make these simple crochet stitches, be sure to check out my learning how to crochet tutorial, which is a great resource for beginners.
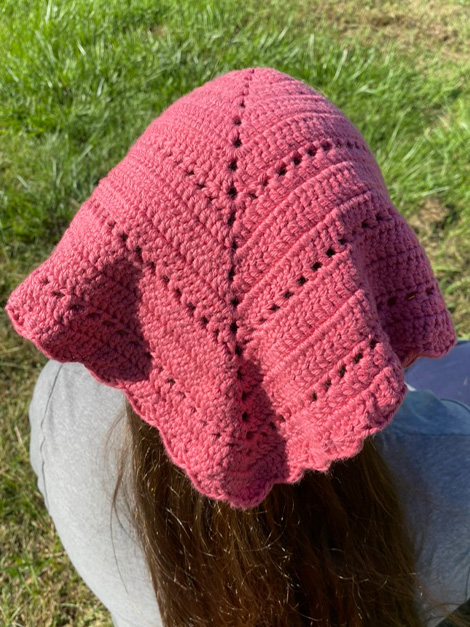
Beautiful Crochet Bandana Pattern
Materials Needed
100% Cotton Yarn
Size D Crochet Hook
Scissors
Abbreviations (US Terms)
sl st – slip stitch
ch – chain
sc – single crochet stitch
dc – double crochet stitch
st/sts – stitch/stitches
Skill Level: advanced beginner / intermediate
Gauge: 12 sts in a 2 inch row
How to Crochet A Bandana
The Bandana
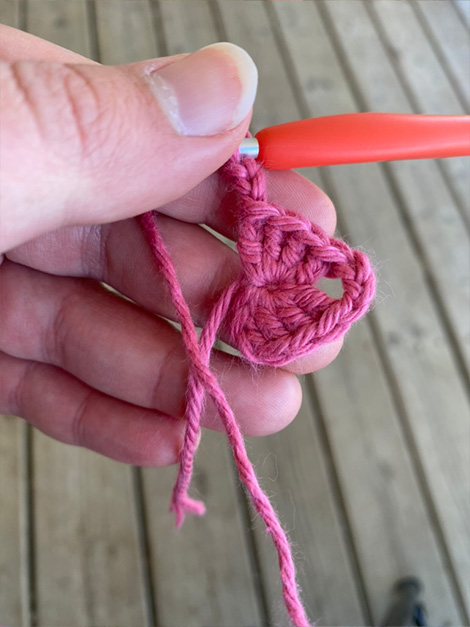
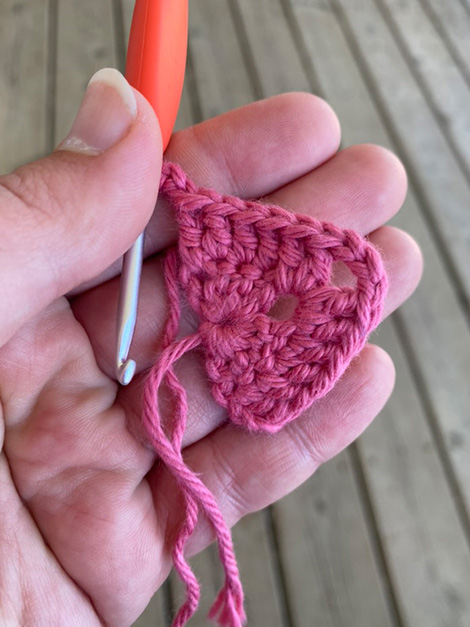
Row 1: ch 4 sts, in the 4th ch from your hook, make 3 dc sts, ch 3, 4 dc sts.
Row 2: ch 2 sts, turn. Dc in each of the next 4 dc sts, in the ch space make 2 dc, ch 3, 2 dc sts, dc in the remaining 4 dc sts.
Row 3: ch 2 sts, turn. Dc in each of the next dc sts, in the ch space make 2 dc sts, ch 3, 2 dc, dc in each of the remaining dc sts.
Row 4: Repeat row 3 one time more
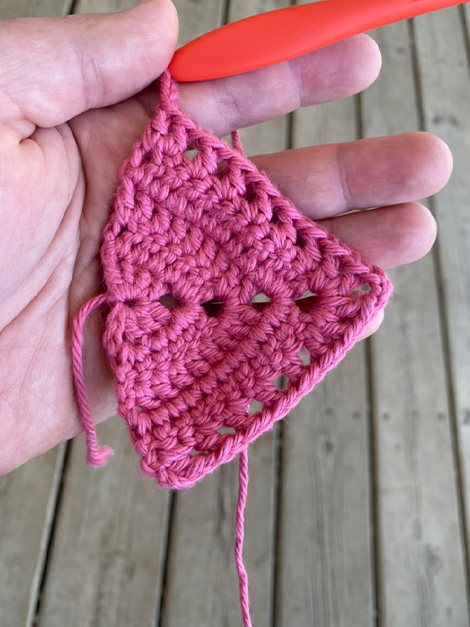
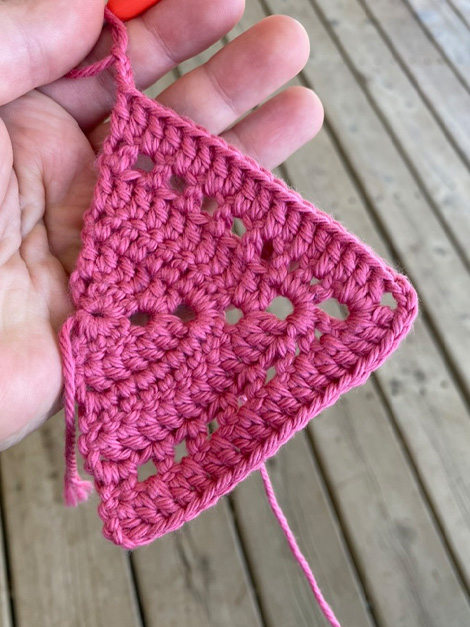
Row 5: ch 2 sts, dc in the next dc st, ch 1, skip the next dc, dc in the next dc. Repeat until you come to the chain 3 space. In the ch 3 space, work dc, ch 1, dc, ch 3, dc, ch 1, dc, on the other side work ch 1, dc, skip the next dc, ch 1, dc, skip the next dc across to the end. Dc in the last two sts.
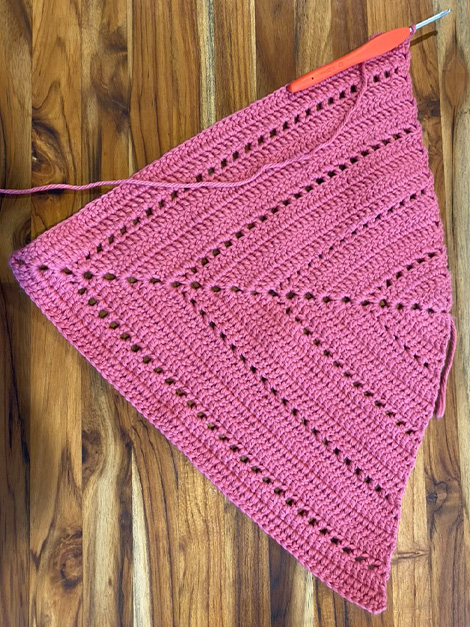
Repeat row 3 four times, then make row 5. Continue alternating in this pattern until your bandana is your desired size. I made 4 groups of the 4 dc rows, and chain row, then added two more double crochet rows before adding the edging.
The Border
When you finish the body of the bandana, do not finish off. Instead you can start the boarder.
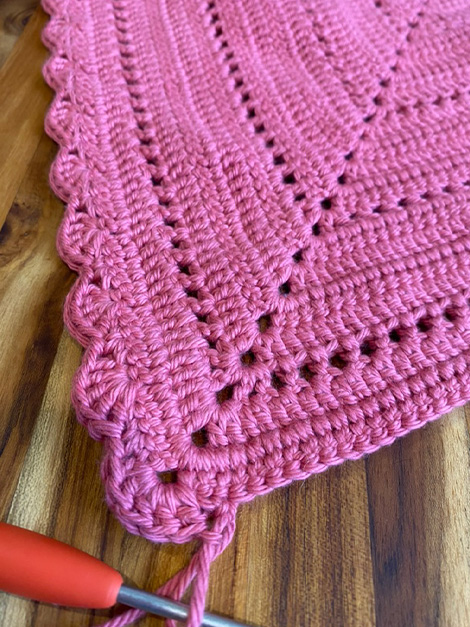
To make the boarder, ch 1, turn and sc on top of the last dc made. *Skip the next 2 sts, and then make 5 dc sts in the next st, skip the next 2 sts, sc in the next st.* Repeat from * to * across.
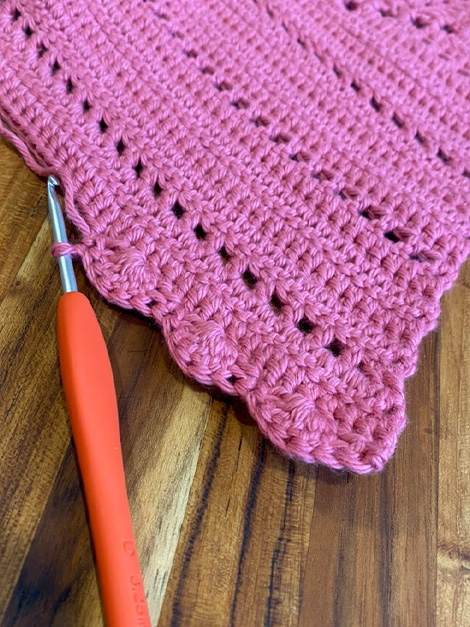

Making Ties
On the side of the bandana, I like to add some tie strings. To do this, you can join the yarn at either side. then chain approximately 81 sts, or as many as you prefer. In the second ch from the hook, make a sl st. Sl st in each st back up to the bandana. Finish off and weave in the yarn ends. Repeat the same steps for the other side of the bandana. Then you are finished and ready to enjoy your crochet head scarf!
Tips for Crocheting Bandanas and Headscarves
Check your Gauge for Sizing
In the above pattern, a gauge has been provided. In order to check this, you will also want to use a gauge to measure your stitches. This will ensure that your bandana turns out the same size as mine did. If needed, you can use a smaller hook or larger crochet hook to help adjust the size so that the stitch count matches up to the gauge.
Adjust the Size as you go if Needed
When making this crochet bandana, you can easily adjust the finished size by adding or subtracting the number of rows you create. This way you can make the finished bandana as large or as small as you prefer.
Choose the Best Yarn for your Project
I highly recommend using crochet thread for this project, so that the bandana turns out nice and lacey. However, you don’t have to use crochet thread if you prefer something else. Just remember that it will change the size of your bandana if you use a different size yarn, and you will also want to change the hook size you use.
Some other good yarn options include 100% cotton yarn. For this type of project, you might like Lion Brand’s 24/7 cotton yarn, or Hobby Lobby has its own brand of this type of yarn as well. If you decide not to use cotton crochet thread, then cotton yarn is the next best option.
Additional Questions
What yarn is best for making crochet bandanas?
The best yarn for making this crochet pattern is going to be cotton crochet thread, or if you prefer 100% cotton yarn. While you can use acrylic yarn, the best results will be had with cotton yarn.
How Long Does it Take to Crochet an Easy Bandana?
How long it takes to make a bandana depends on you. How much time you work on the project, and how fast you are at stitching. This lace crochet bandana is a fairly quick crochet project because it is a smaller project to make.
Can beginners crochet a bandana?
While beginners can make a crochet bandana, this specific pattern is going to be best for crocheters who have a little bit of experience under their belts. I recommend this pattern for advanced beginners or intermediate crocheters.
Can you make this pattern in different sizes?
Yes, making this pattern in different sizes is very easy to do. Because the pattern is worked in repetitive rows, you can easily increase or decrease the number or rows you make in order to change the finished size of your bandana.
Lace Crochet Bandana Pattern Copyright
Please note that this pattern is intended for personal use only, and is not for commercial distribution. By copyright, unless otherwise noted, you are not authorized to copy or claim my content as your own. You are, however, more than welcome to sell your finished products made with my patterns. I always appreciate it when you link to my patterns so that others can find them too!
Crochet Bandana: Your New Favorite Headwear
I love this cute crochet bandana, it is super cute and helps to bring out your personal style with this simple bandana. If you are looking for a fun crochet project to try out, or trying to accentuate the cottage-core look, then this is one crochet pattern you have got to try out!
Thank you so much for stopping by to check out my free pattern to make a lace crochet bandana pattern. I hope that you will try this free crochet bandana scarf pattern out, and I hope you will love it!
Happy Crocheting!
More Crochet Patterns You Will Love!

Find Us Online!
Be sure to follow us online on your favorite social media platform!
Crochet Bandana Pattern
Materials
- 100% Cotton yarn
- Size D Crochet Hook
- Scissors
Instructions
- Row 1: ch 4 sts, in the 4th ch from your hook, make 3 dc sts, ch 3, 4 dc sts.
- Row 2: ch 2 sts, turn. Dc in each of the next 4 dc sts, in the ch space make 2 dc, ch 3, 2 dc sts, dc in the remaining 4 dc sts.
- Row 3: ch 2 sts, turn. Dc in each of the next dc sts, in the ch space make 2 dc sts, ch 3, 2 dc, dc in each of the remaining dc sts.
- Row 4: Repeat row 3 one time more
- Row 5: ch 2 sts, dc in the next dc st, ch 1, skip the next dc, dc in the next dc. Repeat until you come to the chain 3 space. In the ch 3 space, work dc, ch 1, dc, ch 3, dc, ch 1, dc, on the other side work ch 1, dc, skip the next dc, ch 1, dc, skip the next dc across to the end. Dc in the last two sts.
- Repeat row 3 four times, then make row 5. Continue alternating in this pattern until your bandana is your desired size. I made 4 groups of the 4 dc rows, and chain row, then added two more double crochet rows before adding the edging.
- When you finish the body of the bandana, do not finish off. Instead you can start the boarder.
- To make the boarder, ch 1, turn and sc on top of the last dc made. *Skip the next 2 sts, and then make 5 dc sts in the next st, skip the next 2 sts, sc in the next st.* Repeat from * to * across.
- On the side of the bandana, I like to add some tie strings. To do this, you can join the yarn at either side. then chain approximately 81 sts, or as many as you prefer. In the second ch from the hook, make a sl st. Sl st in each st back up to the bandana. Finish off and weave in the yarn ends. Repeat the same steps for the other side of the bandana. Then you are finished and ready to enjoy your crochet head scarf!
The Bandana
The Border
Making Ties
PIN for Later!