DIY Toddler Busy Board
I am so excited to show you how to make your own DIY toddler busy board. I recently made one of these for my toddler, and it was a huge hit. My little one absolutely loves to play with it, and it’s such a good learning experience for young toddlers to gain fine motor skills.
When I was looking to make mine, I searched and searched for a simple list of what to buy. I was looking for things that I could just screw to a board, without needing a bunch of power tools, but didn’t have any luck finding something like that. So I decided to put together a list, and share it with you, in case you would like to make a simple busy board too.
All of these items included on the activity board can be purchased from your local hardware store. I got all of ours from Home Depot, but most hardware stores should carry these items.
DIY Busy Board For 1 Year Old
There are many different elements that you can choose to include in your activity board. Just make sure that they are age-appropriate activities, and that you don’t include anything that your little one could get hurt on, and be sure to avoid anything that could be a choking hazard. When you select the items for your busy board, keep in mind that there are endless opportunities, so be sure to use items that are in line with your child’s interests.
Making your own busy board is a great way to provide your child with opportunities for independent play, but also a way to help your child learn and grow. This board is not only a fun activity for them to do, but it will help them to explore and learn how things work.
Child Development Benefits
Believe it or not, a busy board is not just a fun toy to help keep your child’s little hands busy, but it is a rewarding project, because it will help with their cognitive growth. The items included on a busy board can help toddlers learn good hand-eye coordination skills, and it gives them a safe environment to learn how things work.
Let’s jump into the list of items I included and how to make the board. Later, I’ll also give you ideas of other things you might include.
Making A Toddler Busy Board DIY
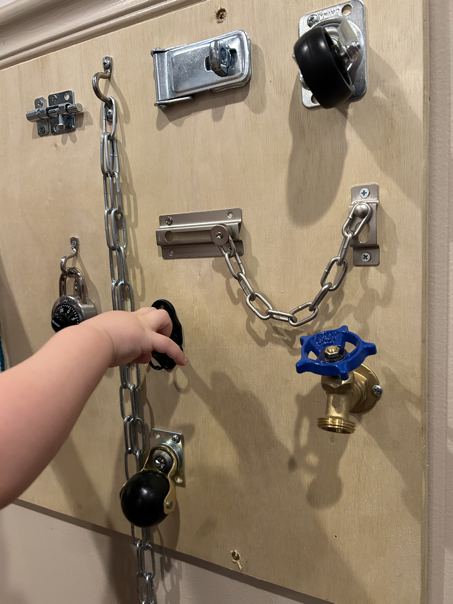
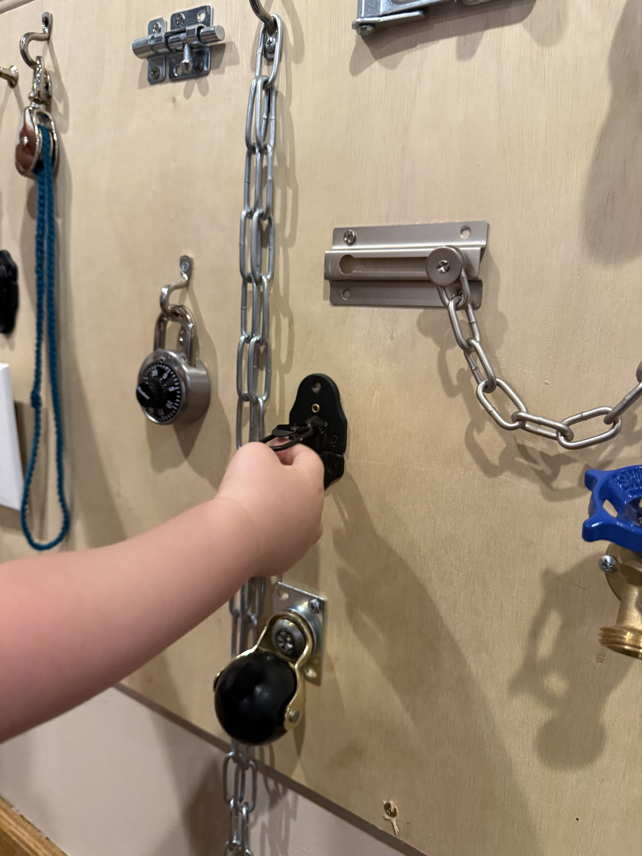
The Busy Board Ideas: Ideas Of What To Include
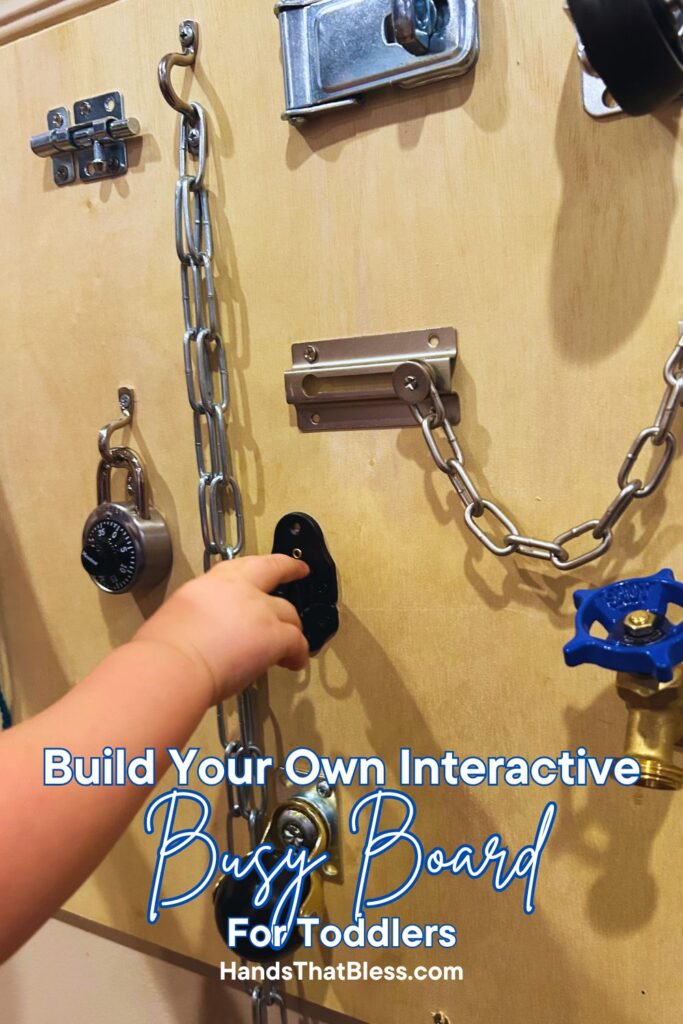
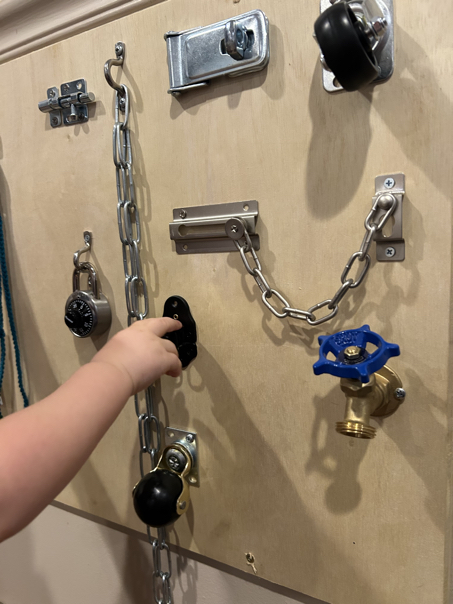
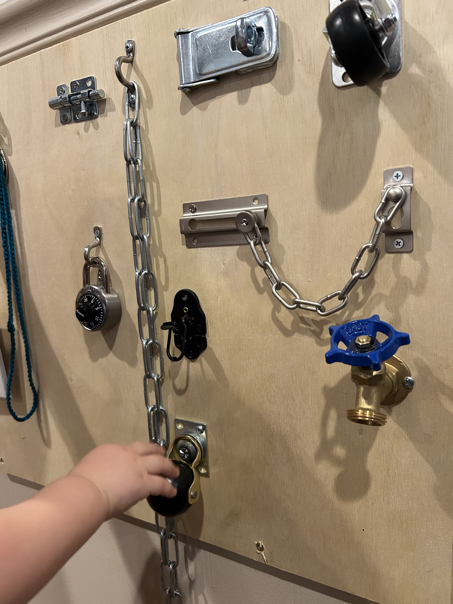
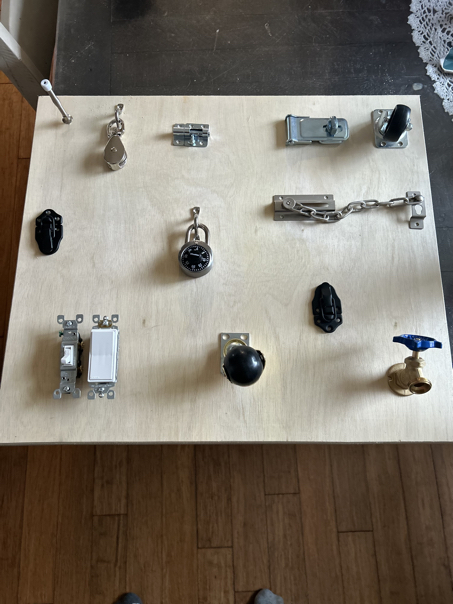
3 ½ inch Chain door lock
2 inch Window bold
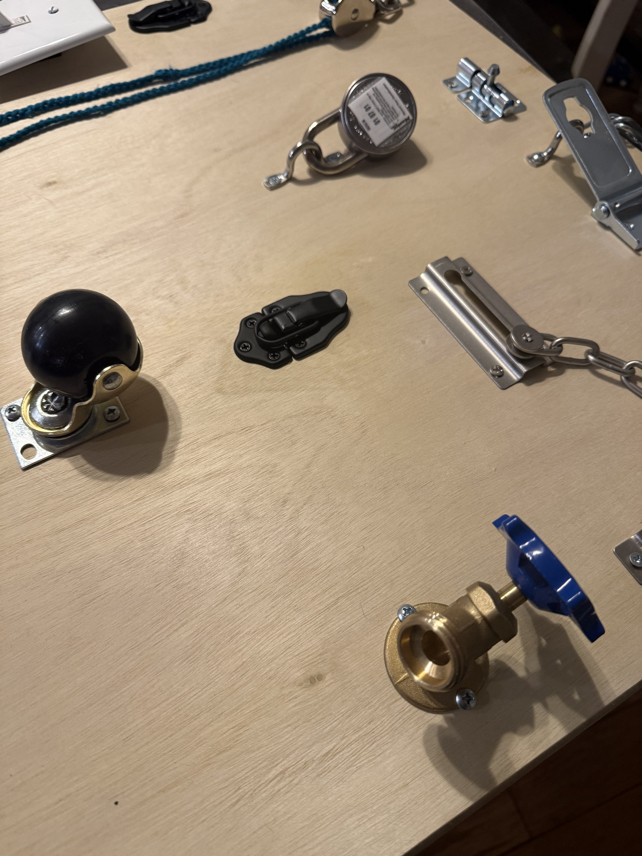
2 inch Black rubber and brass hooded ball swivel plate caster
2 inch Black polypropylene and steel swivel plate caster
2 pack 2-¾ inch x 1 ½ inch chest door latch
Light duty spring door stop
1-⅞ inch Combination padlock
1 ¼ inch Swivel pulley
3 9/16 inch Rope loop
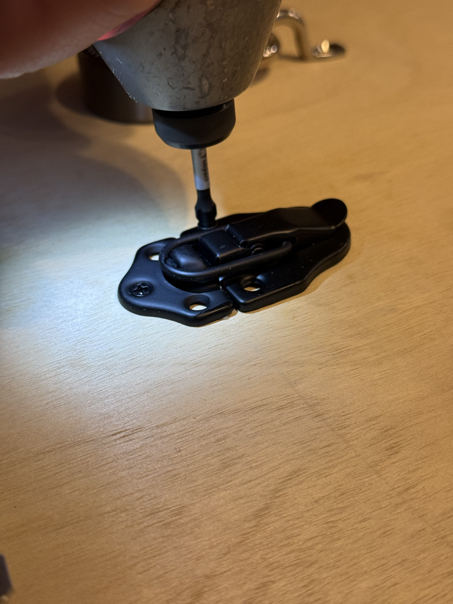
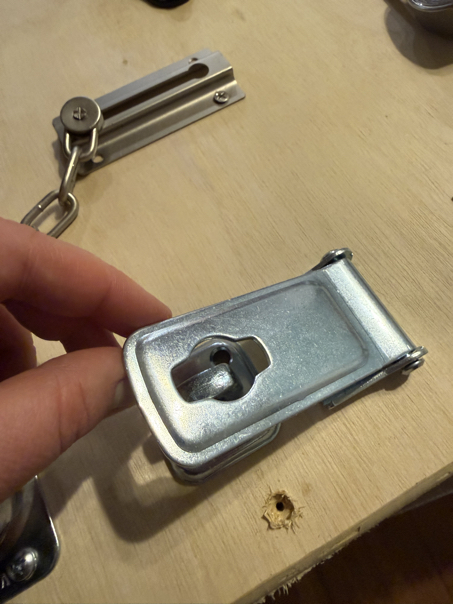
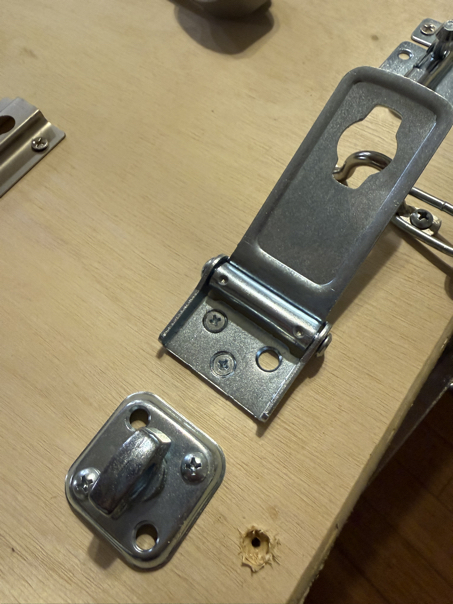
3 ½ inch Latch post safety hasp
½ in x 2 ft x 4 ft Sande plywood project panel (only used half of it)
Small length of chain (be careful to attach it so that your baby can safely play with it)
4 long screws to attach the board to the wall
Basic Tools You Will Need
Screw driver or impact
Saw (or you can ask the store to cut the board for you, most stores that sell lumber will do this)
Router or sander for smoothing and rounding the sharp edges
How To Make A DIY Toddler Busy Board
Step 1: Get Your Supplies
Before you can begin creating, you will need to gather all of the items that you will want to include on your busy board. Above is the list of items I included, but feel free to add or subtract items as you wish. Also make sure you have a board to attach the items on to.
Step 2: Cut The Board To Size And Remove Sharp Edges
Before you add the items, it is best to cut your board to the size you want it to be. We cut our board in half. Then be sure to use a router or sander to round the edges and corners of the board so that there are not any sharp edges for your little one to get hurt on.
Step 3: Lay Them Out On The Board
Now take the board that has been cut to size, and lay your items out on it. Arrange them however you want. You may want to take a picture of the layout in case something gets messed up.
Step 4: Screw Them On
Now it’s time to attach the items onto your board. Most of the locks and latches will come with screws, so you can simply open the packaging and screw the items in place. If they do not come with screws, you may need to provide some of your own. We were able to make our busy board work with the screws that came with the different locks and latches.
Step 5: Hang The Board
After all of the items are securely attached to the busy board, you will want to screw the board securely to the wall. We did this by screwing it in four different locations, so that the board was held through studs in the wall. After your busy board is secured in place, it is ready for your toddler to play with and enjoy.
Busy Board Tips and Tricks
Selecting child-safe products
When you are choosing the items to go on your busy board, be very cautious to make sure that all of them are child safe! This means, make sure that there is not anything that could come off and become a choking hazard, or anything attached to the board that they could get hurt on.
For example, there is an outdoor faucet in the pictures. I would not recommend including this, as we later found out that there are small pieces that can come apart if your toddler is determined enough. Keep this in mind when you pick out items for your busy board, and avoid things with small pieces that easily come apart. Also avoid adding strings or chains that are too long and could be a hazard.
Determining the size of the board
Figuring out the size of your busy board will depend on how much you want to include on the board, as well as where you want to put it in your home. Make sure that there is enough space on the wall for it, and also enough space for all of the things you want to attach to the board.
Various Items You Can Include
There are a lot of items to choose from when it comes to adding things to your busy board. In addition to the list above, here are a few more ideas of fun items you might like to include on your busy board.
A door knob
Light switches
An old rotary phone or an old phone in general
A press on light
Adding a little door with a piece of wood and some door hinges and knob
Alternative Options For The Board
If you are looking for an alternative back for your board rather than using plywood, other ideas can include a large cutting board, or a 1×6 inch board.
Toddler DIY Busy Board
There are so many great options that you can include on your busy board to make it such a fun toy. With just a little imagination your toddler can have a board full of fun things to hopefully keep them busy for many hours, and not only provide hours of independent play and entertainment, but also help them to learn, grow, and explore how things work.
Thank you so much for stopping by to check out our easy instructions for how to make a DIY toddler busy board. It is my hope that you found this to be very helpful, and will assist you in making your own activity board for your toddler.
Be sure to follow us online on your favorite social media platform!
More Craft Ideas

PIN for Later!