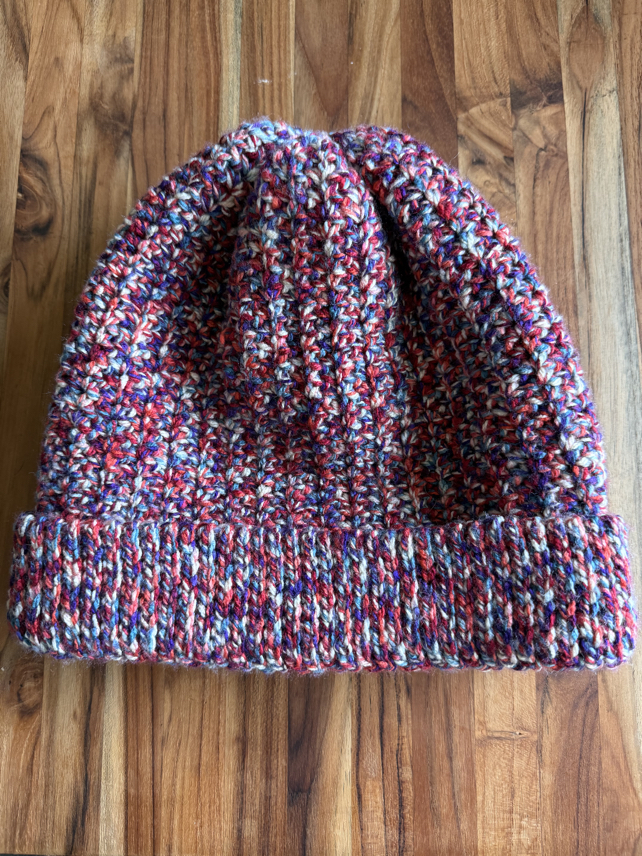
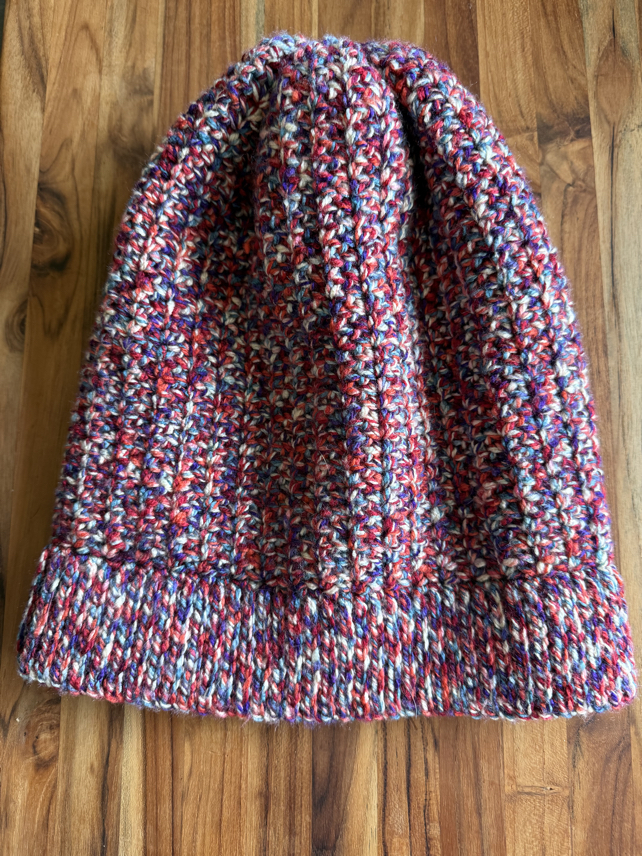
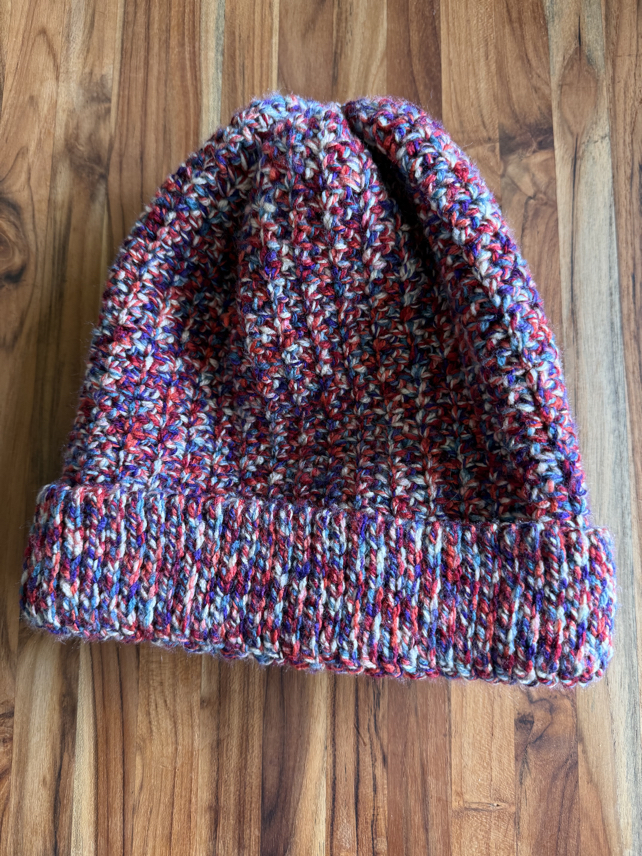
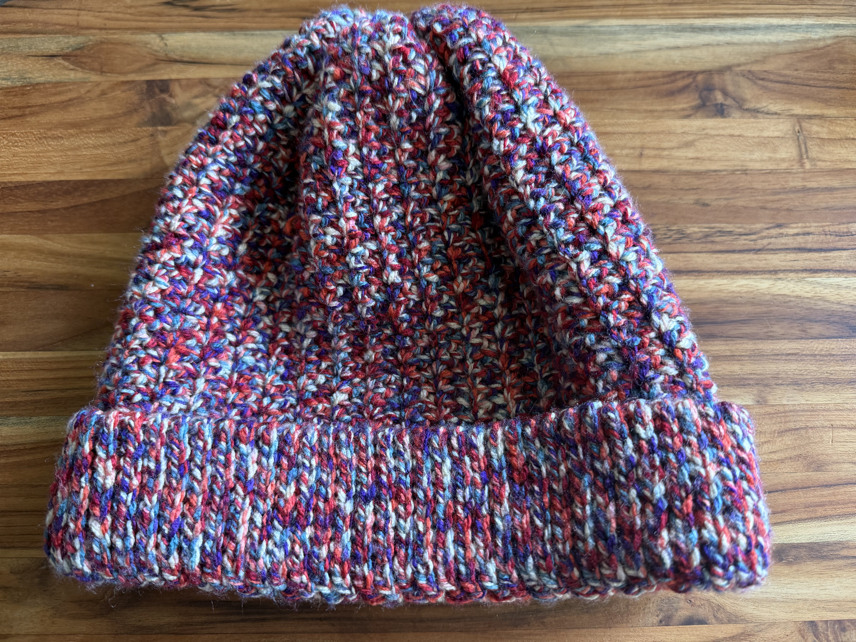
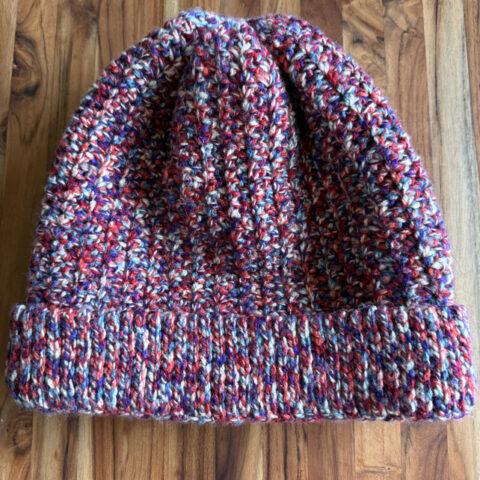
Free Basic Crochet Hat Pattern
In this free pattern, I’m so excited to share with you a very simple crochet hat pattern. This simple beanie is the perfect hat pattern if you are looking for a beginner crochet hat pattern. This free basic crochet hat pattern uses simple stitches to make a nice crocheted winter hat in all sizes.
Easy Crochet Hat Pattern
There are many different techniques that can be used to make a crocheted hat. In this free crochet pattern, we follow some very basic crochet stitches put together to make a simple yet nice crocheted winter hat.
Another great thing about this free basic crochet hat pattern is that you can easily make it in many different sizes. Adult sizes and children’s hat sizes are very easy to do, all you have to do is make the hat to fit the right heads circumference.
The short rows are used to make the initial band of the crocheted hat, then the main part of the hat is created from the band, for easy construction and the perfect fit. If you’d like to make a simple crochet hat that is practical, cute, and simple, you are in the right place! Our written pattern will walk you through the step by step processs.
The Basic Stitches Used
This crochet hat pattern uses just a few basic crochet stitches. Because it uses only a few basic crochet stitches. It is an ideal pattern for crochet beginners. Here are the main stitches this hat pattern uses.
Slip stitch. A slip stitch is often used to join stitches together, in this case it is used as an actuial stitch. To make it, insert your hook into the next stitch, yarn over and pull up a loop, pull that same loop through the previous loop on your hook.
Chain stitches. The chain stitch is made by yarning over, and pulling a new loop through the previous one on your hook.
Single crochet. A single crochet stitch is made by inserting the hook into your stitch, yarning over and pulling up a new loop so that there are now two loops on the hook. Yarn over and pull through all the two loops on the hook.
Join our Mailing List and Receive a…
Easy Crochet Beanie Pattern
Materials
2 skeins medium weight yarn
5.0 mm crochet hook (size H)
A yarn needle
Scissors
Skill level: beginner
Abbreviations
blo – back loop
sl st – slip stitch
ch – chain
sc – single crochet stitches
hdc – half double crochet
dc – double crochet
How to crochet our basic hat pattern
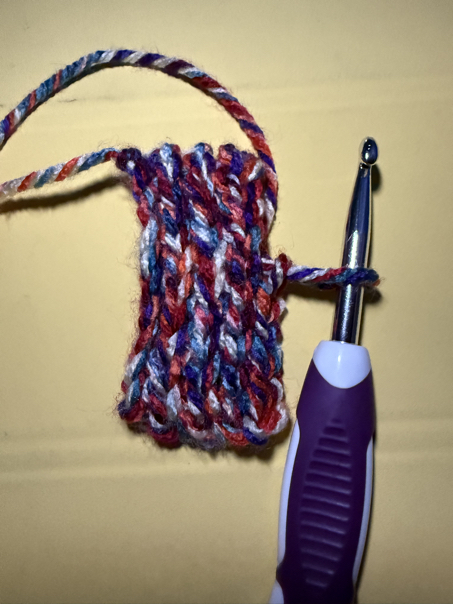
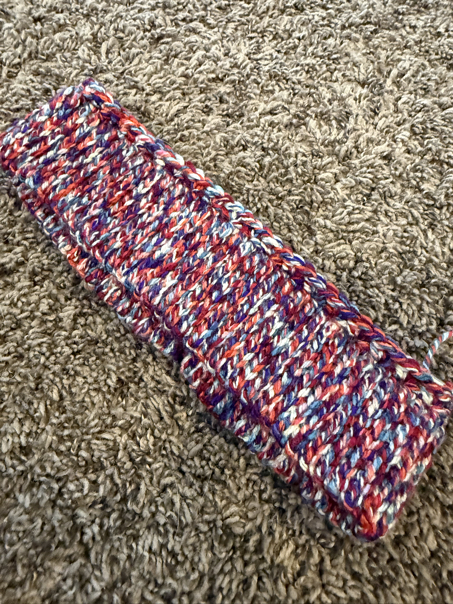
Step 1: Making the Band
R1. Ch 11 sts
R2. Turn, skip the first st, and sl st in the remaining 10 sts.
R3. Ch 1, turn, sl st in the blo of each of the 10 sts across.
Repeat row 3 until the band is wide enough to wrap around your head. Usually, this is around 22 inches long.
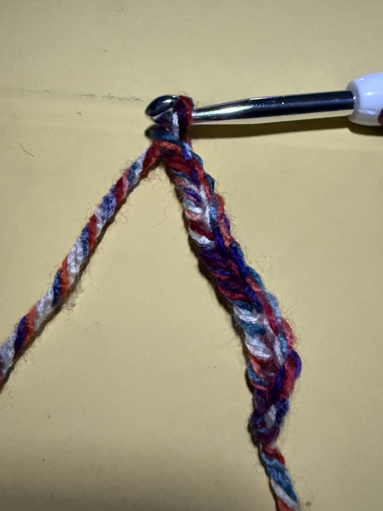
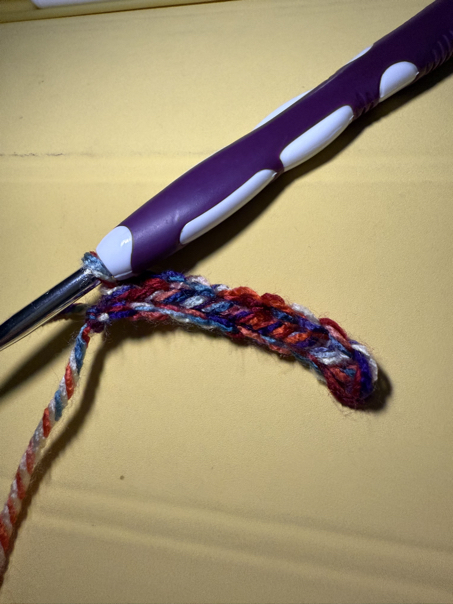
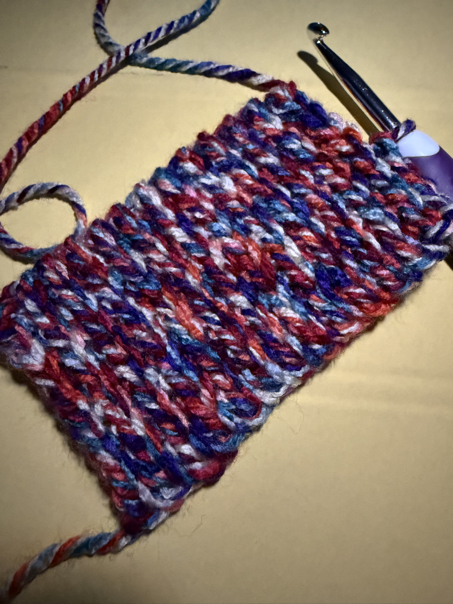
When your band is long enough to wrap around your head, join the ends together by slip stitching the two ends to form a circle.
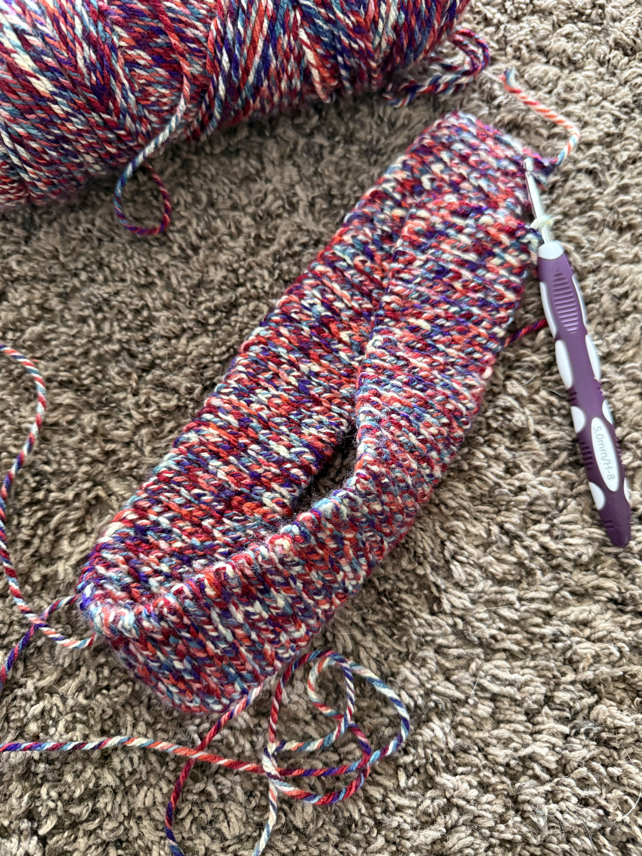
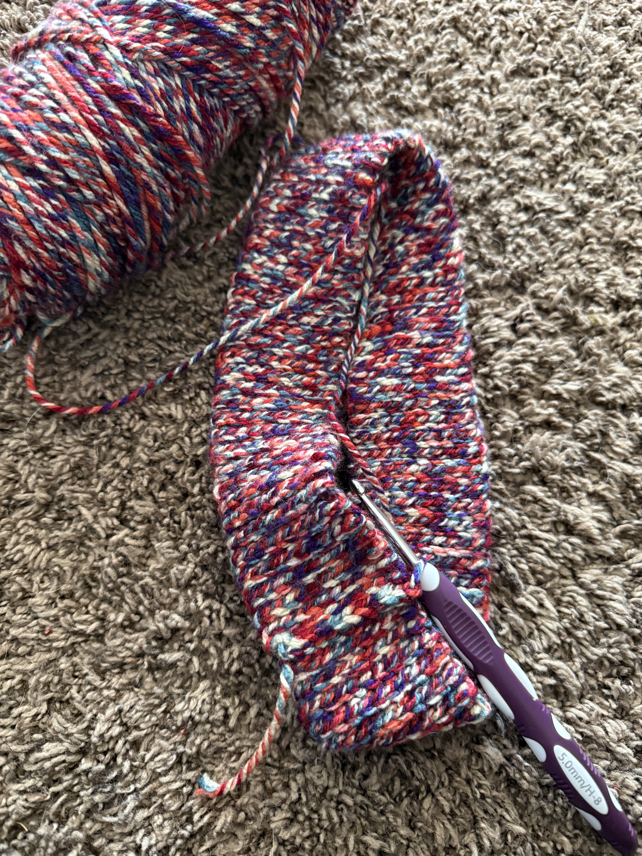
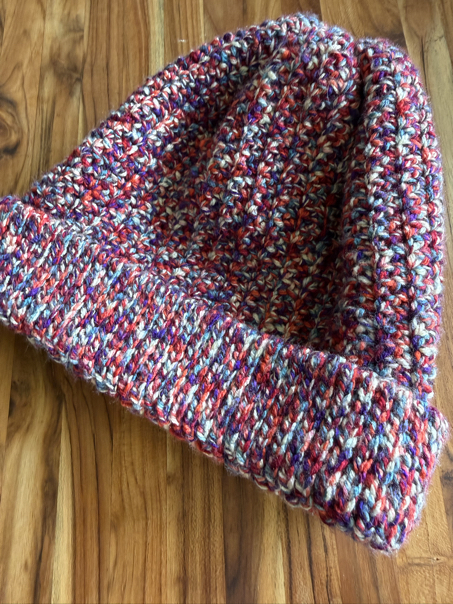
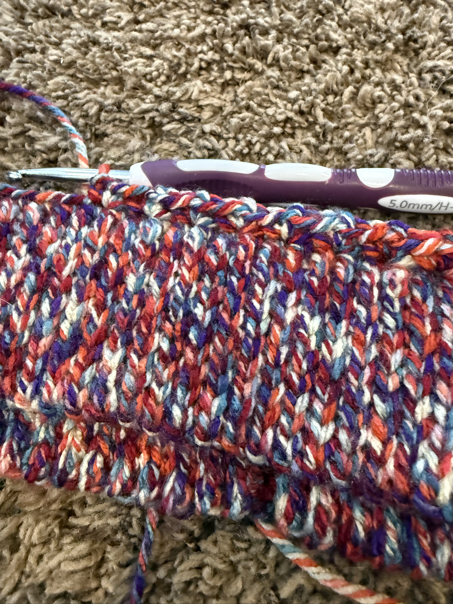
Step 2: Making the Body of the Hat
R4. Now, turn the band on it’s side. See where the ribbing from the slip stitches pushes out the back side? This is where you will start working your stitches, in these valley’s. In the first place, working on the side of the band, make a sc, ch 1, sc, skip the next valley, and in the next one work sc, ch 1, sc. Repeat these steps across.
R5. When you reach the end of the first round, do not join. Instead continue working in the ch 1 spaces. In the first ch 1 sp, work sc, ch 1, sc, skip to the next ch 1 sp, work sc, ch 1, sc. Repeat around, and until the hat body is as tall as you would like it to be.
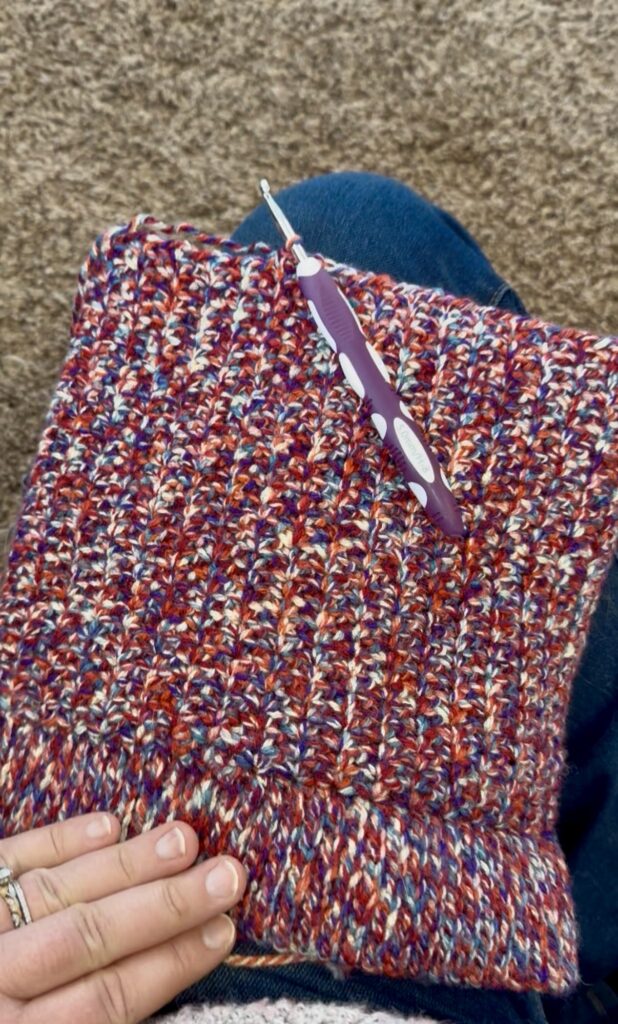
Step 3: Closing the Top
To close the top of the hat, you will first want to decrease the overall number of stitches in the round. To do this, start off by making a sc in each ch 1 space around.
When you have completed an entire round of just sc sts, make one more round of sc dec sts. Join with a sl st.
Cut a long tail of yarn, and thread a yarn needle. Insert your needle weaving the yarn up and down through the remaining stitches around the opening of the hat.
Pull the yarn tail tight, to cinch it together, then turn the hat inside out and make sure to sew it securely in place. Tie a knot and weave in any yarn ends.
Step 4: Finishing the top of the hat
To finish out the top of the crochet hat, there are three options, first you can simply leave it plain, but if you’d like to add embellishments you can make a yarn Pom Pom or attach a faux fur Pom Pom to the top.
The yarn pom pom
There are a few different ways you can make a yarn Pom Pom, and gadgets that can help you. My preference is to use a large serving fork, and wrap the yarn around it a bunch of times.
Then tie it securely in the center, leaving some long tails of yarn for securing it in place on the hat, before cutting the sides to make it into a Pom Pom. Then use the yarn needle to attach it really well to the top of the hat.
The faux fur pom pom
You can purchase a faux fur Pom Pom form your local craft store or online. Then all you need to do is attach it securely to the top of your hat. Easy peasy.
Free Crochet Beanie Pattern All Sizes
This basic crochet hat pattern is an easy pattern to make into different sizes. In order to make it the right size, you will just need to know the head circumference measurement of the person you want to make the hat for.
Once you know their head measurement, you can determine the circumference of the circle band that is the base of the hat pattern. This way the hat is the right size every time.
If you don’t have the person’s head measurement, don’t worry! Here is a crochet hat size chart that will help you determine the size based on the average head measurements.
Basic Crochet Hat Pattern Copyright
Please note that this pattern is intended for personal use only, and is not for commercial distribution. By copyright, unless otherwise noted, you are not authorized to copy or claim my content as your own. You are, however, more than welcome to sell your finished products made with my patterns. I always appreciate it when you link to my patterns so that others can find them too!
Basic Crochet Hat Tips and Tricks
The best kind of yarn
Most types of yarn readily available are some kind of acrylic yarn blend. These will work just fine for this hat pattern. You can also use a cotton yarn, or wool yarn if you prefer.
The best yarn weight
The best yarn weight to use is a number four medium weight yarn. I would recommend avoiding a bulky weight yarn, or thin light weight yarn for this project.
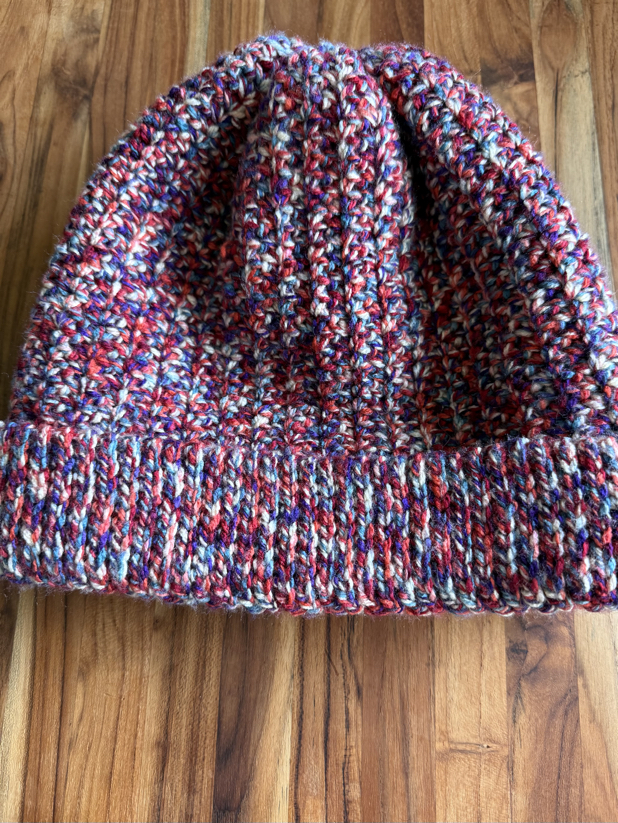
Making the hat brim
You can make the hats brim as wide or as narrow as you prefer. I like to make it narrow, but make the body of the hat longer so that the folded brim can be long enough to cover ears and easily adjust the height of the hat as needed.
Free Crochet Hat Patterns
Our free basic crochet hat pattern is a simple design that helps a new crocheter make a basic beanie to fit any head size. This crochet winter hat pattern is easy to make using a few basic crochet stitches and it will keep you warm and cozy in the cold weather.
Thank you so much for stopping by to check out our free basic crochet hat pattern! I hope that you will give this crochet hat pattern a try, and I hope you will enjoy making it!
Be sure to follow us online on your favorite social media platform!
More Crochet Hat Patterns


Basic Crochet Hat Pattern
Materials
- 2 skeins medium weight yarn
- 5.0 mm crochet hook (size H)
- A yarn needle
- Scissors
Instructions
- R1. Ch 11 sts
R2. Turn, skip the first st, and sl st in the remaining 10 sts.
R3. Ch 1, turn, sl st in the blo of each of the 10 sts across.
*Repeat row 3 until the band is wide enough to wrap around your head. Usually, this is around 22 inches long. - When your band is long enough to wrap around your head, join the ends together by slip stitching the two ends to form a circle.
- R4. Now, turn the band on it’s side. See where the ribbing from the slip stitches pushes out the back side? This is where you will start working your stitches, in these valley’s. In the first place, working on the side of the band, make a sc, ch 1, sc, skip the next valley, and in the next one work sc, ch 1, sc. Repeat these steps across.
- R5. When you reach the end of the first round, do not join. Instead continue working in the ch 1 spaces. In the first ch 1 sp, work sc, ch 1, sc, skip to the next ch 1 sp, work sc, ch 1, sc. Repeat around, and until the hat body is as tall as you would like it to be.
- Closing the Top
To close the top of the hat, you will first want to decrease the overall number of stitches in the round. To do this, start off by making a sc in each ch 1 space around.
When you have completed an entire round of just sc sts, make one more round of sc dec sts. Join with a sl st.
Cut a long tail of yarn, and thread a yarn needle. Insert your needle weaving the yarn up and down through the remaining stitches around the opening of the hat.
Pull the yarn tail tight, to cinch it together, then turn the hat inside out and make sure to sew it securely in place. Tie a knot and weave in any yarn ends.
PIN for Later!

