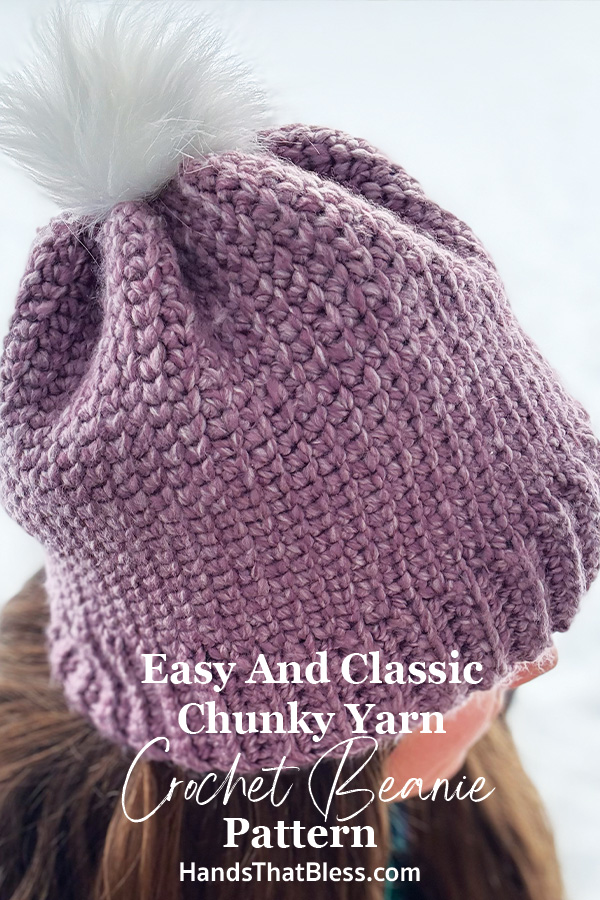
Chunky Beanie Crochet Pattern
I am so excited to share this free crochet pattern with you to make your very own crocheted chunky beanie. This is a fun pattern, you can make it easily using chunky yarn. Because the yarn is larger, the hat works up quickly, making it a fun and quick crochet project to make.
Chunky Beanie Crochet Pattern for Beginners
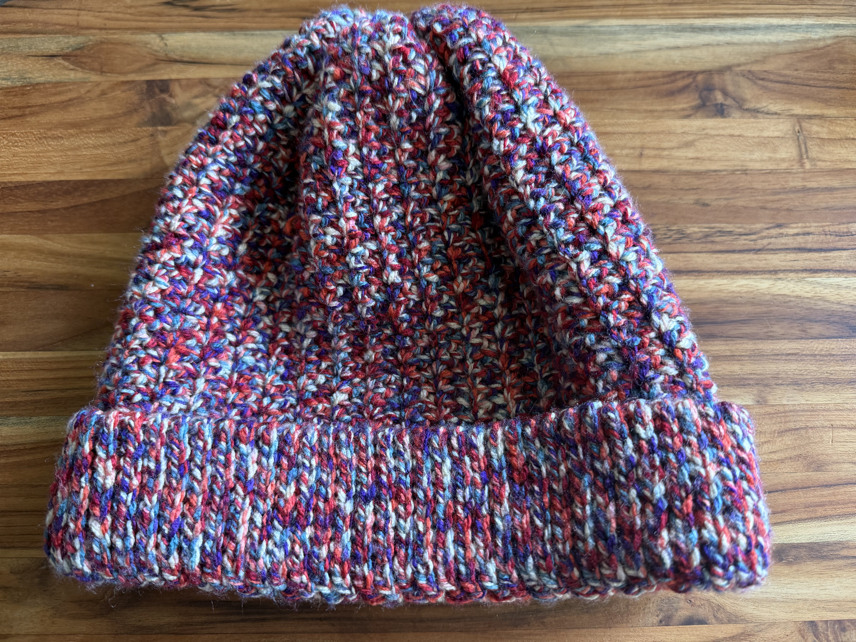
This free crochet beanie pattern using chunky yard is a great project to make if you are a beginner crochet. In this free pattern, I’ll show you how to make this chunky crochet hat pattern, using just a couple basic crochet stitches. This chunky crochet hat pattern starts with a band at bottom of your beanie, then works up to the top of the beanie.
The Basic Stitches
The basic crochet stitches that you will need to know for this crochet hat pattern is the chain stitch, single, crochet stitch, and half double crochet stitch.
The chain stitch. To make a chain stitch, you will simply hear over from back to front, with your working yarn around the hook, and then pull the new yarn through your previous loop to create a chain stitch.
The single crochet stitches. A single crochet stitch is made by inserting your hook into the stitch indicated, yarning over, pull up a loop so there are now two loops on your hook, then yarn over again and pull through the two loops on your hook to make the single crochet stitch.
The half double crochet stitch. The half double crochet stitch is made by first yarning over, then inserting your hook into the space indicated, yarn over and pull up a loop, there are now three loops on your hook. Yarn over and pull through all three loops on your hook.
If you are a new crocheter, be sure to check out our learning how to crochet tutorial for step by step instructions on how to make each of these stitches.
Let’s jump into the full written pattern for this chunky beanie crochet pattern.
Easy Chunky Beanie Crochet Pattern
Materials
2 skeins chunky yarn
6.0 mm crochet hook (size J hook)
A faux fur pom pom
A yarn needle
Abbreviations
sl st – slip stitch
ch – chain
sc – single crochet
hdc – half double crochet
blo – back loop only
blo sc – back loop only single crochet
dec – single crochet decrease
How to Crochet a Chunky Beanie
Making The Band
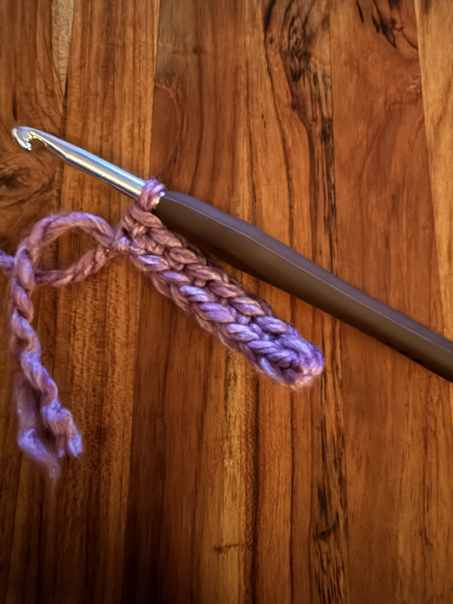
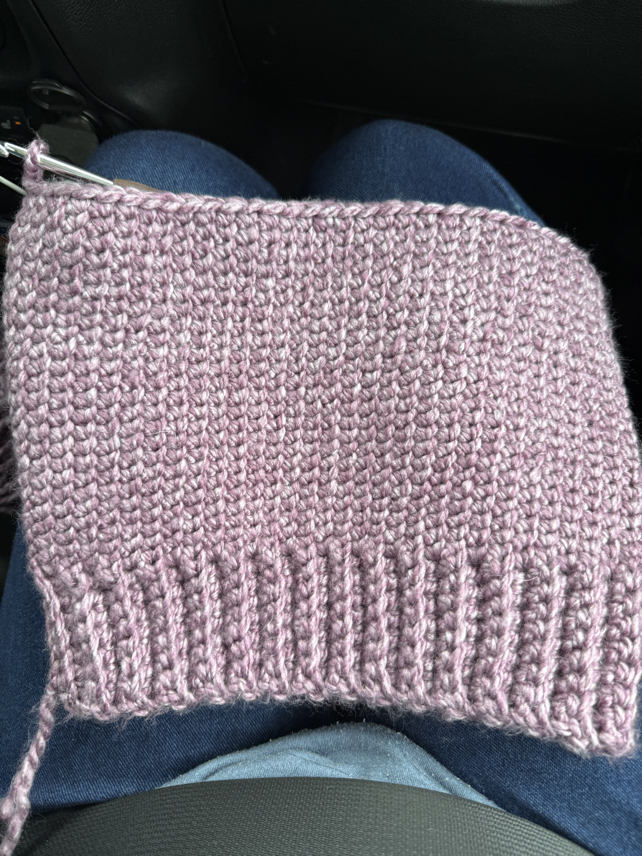
Starting with the band to go around your head…
R1. ch 9 sts
R2. in the 2nd ch from your hook, make a sc st, sc in the remaining 7 sts. (8)
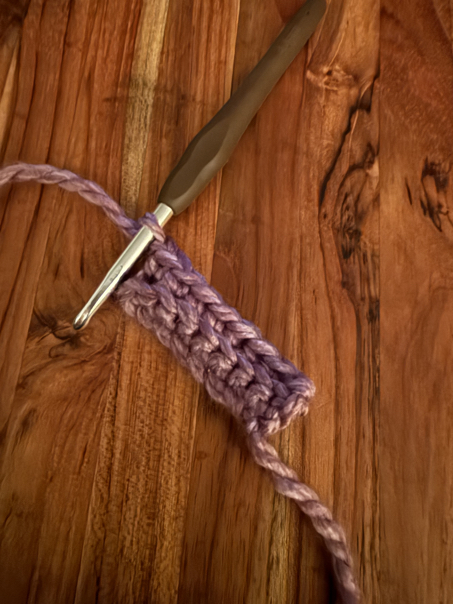
R3. ch 1, turn, sc in each st across. (8)
Repeat row 3, until the band measures the circumfrence of your head.
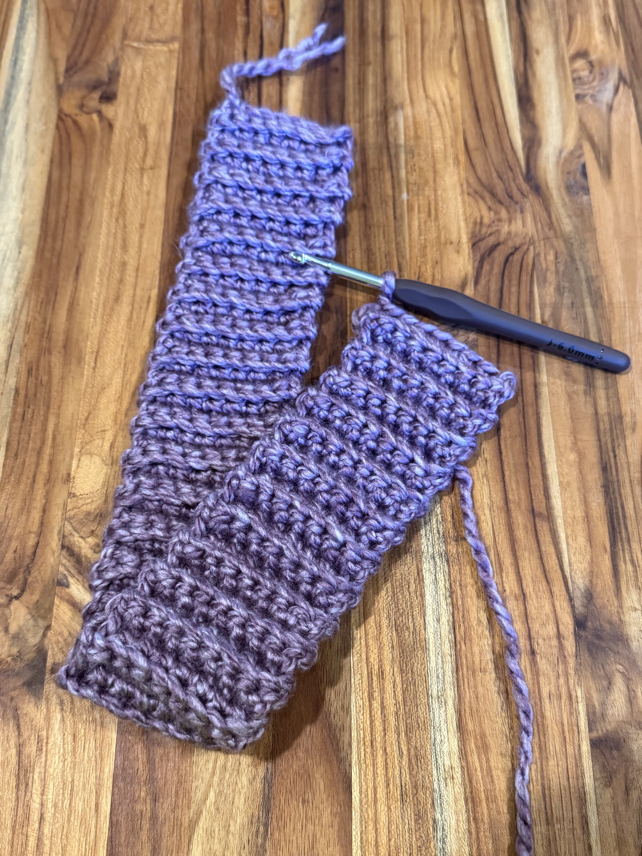
Join the band together with slip stitches. Do not finish off.
Making the Body of your Hat
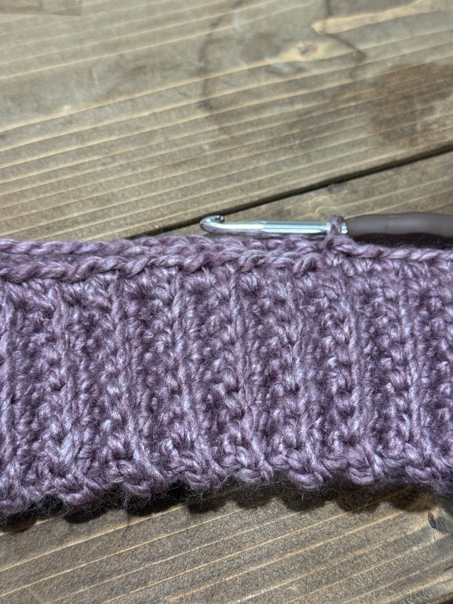
R4. Turn the band that you created on it’s side, and flip your joining slip stitches in towards the center. Working on the top side, make a sc st in the side of each st around. Join with a sl st.
R5. ch 1, now you are going to make a sc in each st around, however, in order to get this specific look, you will want to insert your hook through the center of the previous round’s sc sts, where it forms the “v”. Insert your hook through the middle for each st around. Do not join. From this point on you can work the body of this hat in continuous rounds until it gets as tall as you want it to be.
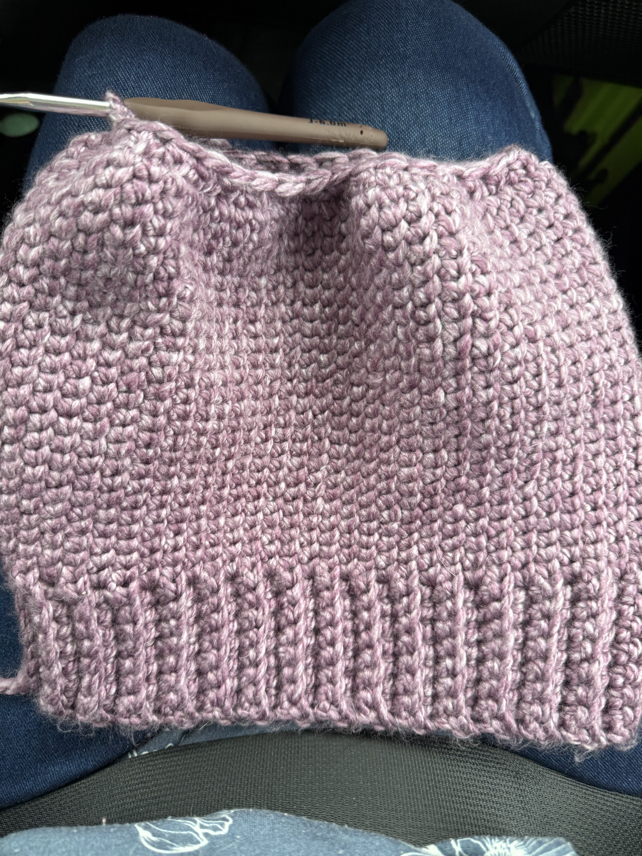
Finishing the Top of the Hat
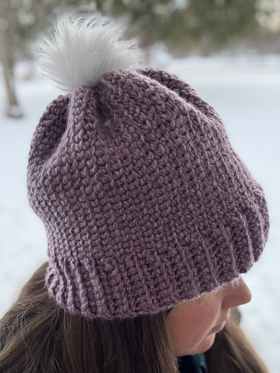
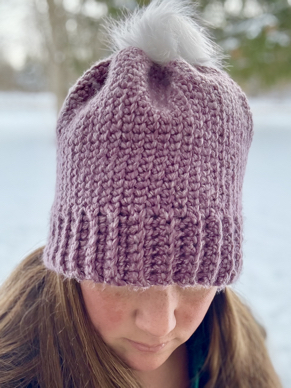
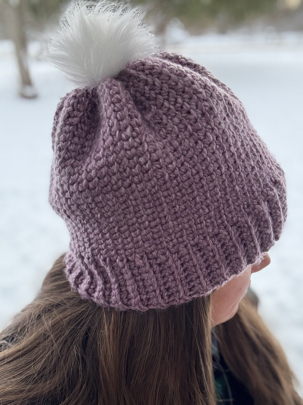
R6. To finish the top of your hat, you will want to work a (dec, sc) repeat around. Continue working your dec, sc sts around until your opening becomes approximately 3 inches in diameter. You can then work two decrease stitches to close the top, or you can finish it off, leaving a long tail for sewing. Then take your yarn needle, thread it with the long tail of yarn, and weave the needle in and out around the opening. Pull the yarn tight to close the top of your beanie, then on the inside use that yarn to sew the opening securely closed.
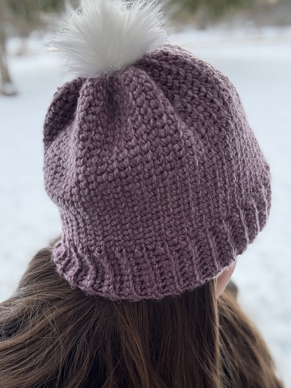
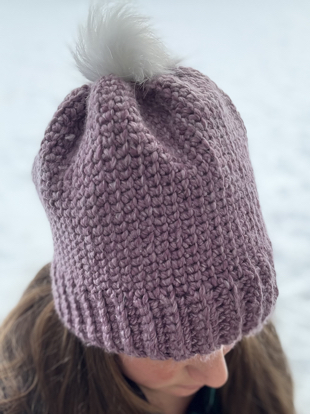
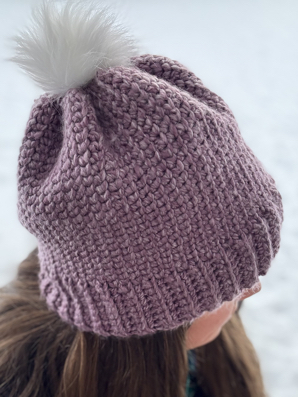
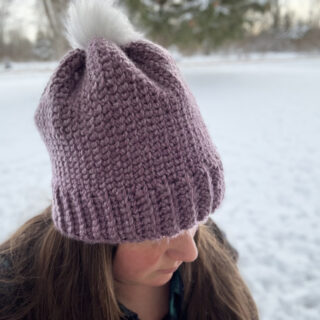
Adding A Pom Pom
You can also add a flux fur pom pom to the top, or make your own yarn pom pom if you prefer. In the pictures of this hat, I used a fur pom pom that I got from Hobby Lobby, but either way works great!
Making the Right Size Hat
Being able to make the correct size hat is very important. This crochet beanie pattern can be easily adjusted to fit any head size no matter if you’re making the hat for a baby, child, or adult. All you need to do is measure the heads circumference of the person you are making the hat for. If you do not have the person‘s head circumference measurement, don’t worry. Below is a chart of average head measurements for your reference.
Baby size hat: 12-16 inches around by approximately 7 inches tall
Child size hat: 17-20 inches around by approximately 8 inches tall
Adult size hat: 20-24 inches around by approximately 10-13 inches tall

When you know the circumference you need to make the hat size for, you can simply create the first band of the hat to fit. So if the head measurement is 15 inches around, then you will want to make the hat band to measure approximately 15 inches. Otherwise, you can follow the pattern as instructed above.
Easy Crochet Hat Pattern Pattern Copyright
Please note that this pattern is intended for personal use only, and is not for commercial distribution. By copyright, unless otherwise noted, you are not authorized to copy or claim my content as your own. You are, however, more than welcome to sell your finished products made with my patterns. I always appreciate it when you link to my patterns so that others can find them too!
Free Crochet Beanie Pattern Tips and Tricks
Choosing your crochet hook size
In the above pattern, I have given my recommended hook size to use, however, you might need to increase or decrease the crochet hook size that you use, depending on your preference, and stitching attention. Feel free to adjust the crochet hook size as needed. You can also reference the manufacturers packaging on the skiing label to see what size crochet hook the manufacturer recommends using for that specific yarn.
The best yarn to use
There are many different yarn weights to choose from. For this crochet hat pattern, I like to used Hobby Lobby’s chunky yarn line. This means it will be a higher weight yarn, but you will want to avoid using super bulky weight yarn or jumbo yarn as those will be a little big to work with.
Stitching Tension
With this stitch in particular, it is so much easier if you are able to make your stitches loose. That way when you work your next round’s stitches into the center of the previous round’s single crochet stitches, you don’t have to work as hard, and it is a nice thick textured crochet hat.
Simple Chunky Yarn Hat Crochet Pattern Free
Making this easy, crochet beanie pattern using a chunky yard is a quick project that you can enjoy making. The bulky classic beanie is a fun one to make in a short amount of time, with easy construction to create the crocheted hat pattern.
Thank you so much for stopping by to check out my free, crochet hat pattern using chunky yarn. This is a fun winter hat pattern that you can make quickly using chunky yarn. I love to make these hats, and it is my hope that you will enjoy using this pattern to make your own crocheted beanies as well. Now it’s your turn to get started crocheting your own hat!
Happy crocheting!
Be sure to follow us online on your favorite social media platform!
More crochet hat patterns


Chunky Beanie Crochet Pattern
Materials
- 2 skeins chunky yarn
- 6.0 mm crochet hook (size J hook)
- A faux fur pom pom
- A yarn needle
Instructions
- R1. ch 9 sts
- R2. in the 2nd ch from your hook, make a sc st, sc in the remaining 7 sts. (8)
- R3. ch 1, turn, sc in each st across. (8) Repeat row 3, until the band measures the circumfrence of your head.
- Join the band together with slip stitches. Do not finish off.
- R4. Turn the band that you created on it’s side, and flip your joining slip stitches in towards the center. Working on the top side, make a sc st in the side of each st around. Join with a sl st.
- R5. ch 1, now you are going to make a sc in each st around, however, in order to get this specific look, you will want to insert your hook through the center of the previous round’s sc sts, where it forms the “v”. Insert your hook through the middle for each st around. Do not join. From this point on you can work the body of this hat in continuous rounds until it gets as tall as you want it to be.
- R6. To finish the top of your hat, you will want to work a (dec, sc) repeat around. Continue working your dec, sc sts around until your opening becomes approximately 3 inches in diameter. You can then work two decrease stitches to close the top, or you can finish it off, leaving a long tail for sewing. Then take your yarn needle, thread it with the long tail of yarn, and weave the needle in and out around the opening. Pull the yarn tight to close the top of your beanie, then on the inside use that yarn to sew the opening securely closed.
- You can also add a flux fur pom pom to the top, or make your own yarn pom pom if you prefer. In the pictures of this hat, I used a fur pom pom that I got from Hobby Lobby, but either way works great!
Making The Band
Starting with the band to go around your head…
Making the Body of your Hat
Finishing the Top of the Hat
Adding A Pom Pom
PIN for Later