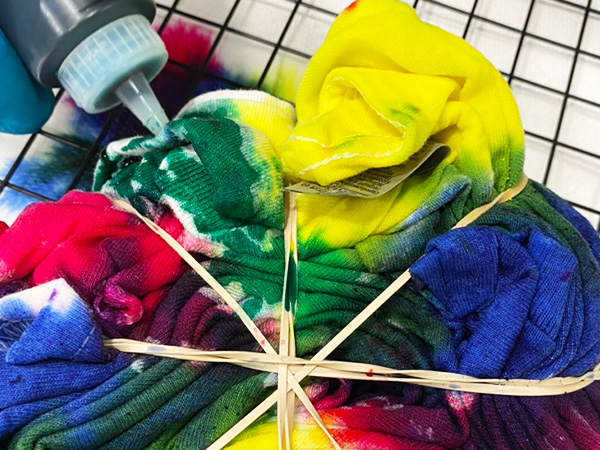
How to Finish a Tie Dye Shirt
Whether it is your first time, or you have made many tie-dye shirts, knowing how to finish a tie-dye shirt is very important. Being able to finish out the craft correctly can be a game-changer when it comes to how it looks completed.
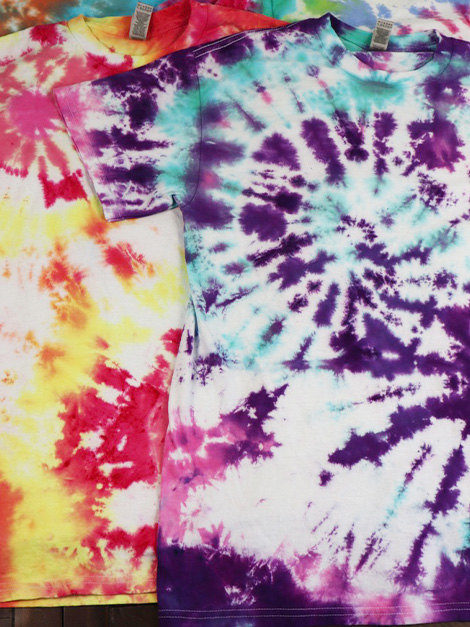
We all love to enjoy those bold or bright colors on tie-dye projects, and in this tutorial, we will walk together through a simple step-by-step process you can follow for the best results in making this easy craft.
The Comprehensive Guide
When making a tie-dyed shirt, there are many different methods you can use to prepare the tie-dye project. However, when it comes to finishing it out, there are several important steps you want to be sure you follow and do not overlook. Below, we have provided an ultimate guide you can follow for all of your tie-dye projects.
Now, we are going to start off by walking you through the best steps to take when finishing out your tie-dyed shirt after it has been dyed and rested for approximately 12 to 24 hours. After the tie dye has rested, you will want to rinse out any extra dye. We will start by looking at the first important step you will want to follow to rinse out any excess die from the project.
Let’s look at how to finish tie dye projects!
How to Rinse & Wash Tie-Dye the First Time
How to Set the Tie Dye
After your shirt has been tie-dyed with your desired pattern, you want to wrap the tie-dye securely so that the moisture stays in. I would recommend using a plastic bag or wrapping it thoroughly in Saran wrap.
Then once it is wrapped to hold the moisture in, set the tie-dye project in a warm location. Ideally, it will work best if the tie-dye sits in an area that is 70°F or warmer for the best color results.
If possible, you’ll want to let the tie-dye project set for a minimum of six hours but preferably 12 to 24 hours for the best results. If you rinse it out too quickly, you will not end up with many colors left as the project will not have completely set in the fabric.
I try to let my tie-dye project set for approximately 24 hours before rinsing them out. This way the dye is set in the fabric, and then it’s okay to rinse out anything remaining without damaging your creations.
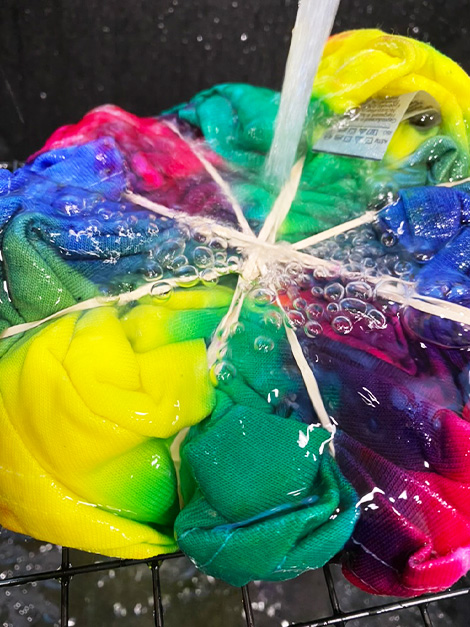
How to Rinse Tie Dye
1. Bring tie-dye to the sink
First, it’s important to point out that when you rinse, you are rinsing dye, so you will want to do it in a safe location. If you’re able, it’s ideal to rinse the tie-dye projects outside, so that you do not end up accidentally dying anything inside.
The best places to rinse your tie-dye are either outside using running water or in a kitchen sink or bathtub. If you do choose to use a kitchen sink or bathtub, you’ll want to be careful that it is a surface that can easily be cleaned.
2. Start rinsing under cold water
To rinse the excess dye from your project, start first by putting disposable gloves on to protect your hands. When you have gloves on, hold the entire project under cold running water until you begin to see the water run clear.
3. Remove rubber bands and open up the shirt
When you see the water run clear, remove any rubber bands or string you used to hold the tie-dye project in place. Open the project, so that it is lying flat, then hold it under cold water once more, to remove any extra dye until the water runs clear once more.
Please note that it is normal that your tie-dye shirt lightens in color as it is rinsed. This is a normal part of rinsing out the excess dye that has not set. This is also why I strongly recommend you allow the tie-dye project to set for 12 to 24 hours before rinsing out the project. This will give you the most color that sets in your project and does not rinse away.
When all of the extra dye is rinsed with cold water, you can carefully squeeze any excess water from the project. It is now time to wash the tie-dyed project for the first time.
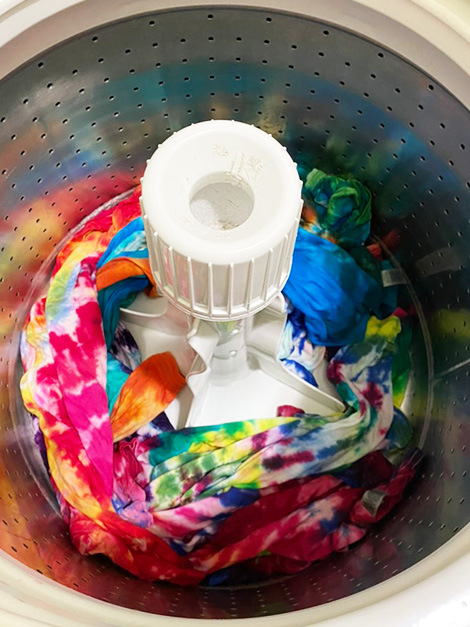
Washing Tie-Dye For the First Time
How to Wash Tie Dye
After the tie-dye project has been thoroughly rinsed with cold water, it is time to wash the project for the first time. You can use a washing machine to wash the tie-dye project for the first time, but you will want to wash only the tie-dye, do not include any other laundry in this load.
Into the washing machine, add your tie-dyed projects. You can add more than one tie-dye item at a time for this first wash, then add your usual laundry detergent. I would not recommend using fabric softener at this time.
Turn the washing machine to a gentle cycle, and make sure that it is using hot water. The high heat of the washing machine will help to set the tie-dye. Make sure to turn the water temperature as high as it can go.
After the tie-dye has been completely washed in hot water, the next step is to dry the tie-dye.
Drying Tie-Dye for the First Time
How to Dry Your Tie Dye
After your tie-dye has washed in hot water, you can place them into the dryer, and dry them on a regular cycle until your projects are completely dry.
While you could dry your tie-dye with other laundry, I would recommend drying them separately, especially for this first time, just to be safe.
When your tie-dye projects are completely dry, they are good to go! Now you can enjoy your completed tie-dye items.
Future Washes for your Tie Dye
After the first wash, it may be a good idea to wash the tie-dye project separately for the next time or two. While they are usually safe to wash with your other laundry, it’s best to be safe and wash them separately a couple of times just to make sure your other clothes are not going to get ruined.
Now that you know all about how to finish out your tie-dye shirt or other tie-dyed projects, let’s go back and look at other important things to know about tie-dye. Let’s begin with how to select the correct dye and fabrics for your projects.
Start with the Right Dye and Fabrics
The most common tie-dye projects are to make tie-dye T-shirts. This is such a fun activity that individuals of all ages can enjoy. I still remember my first time making a tie-dyed shirt at summer camp. It was such a fun experience, and I have been hooked ever since.
In addition to making tie-dyed T-shirts, you can also make other types of tie-dyed clothes as well. You can even tie-dye tote bags or other fabric items. Really the sky is the limit. Making tie-dye is also another great use of your old clothes. If you have clothes that are faded, or simply need a refresher, making them into tie-dye is a very fun project.

Type of Fabric
No matter what type of project you are making with your tie-dye, the type of fabric you select is an important element. The best type of fabric to use is cotton fabric. This is why you often see a cotton shirt or cotton T-shirts are often made into tie-dyed shirts.
If you are looking for another type of tie-dye project to make, it’s always a good idea to look for cotton fabric to make your tie-dyed project with.
Type of Dye
Selecting the right type of dye is very important for your tie-dye process. You can easily pick up a tie-dye kit at most large grocery stores, or craft stores. You can even buy a tie-dye kit online for convenience’s sake.
Buying a tie-dye kit is probably the easiest way to go, because you are sure that your powder is good to use for tie-dye purposes, and often the kits come with gloves, bottles, and rubber bands but you will also need them.
In addition to buying a complete tie-dye kit, you can also pick up powdered dye individually, but then you also need to remember to get your other tie-dye supplies as well. If you choose to buy individual packets of colored dye, it is important that you select fiber-reactive dyes, and not basic all-purpose dyes, for the best results with your tie-dye project.
Some good brands are Tulip powdered dye, Procion dye, or other fiber-reactive dyes. There are many different options to choose from, so feel free to find whatever works best for you.
Tie Dye Patterns
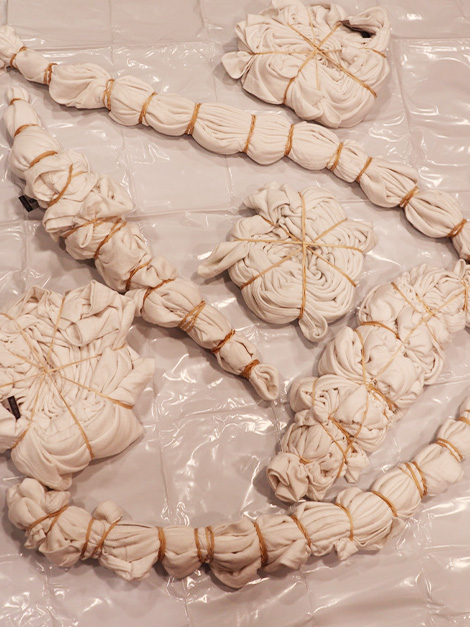
There are so many different dye patterns you can make with your tie-dye project. These different ways are great to mix things up and personalize your tie-dye project.
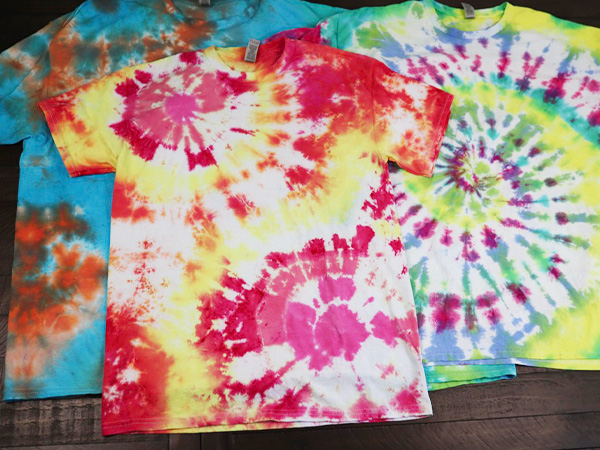
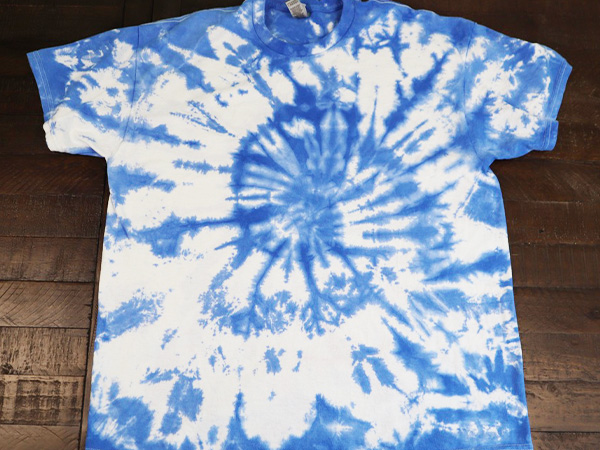
Some specific patterns, that are often made with tie-dye are the spiral pattern, which is when you see the tie-dye swirl on different parts of the project.
Accordion folds, which can be done in different ways, give you various kinds of stripes on the project. This accordion fold can give you stripes, or even chevron lines depending on how it is folded.
Another common pattern is a basic scrunch, which just gives a random tiny effect on the project.
Still another one is to create a bull’s-eye tie-dye pattern. These are just a few of the more common types of tie-dye patterns that can be made, there are many other options that can be created as well!
Materials Needed to Tie Dye
To make tie dye shirts or other tie-dye projects, there are several specific tie dye items you want to have on hand in order for the best results with your project. Let’s look at some of the materials you will need together for your project.
White T-Shirt. Most tie-dye projects are done using a white cotton T-shirt. You can use other types of cotton material as well, to make other projects besides a T-shirt, but you likely want them to be white.
Rubber Bands. Rubber bands are used to hold the T-shirts in place so that you can create a tie-dye pattern. It’s best if you use rubber bands that can be thrown away if needed. For some designs, you can also replace rubber bands with string if needed.
Rubber Gloves. It’s very important to have rubber gloves on hand so that you can wear gloves as you create your tie-dye projects. This will help prevent your hands from getting dyed as well.
Squeeze Bottles. Having squeeze bottles or squirt bottles, to mix the dye powder in, is also very important. You will want to have a bottle for each of the dye colors you intend to use.
Dye Powder. Select the dye powder colors you wish to use to make your tie dye. It’s best to select fiber-reactive dyes, that are specific for tie-dye projects.
Plastic Bag. After your tie-dye project is complete, you will want to have a sealable plastic bag or plastic wrap on hand to place your finished project in, so that the colors can set. It’s important to use a plastic bag or plastic wrap, to keep the project damp for 12 to 24 hours.
Soda Ash. Soda ash may be needed depending on what type of powdered dye you are using. Specifically, if you are using Procion, you will want to pre-soak the fabric in soda ash before tie-dying. However, this is not required for all types of powdered dye, and some already contain soda ash.
Tie-Dye Kit. If you’re looking for an easy way to make a tie-dye project, then you may want to consider purchasing a tie-dye kit. There are several different tie dye kits to choose from, with varieties of color options.
These tie-dye kits are ideal if you’re looking for an easy craft, as most tie-dye kits contain powder die, dye bottles, rubber bands, and disposable gloves. All you have to do is mix water with the dye for most kits, then purchase the T-shirts you want to tie dye.
If you choose to use a tie-dye kit, you will of course want to double-check that everything you need is included in the kit before you start making the craft.
The Dying Process
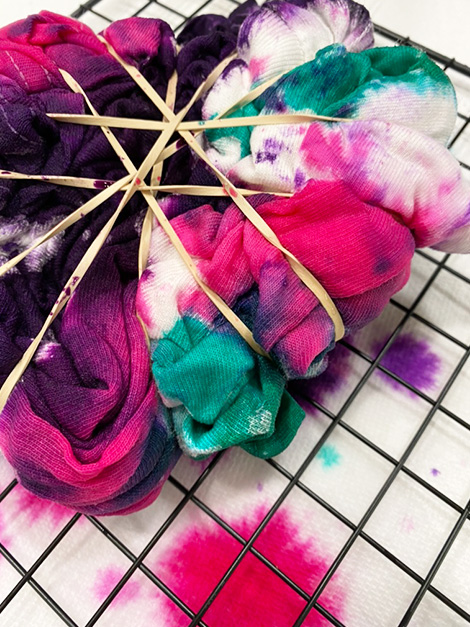
Before you begin making your tie-dye project, you won’t want to mix up your selected dye colors, choosing from the different colors available to you. Think of the different color combinations you want to create with your tie-dye project, then mix up the colors you want.
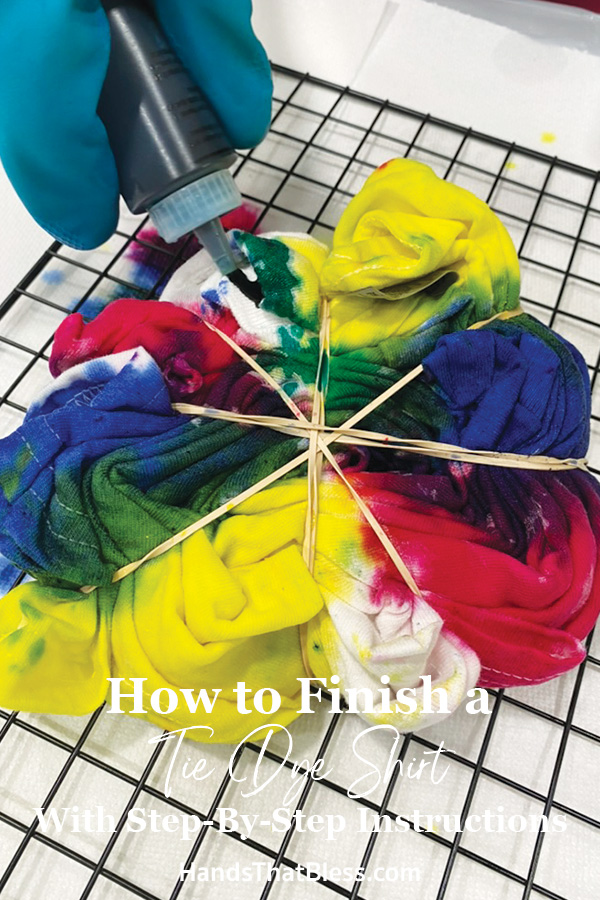
You’ll then want to make sure you have a work area, that can be easily cleaned, or one that doesn’t matter if it gets messy. If you have a plastic sheet, we recommend spreading plastic sheets over the area so that you can clean it up easily. Another option would be to tie-dye outside, or in a sink, using a wire rack for your tie-dye.
How to Tie Dye
Before you begin creating your tie-dye, you will want to follow these simple steps in making your fun craft project.
1. Prewash your white T-shirts to remove any unwanted residue from the material.
2. Spread plastic sheets over the work area, or find a good location outside, or set a kitchen wire rack in the sink. No matter what your work area is, make sure that it is protected before you begin.
3. Make sure you put on protective clothing, or clothes that you don’t care about so that if you get dye on your clothes, it’s easily removable.
4. Mix the dye powder.
5. Select your desired pattern and fold a shirt accordingly. Secure with rubber bands.
6. Apply the colored dye to your T-shirt, using the rubber band as dividers.
7. Once the top side of your project is tie-dyed, carefully turn the project over and apply dye to the backside if the dye did not go all the way through.
8. Place the tie-dye project into a plastic bag, seal it, and let it sit in a warm location for 12 to 24 hours.
9. Rinse the tie-dye t-shirt thoroughly with cold running water.
10. Remove the rubber bands, and continue rinsing with cold water until the water runs clear.
11. Wash the tie-dye T-shirt in the washing machine using hot water and laundry detergent on a gentle cycle.
12. Dry the tie-dye T-shirts in the dryer.
13. Continue washing them separately for the next time or two, before mixing the tie-dye shirt with your other laundry just to be safe.
Let the Tie Dye Rest
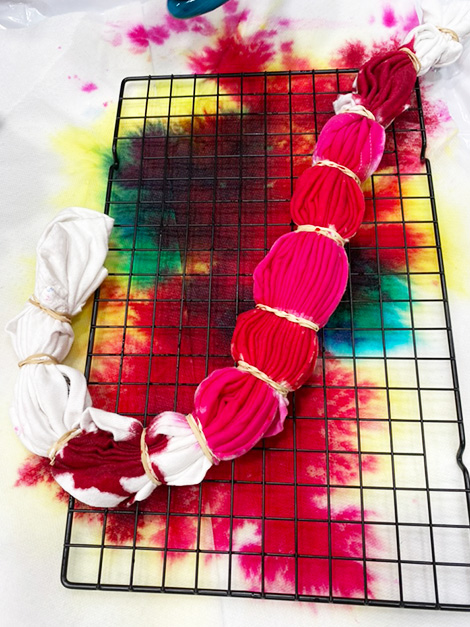
One of the key steps to making a tie-dye shirt is to allow plenty of time for the shirt to set. This rest time is very important because how long the shirt rests, will determine how much dye sets in the shirt, and could ultimately result in brighter colors.
The ideal length of time for a tie-dye shirt to rest is between 12 and 24 hours. It’s important to let the shirt rest for enough time, but not a super long time.
If the shirt rests for a lot of days, it is likely to mold and turn disgusting. Instead, the sweet spot for having a nice bright tie-dye shirt, that does not list all of the colors is to let it rest between 12 and 24 hours.
My personal preference is to let tie-dye T-shirts rest for 24 hours before rinsing out the excess dye.
Tips & Tricks
Pre-wash the Fabric
When you are making a tie-dye project, it is a great idea to pre-wash your T-shirts, so that any factory residue is removed from them. Some shirts come with a residue, which could prevent the dye colors from applying as they should.
When you pre-wash fabric for your tie-dye projects, I recommend using laundry detergent but do not use fabric softener.
Set the Tie-Dye
For the dye to set properly in your tie-dye, you will first want to wrap your project securely in a plastic bag, or in plastic wrap. This is important so that the project stays moist and does not dry out.
Second, you want to store the project in a warm location. Ideally, letting the tie-dye project rest at 70°F will give you the best results.
Finally, for the dye to set well, it is best to let the tie-dye project set for 12 to 24 hours before you start rinsing out the excess dye.
How to Wash tie Dye for the First Time
Step 1: Rinse Thoroughly in Cold Water
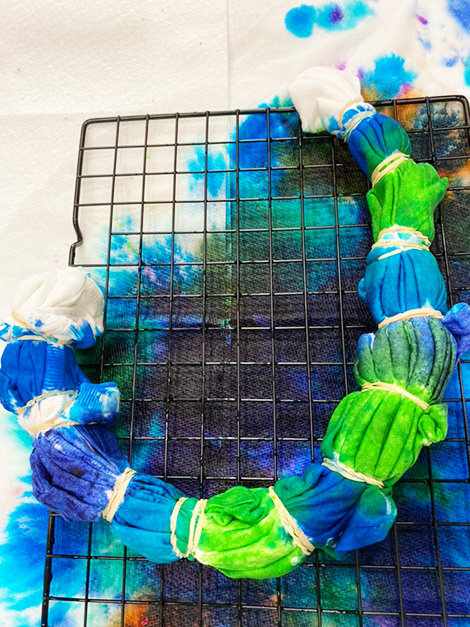
Before washing tie dye for the first time, you will want to rinse the project thoroughly in cold water. Make sure to rinse until the water begins to run clear.
Step 2: Washing Tie Dye the First Time
Now that your tie dye has been throughly rinsed, set your washing machine to your hot water setting. You will want to wash your tie dye as hot as possible, so that the colors set. You may use your desired laundry detergent at this time.
Step 3: Dry the Tie Dye
After washing your tie-dye project in hot water, you can then dry your tie-dye project until it is completely dry.
Tip: After washing and drying the first time, it is a good idea to wash the project separately one more time before adding it to your regular load of laundry.
The Best way to keep White Sections White
First, in order for the white sections on your tie-dye shirt to stay white, it’s important to select the correct type of dye. This means, that you will not want to use just a basic all-purpose color dye. Instead, you will want to make sure to use tie-dye specific dye. This will ensure that the dyes do not run into the white sections.
It’s also important that you be sure to allow plenty of time for the tie-dye shirts to rest before you start rinsing out the dye. This will also help to keep the white sections of the tie-dye shirt white.
The last thing that will help to be sure to keep the white part of your tie-dye shirts white, is to rinse the project thoroughly in cold water until the water runs clear. Then after it has been rinsed thoroughly in cold water, add it to the washing machine, and wash it on a gentle cycle, using hot water.
How to Prevent Fading
After you have finished making your tie-dye shirt, you might wonder how to keep the tie-dye shirt from fading, in the future. The best rule is to wash your tie-dye clothes with similar color clothing. This will help it to maintain its color.
Another tip is to use gentle laundry detergent, and not something that is going to be rough on it. Finally, you might consider air drying the tie-dye shirt instead of running it through the dryer every time. This will help the colors to last longer.
How to Remove Tie Dye from Your Skin
Even though we wear gloves when making tie-dye, it’s often inevitable that we end up with a few dye colors on our hands when we’re done. The good thing about most tie-dye is that they are water-soluble dyes. This means that if you continue washing your hands with soap and water, the dye will eventually come out of your skin.
FAQs
How long to wait before rinsing?
You will want to wait a minimum of 8 hours before rinsing out your tie-dye project. However, for the best results, it is best to wait for 12 – 24 hours before rinsing out your tie-dye project. Your colors will set much better when you let the project set longer.
Should you rinse with hot or cold water?
When you are rinsing your tie-dye project, it is best to rinse in cold water first, until the water runs clear. Then wash the tie-dye project in your washing machine in hot water.
What if you rinse too quickly?
If you rinse out your tie-dye project too quickly, you will lose a lot of the color. Your tie dye project needs time for the color to set. This is why we recommend letting your tie-dye project set for 12-24 hours.
Basic Guide for Ultimate Tie Dye
Making a tie-dye shirt is such a fun and creative activity that everyone can enjoy. Knowing how to finish a tie dye shirt is key to having the best results. Together we have looked at all kinds of tips and tricks as well as step-by-step instructions you can follow to make an amazing tie-dye shirt. Now that you know all about making amazing tie-dye, it’s time for you to get started on your project! I hope you enjoy it!
Happy Tie Dying!
You might also like these tie dye color ideas or this fun reverse tie dye tutorial!
Find Us Online!
Be sure to follow us online on your favorite social media platform!
How to Finish a Tie Dye Shirt
Materials
- White T-Shirt
- Rubber Bands
- Rubber Gloves
- Squeeze Bottles
- Dye Powder
- Plastic Bag
- Soda Ash optional
- Tie-Dye Kit
Instructions
How to Set the Tie Dye
- After your shirt has been tie-dyed with your desired pattern, you want to wrap the tie-dye securely so that the moisture stays in. I would recommend using a plastic bag or wrapping it thoroughly in Saran wrap.
- Then once it is wrapped to hold the moisture in, set the tie-dye project in a warm location. Ideally, it will work best if the tie-dye sits in an area that is 70°F or warmer for the best color results.
- If possible, you’ll want to let the tie-dye project set for a minimum of six hours but preferably 12 to 24 hours for the best results. If you rinse it out too quickly, you will not end up with many colors left as the project will not have completely set in the fabric.
- I try to let my tie-dye project set for approximately 24 hours before rinsing them out. This way the dye is set in the fabric, and then it’s okay to rinse out anything remaining without damaging your creations.
How to Rinse Tie Dye
- First, it’s important to point out that when you rinse, you are rinsing dye, so you will want to do it in a safe location. If you’re able, it’s ideal to rinse the tie-dye projects outside, so that you do not end up accidentally dying anything inside.
- The best places to rinse your tie-dye are either outside using running water or in a kitchen sink or bathtub. If you do choose to use a kitchen sink or bathtub, you’ll want to be careful that it is a surface that can easily be cleaned.
- To rinse the excess dye from your project, start first by putting disposable gloves on to protect your hands. When you have gloves on, hold the entire project under cold running water until you begin to see the water run clear.
- When you see the water run clear, remove any rubber bands or string you used to hold the tie-dye project in place. Open the project, so that it is lying flat, then hold it under cold water once more, to remove any extra dye until the water runs clear once more.
- Please note that it is normal that your tie-dye shirt lightens in color as it is rinsed. This is a normal part of rinsing out the excess dye that has not set. This is also why I strongly recommend you allow the tie-dye project to set for 12 to 24 hours before rinsing out the project. This will give you the color that sets in your project and does not rinse away.
- When all of the extra dye is rinsed with cold water, you can carefully squeeze any excess water from the project. It is now time to wash the tie-dyed project for the first time.
How to Wash Tie Dye
- After the tie-dye project has been thoroughly rinsed with cold water, it is time to wash the project for the first time. You can use a washing machine to wash the tie-dye project for the first time, but you will want to wash only the tie-dye, do not include any other laundry in this load.
- Into the washing machine, add your tie-dyed projects. You can add more than one tie-dye item at a time for this first wash, then add your usual laundry detergent. I would not recommend using fabric softener at this time.
- Turn the washing machine to a gentle cycle, and make sure that it is using hot water. The high heat of the washing machine will help to set the tie-dye. Make sure to turn the water temperature as high as it can go.
- After the tie-dye has been completely washed in hot water, the next step is to dry the tie-dye.
How to Dry Your Tie Dye
- After your tie-dye has washed in hot water, you can place them into the dryer, and dry them on a regular cycle until your projects are completely dry.
- While you could dry your tie-dye with other laundry, I would recommend drying them separately, especially for this first time, just to be safe.
- When your tie-dye projects are completely dry, they are good to go! Now you can enjoy your completed tie-dye items.
Future Washes for your Tie Dye
- After the first wash, it may be a good idea to wash the tie-dye project separately for the next time or two. While they are usually safe to wash with your other laundry, it’s best to be safe and wash them separately a couple of times just to make sure your other clothes are not going to get ruined.
- Now that you know all about how to finish out your tie-dye shirt or other tie-dyed projects, let’s go back and look at other important things to know about tie-dye. Let’s begin with how to select the correct dye and fabrics for your projects.
More Tie Dye Tutorials
PIN for Later!
