How to Reverse Tie Dye
Tie-dying is such a fun project, especially to do during the summer months. Did you know that you can reverse tie-dye? I am so excited to show you how to reverse tie-dye, and what exactly it is. You don’t want to miss out on a thing, because this is going to be a fun project!
Traditional Tie Dye
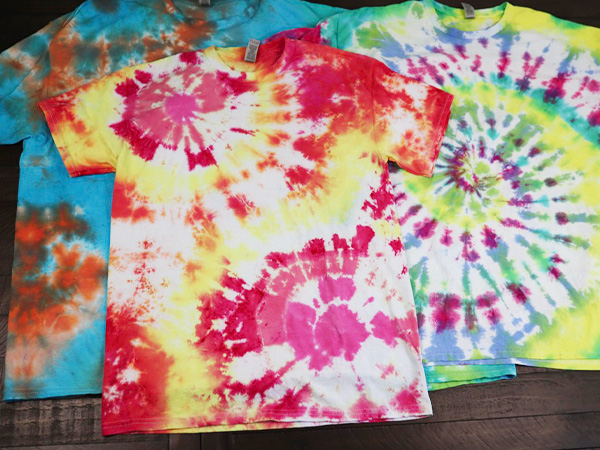
Traditional tie-dye can be done with a tie dye kit, or with tie-dye powder. It is usually done using white shirts in your desired colors. It can be done in all kinds of different color combinations and pattern designs.
What is Reverse Tie Dye?
Reverse tie-dye is when you take a solid color fabric shirt, like a black shirt, or another dark color T-shirt, and then dye it using household bleach or another chemical to remove the color.
After the color is removed you can then leave it white or dye the bleached areas with your color. This is what we are going to look at doing today, dying a black shirt, first with bleach, and then adding your desired colors into the shirt, to make it look amazing.
Bleach Tie dye – AKA Reverse Tie Dye
Reverse Tie Dye Technique
There are a few different reverse tie-dye techniques that you can choose to use. Essentially you want to use something as a color remover for your dark-colored shirt. Bleach is one of my personal favorite options, but there are several others. Below is a list of other items you can use as a color remover for your T-shirt.
– Bleach
– Bleach Toilet Cleaner
– Tulip’s own Reverse Tie Dye Kit
– Hydrogen peroxide
Reverse Tie Dye Shirts
There are many different ways you can make reverse tie-dye shirts. I am going to go over two main ways that you can reverse tie-dye T-shirts. Keep in mind that there are several different variations of these two main methods.
The first reverse tie-dye method that we are going to look at is how to tie-dye a black T-shirt. This is when you take a black shirt or another type of dark-colored shirt, then use a bleach solution to remove the color, and then finally add your colored die to the light areas.
The second method that we are going to look at together, is another way to make reverse tie-dye. This method uses a white T-shirt, that you add color to like a normal tie-dye project. Then, you tie dye one side all black when you are done. This gives you a very similar appearance as if you had tie-dyed a black T-shirt.
There are a few different ways you can use these reverse tie-dye techniques. You can tie-dye graphic tees with reverse tie-dye. This is when you take a black shirt with a graphic on it, then tie-dye a color.
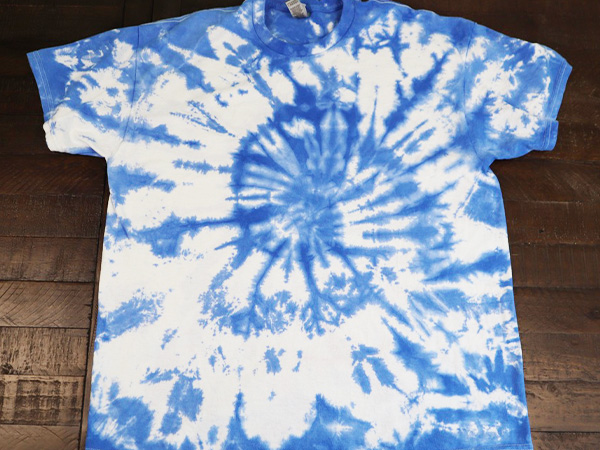
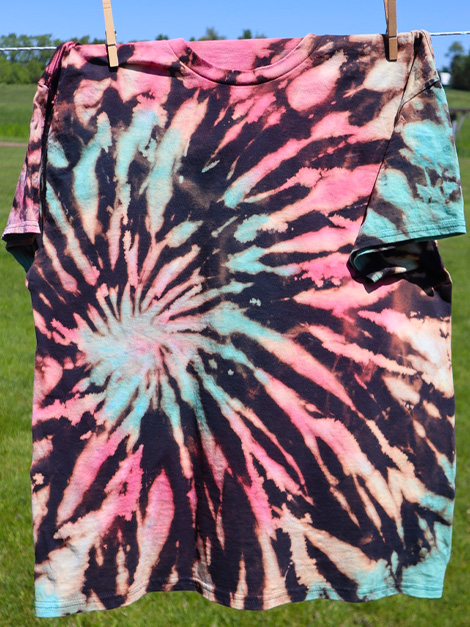
You can make a plain black spiral, by bleaching a black shirt, and then end up with a white spiral. You can also add color to the white spiral so that it has a nice reverse tie-dye appearance.
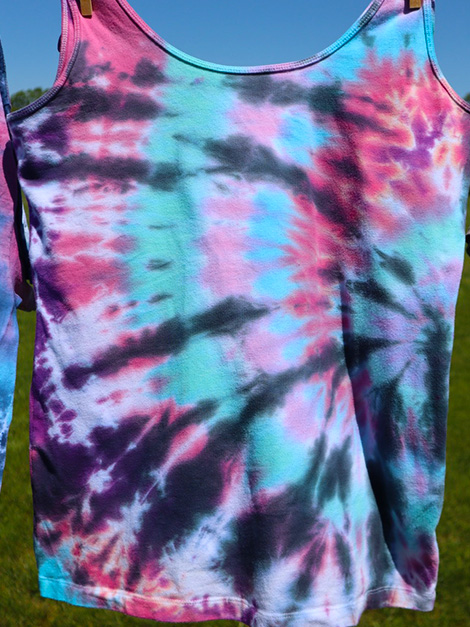
Another fun project you can do with reverse tie-dye is to make what is known as the galaxy reverse tie-dye. This is when you don’t make a specific pattern, but instead kind of make a scrunch to your dark-colored shirt, then remove the color with bleach. You can add color back in if desired or simply leave it with the bleached areas.
Choosing the Right Shirt
When you are making a reverse tie-dye shirt, it’s really important to choose the right kind of shirt so that your project turns out. As we mentioned, there are a few different ways you can reverse tie-dye. The most common one is when you use a dark-colored shirt, such as a black or navy blue shirt, then bleach it before adding color.
When you are making a reverse tie-dye shirt it is extremely important to choose the right kind of shirt. For success in your project, you will want to use a shirt that is made with 100% cotton fabric. This way your shirt will tie dye correctly.
Reverse Tie-Dye Project
There are many different cool patterns that you can make with reverse tie-dye. Just like with normal tie-dye, you can use rubber bands to secure the black fabrics, bleach them, and then add your color. You don’t have to stick with the traditional spiral for reverse tie-dye.
Even though reverse tie-dye typically refers to tie-dying a black T-shirt, or navy-blue T-shirt, it can also be done with other colored shirts. You can easily use the reverse tie-dye method, to tie-dye a plain colored shirt, to be another pattern or color, whatever you prefer.

How to Tie Dye a Black Shirt
Materials to Bleach Tie Dye
To tie-dye a black shirt, you will need the following items on hand:
Black Shirt. A cotton T-shirt is preferred. It can be black for this project.
Bleach. This is just normal household bleach. You will need approximately a cup of bleach (liquid bleach).
Plastic Gloves. Disposable plastic gloves are a must, for this project.
Colored tie-dye. If you want to add colors to your reverse tie-dye, you will want to have some traditional tie-dye colors on hand as well.
Plastic Bag. When you are all done adding the color dye to your project, you would want to let the colors set, by securing the entire project in a sealable plastic bag.
Rubber Bands. Using thin rubber bands to secure your T-shirt with your desired pattern is highly recommended. Alternatives would be to use some string if needed.
Squeeze Bottle. Although you don’t need a squeeze bottle for your bleach, I do recommend that you use a squeeze bottle for the colors you intend to add back into your tie-dye T-shirt. If you’re using powder instead of a kit, you will want to make sure to have squeeze bottles on hand.
Before you Begin
Before you begin, you will want to wash your T-shirt in your washing machine, using your regular laundry detergent, but do not use fabric softener. This will help to remove any residue from the shirt that will prevent it from tie-dying appropriately.
Also, I recommend that you wear old clothes while making this project. After all, you are going to be handling bleach, which could ruin any clothes you have on.

The Tie Dye Process
How to Reverse Tie Dye with Bleach
Step 1: Plan your project
Before you start working on your shirt, you will want to determine what design you want to make on your shirt.
Step 2: Get your reverse-dye supplies
When you know what design you want to make on your shirt, you will need to gather together all of your tie-dye supplies.
Step 3: Set up your work area
Clear a space on a flat surface to make your tie dye project. Cover it with plastic if possible to protect your work surface. Make sure that you are working in a well-ventilated area so that you do not breath bleach fumes.
Step 4: Dampen the shirt
Take your freshly washed black T-shirt, and get it damp. Squeeze out any excess water from the T-shirt, so that it is just lightly damp.
Step 5: Fold the shirt with a folding technique
Lay the Black T-shirt flat on your work surface. Determine what tie dye pattern you want to make your shirt into. There are many different patterns to choose from, the most popular being the spiral pattern. Feel free to select any type of tie-dye pattern you desire.
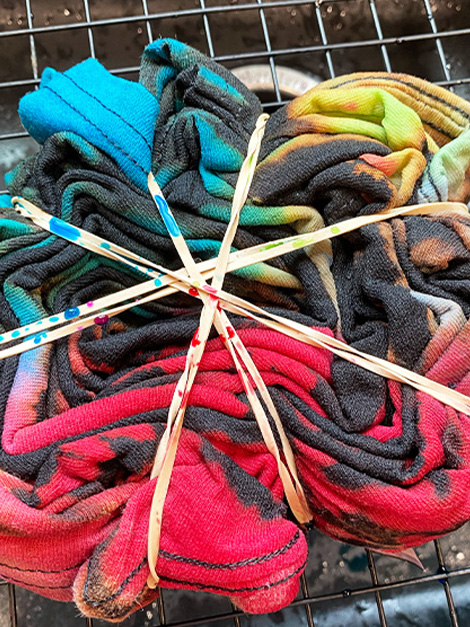
Fold or twist your damp black T-shirt into your desired pattern and secure it with rubber bands.
Step 6: Prepare the bleach solution
Put on rubber gloves and select a disposable container. Add approximately 1 cup of bleach to the bottom of your disposable container. Please note, you may need much less. You will want approximately a splash of bleach, or just enough to cover your container! You don’t need much.
This is straight bleach you do not want to dilute it with a bleach spray made with a bleach and water mixture.
Step 7: Submerge your shirt in the bleach solution
When the whole shirt is folded, dip the black T-shirt into the bleach, on both the front and the back. Because the shirt is damp already, it doesn’t need to sit in the bleach, just dip it on both sides, then let it sit for a few minutes until you see the bleach working. If there are any remaining black spots, you can dip your gloved fingers into the bleach and rub them on the black areas to remove any unwanted black spots.
Step 8: After about 2 minutes, check the color change
Let the bleached areas set for a few minutes until you begin to see the shirt whiten. When it starts to turn white, set it in your kitchen sink.
Step 9: Rinse with Water
Thoroughly rinse the bleach under cold running water. After it is rinsed, remove the rubber bands and rinse it thoroughly.
Tip: I have tried making bleach tie-dyed shirts both by removing the rubber bands before washing, and leaving them in place during the wash. Both methods seem to work just fine, and if you leave the rubberbands in place, you will get a better color tie-dye finish.
Step 10: Wash and dry the bleach dyed shirt
When it has been thoroughly rinsed, place it into the washer, and run it through a regular load, do not use fabric softener, but you can use laundry detergent.
NOTE: do not wash the bleached shirt with other laundry.
Watch this Short YouTube Video to see how it’s done.
Step 11: Adding color dye
After your bleached black t-shirt has been washed and dried, you are ready to move on to step two of your bleach tie-dye, which is to apply color to the bleached areas, or you can stop here for plain bleach tie-dye shirts.

There are a few different ways you can do this, but the best way and the way that I recommend is to fold your shirt back into whatever shape you chose and secure it with rubber bands.
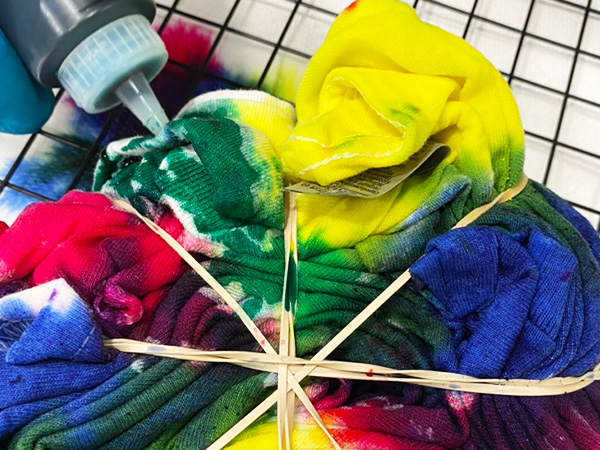
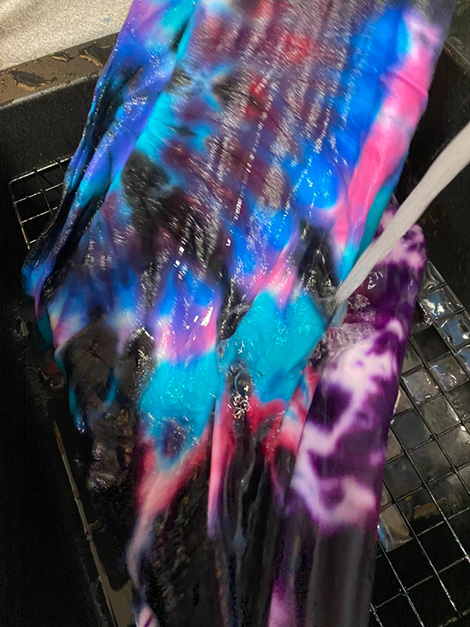
Then take your normal colored dye and apply it in sections as you normally would. After the colors have been applied to your t-shirt, place the reverse dye shirt into a plastic bag and seal it. Let it sit in a warm, dry location for 12-24 hours to allow the color set.
After the color has set, rinse the shirt in cold running water until the water runs clear. When the water runs clear, remove the rubber bands, and continue rinsing in cold water until the water runs clear once more.
When the tie-dye shirt is thoroughly rinsed in cold water, place it into your washing machine, and wash it with hot water. Dry as usual. After the reverse dye shirt has finished washing and drying, it is ready to be worn and enjoyed!
Substitutes for Bleach
If you are looking for an alternative to using straight liquid bleach, there are a few alternatives you could try if desired. They all work the same way with the exception of Hydrogen Peroxide.
It is important to point out that Hydrogen Peroxide may not be the best option for reverse tie dye unless you have no other options. The other choices work much better.
Bleach Toilet Bowl Cleaner
Hydrogen Peroxide
Tulip’s Reverse Tie Dye Kit
Reverse Tie Dye with a White Shirt
The other method you can use to make a reverse tie-dye project is to use a white shirt, with black dye. Here are the steps you will want to follow for this version of reverse tie-dye.
Start off by pre-washing the white T-shirt with a regular load of laundry, without using fabric softener. After the T-shirt has been washed and dried, you can then fold it into your desired pattern and secure it with rubber bands.
Once it’s folded, you can apply your colored dye to the top side of your T-shirt as desired. Make sure that your colored dye covers the top of the shirt.
Then, flip the shirt over. You will notice that there is still a white section on the bottom side of the shirt. Apply your black dye to the entire bottom of the T-shirt. This is what will give you the cool reverse tie-dye effect.
As soon as the black dye is applied to your T-shirt, flip it back over so that the top shows your colors once more. You can touch up any white areas with your colored dye.
When you are happy with your colored dye, place your T-shirt colored side up into a plastic bag and secure it. Let it sit in a warm, dry location for 12 to 24 hours.
After the T-shirt has set, please the T-shirt colored side up into your kitchen sink, and rinse it thoroughly with cold running water. When the water runs clear, remove the rubber bands and continue rinsing the shirt until the water runs clear once more.
Finishing out the Project
After your reverse tie-dye shirt has been thoroughly rinsed in cold water, so that the water runs clear, place it into your washing machine. Turn your washing machine to use as hot of water as possible. You can use your laundry detergent but skip the fabric softener.
Run your reverse tie-dye through the washing machine on a regular load, using hot water. Then dry it thoroughly in your dryer to finish setting the tie dye.
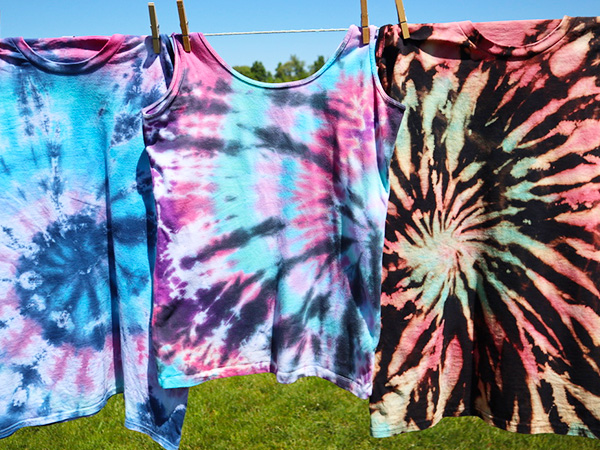
When your reverse tie-dye has finished drying, it is ready to wear and enjoy! Please note that the next time or two that your reverse tie-dye project is washed, I would recommend you wash it separately for one or two more times, before combining it with your regular laundry.
Bleach Safety
When you are using bleach to reverse tie-dye it is extremely important that you follow a few basic safety precautions.
- Only use in a well-ventilated area
- Wear old cloths
- Protect your working surface
- Wear gloves
Frequently asked questions
How long does a bleach solution stay good for?
The bleach solution will last for approximately 24 hours once it has been mixed with water. But it is going to be best when used right away.
Should I mix it with cold or hot water?
The bleach solution will work the best when mixed with cold water.
Should the shirt be dry or wet when applying beach?
For the best results, your shirt should be lightly damp when applying the bleach solution.
How long does it take to bleach a black shirt?
It will not take very long for the bleach to set into your black shirt. Typically around two minutes is all you will need, but no more than five minutes when using a 100% cotton shirt.
How long can you let bleach stay on the shirt?
It is best to only let the bleach stay in your shirt until the color begins to turn. Then rinse it out right away. If you leave the bleach in too long, it will eat through the shirt leaving hols behind.
Can you wash multiple reverse-dye shirts together?
Yes, you can was multiple reverse-dye shirts in the same load of laundry.
Reverse Tie Dye Project
Now that you know the two different methods to make tie-dye T-shirts, using the reverse tie-dye method, you can begin making your own reverse tie-dye shirt. You get to choose between turning a black shirt into a reverse tie-dye, or using a white T-shirt, and applying color as well as black dye to make bleach tie-dye.
I hope that you have enjoyed this tutorial to learn how to reverse tie-dye! Have fun making your very own creations!
Now that you know how to reverse tie-dye a t-shirt, you might also enjoy this reverse tie-dye sweatshirt tutorial!
Find Us Online!
Be sure to follow us online on your favorite social media platform!
How to Reverse Tie Dye
Materials
- 100 % Cotton Shirt
- Bleach
- Plastic Gloves
- Colored tie-dye
- Plastic Bag
- Rubber Bands
- Squeeze Bottle
Instructions
How to Bleach Tie Dye a Dark Shirt
- Before you start working on your shirt, you will want to determine what design you want to make on your shirt.
- When you know what design you want to make on your shirt, you will need to gather together all of your tie-dye supplies.
- Clear a space on a flat surface to make your tie dye project. Cover it with plastic if possible to protect your work surface. Make sure that you are working in a well-ventilated area so that you do not breathe bleach fumes.
- Take your freshly washed black T-shirt, and get it damp. Squeeze out any excess water from the T-shirt, so that it is just lightly damp.
- Lay the Black T-shirt flat on your work surface. Determine what tie dye pattern you want to make your shirt into. There are many different patterns to choose from, the most popular being the spiral pattern. Feel free to select any type of tie-dye pattern you desire.
- Fold or twist your damp black T-shirt into your desired pattern and secure it with rubber bands.
- Put on rubber gloves and select a disposable container. Add approximately 1 cup of bleach to the bottom of your disposable container. Please note, that you may need much less. You will want approximately a splash of bleach, or just enough to cover your container! You don’t need much.
- This is straight bleach you do not want to dilute it with a bleach spray made with a bleach and water mixture.
- When the whole shirt is folded, dip the black T-shirt into the bleach, on both the front and the back. Because the shirt is damp already, it doesn’t need to sit in the bleach, just dip it on both sides, then let it sit for a few minutes until you see the bleach working. If there are any remaining black spots, you can dip your gloved fingers into the bleach and rub them on the black areas to remove any unwanted black spots.
- Let the bleached areas set for a few minutes until you begin to see the shirt whiten. When it starts to turn white, set it in your kitchen sink.
- Thoroughly rinse the bleach under cold running water. After it is rinsed, remove the rubber bands and rinse it thoroughly.
- Tip: I have tried making bleach tie-dyed shirts both by removing the rubber bands before washing, and leaving them in place during the wash. Both methods seem to work just fine, and if you leave the rubberbands in place, you will get a better color tie-dye finish.
- When it has been thoroughly rinsed, place it into the washer, and run it through a regular load, do not use fabric softener, but you can use laundry detergent.
- NOTE: do not wash the bleached shirt with other laundry.
- After your bleached black t-shirt has been washed and dried, you are ready to move on to step two of your reverse tie-dye, which is to apply color to the bleached areas, or you can stop here for plain bleach tie-dye shirts.
- There are a few different ways you can do this, but the best way and the way that I recommend is to fold your shirt back into whatever shape you chose and secure it with rubber bands.
- Then take your normal colored dye and apply it in sections as you normally would. After the colors have been applied to your t-shirt, place the reverse dye shirt into a plastic bag and seal it. Let it sit in a warm, dry location for 12-24 hours to allow the color set.
- After the color has set, rinse the shirt in cold running water until the water runs clear. When the water runs clear, remove the rubber bands, and continue rinsing in cold water until the water runs clear once more.
- When the tie-dye shirt is thoroughly rinsed in cold water, place it into your washing machine, and wash it with hot water. Dry as usual. After the reverse dye shirt has finished washing and drying, it is ready to be worn and enjoyed!
Reverse Tie Dye with a White Shirt
- The other method you can use to make a reverse tie-dye project is to use a white shirt, with black dye. Here are the steps you will want to follow for this version of reverse tie-dye.
- Start off by pre-washing the white T-shirt with a regular load of laundry, without using fabric softener. After the T-shirt has been washed and dried, you can then fold it into your desired pattern and secure it with rubber bands.
- Once it’s folded, you can apply your colored dye to the top side of your T-shirt as desired. Make sure that your colored dye covers the top of the shirt.
- Then, flip the shirt over. You will notice that there is still a white section on the bottom side of the shirt. Apply your black dye to the entire bottom of the T-shirt. This is what will give you the cool reverse tie-dye effect.
- As soon as the black dye is applied to your T-shirt, flip it back over so that the top shows your colors once more. You can touch up any white areas with your colored dye.
- When you are happy with your colored dye, place your T-shirt colored side up into a plastic bag and secure it. Let it sit in a warm, dry location for 12 to 24 hours.
- After the T-shirt has set, please the T-shirt colored side up into your kitchen sink, and rinse it thoroughly with cold running water. When the water runs clear, remove the rubber bands and continue rinsing the shirt until the water runs clear once more.
Finishing out the Project
- After your reverse tie-dye shirt has been thoroughly rinsed in cold water, so that the water runs clear, place it into your washing machine. Turn your washing machine to use as hot of water as possible. You can use your laundry detergent but skip the fabric softener.
- Run your reverse tie-dye through the washing machine on a regular load, using hot water. Then dry it thoroughly in your dryer to finish setting the tie dye.
- When your reverse tie-dye has finished drying, it is ready to wear and enjoy! Please note that the next time or two that your reverse tie-dye project is washed, I would recommend you wash it separately for one or two more times, before combining it with your regular laundry.
PIN for Later!