Crochet Pot Holders Pattern
I am so excited to share this easy crochet pot holder pattern with you! Making crochet pot holders are one of my favorite projects to do in my free time, and you can make them in a short time. No matter what your skill level is, making crocheted pot holders is always a fun project.
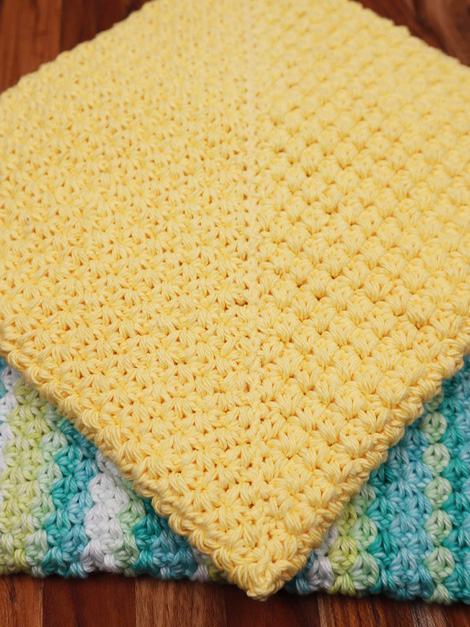
This pattern is an easy one to make, and there are no special skills required by the maker. This pattern is designed so that it easily makes a square, without requiring any effort to form or get it just right. I hope that you enjoy making and following this pattern!
Easy Crochet Potholder Pattern
Making crochet potholders are such a great project to work on. Plus, these pot holders make great gifts, or you can use them in your own home as kitchen décor, or to handle your hot dishes, hot pots, and hot pans.
In addition to using this extra thick pot holder pattern for hot items, you can also use them as hot plate mats because they are designed to withstand a high temperature. These handmade pieces are made in a large panel, and our basic shapes can have many different purposes throughout your home.
These unique patterns are a great way to decorate with a farmhouse pot holder or modern potholders style. Perhaps you are simply looking for a crochet project to make during the holiday season for a gift. This pattern is easy to create and makes the perfect gift for anyone on your list.
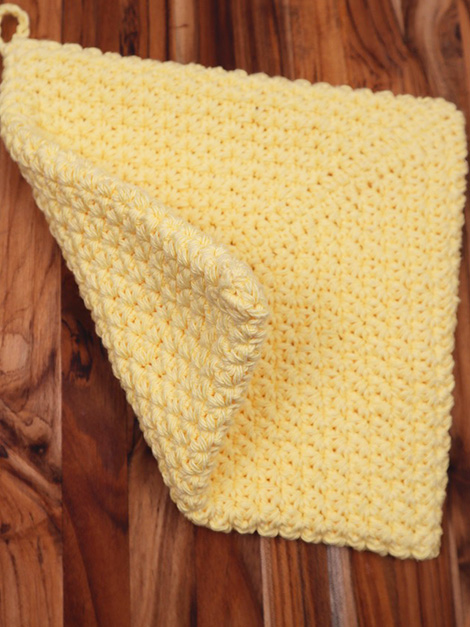
Diagonal Potholder Design
When you use this diagonal potholder pattern design, you can easily make a double-thick potholder that is perfect for any hot dish in your kitchen.
The diagonal potholder pattern is made first by creating a chain, then stitching around the entire perimeter in continuous rounds until the potholder meats in a square down the center of the other side.
This type of potholder is a really easy and useful kind to make. It also looks pretty, so it’s a win all the way around.
Double Thick Potholder Pattern: Free Crochet Pattern
The specific patterns that follow make extra thickness in your crochet pot holders. The extra thickness in the pot holder provides protection to your hands from the heat. There are many free crochet pot holder patterns available on the internet. However, I hope you will enjoy this pattern, because it is unique, easy to make, and turns out looking very beautiful.
This square potholder is such a fun project, it is an easy way to handle hot items. It could even be used as an oven mitt if you don’t mind your hands being exposed.
There are many different stitches that are used to make projects. This specific pattern uses very basic stitches. Some suggest that a thermal stitch is used for pot holders, however, this pot holder is already double thick, so there is no need to move away from basic stitches.
Following this pattern is a very easy way to make pot holders no matter what skill level you are at on your crochet journey. I hope you have a great time making this project, and I hope this is the perfect pattern for you.
Now, let’s turn our attention to the best type of yarn to use for making crocheted pot holders.
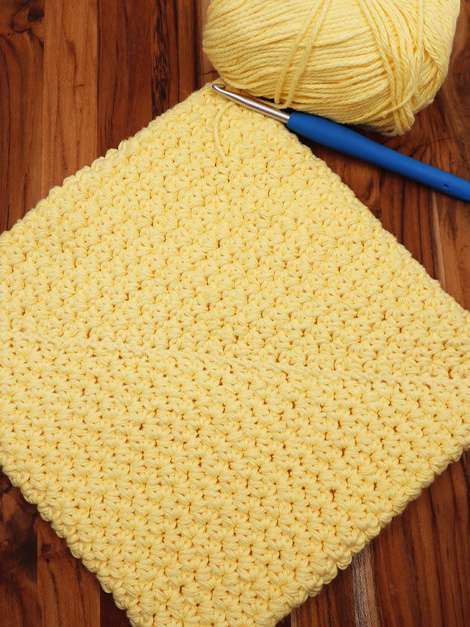
Best Cotton Yarn for Potholders
There are many different yarn types to choose from, so what works best for a crocheted pot holder? When making a crocheted pot holder it’s very important to remember that a pot holder can be used to protect your hands or items against heat. That means that they need to be heat resistant.
Let’s just start right off by saying that acrylic yarn should not be used to make a pot holder as it is not heat resistant and could even melt when exposed to a hot item.
The better bet would be to use a thicker yarn made of wool yarn or cotton yarn. If you’re using cotton, it should be 100% cotton. Wool yarn and cotton yarn are known to be heat resistant. Usually, the most common type of yarn is cotton yarn, the most popular brand of cotton yarn to use is Lily sugar n cream, or peaches and cream.
When selecting the type of yarn to use, it’s best to use heat resistant yarn and the best yarn is thick yarn. Make sure that the strands of worsted weight cotton yarn, are thick enough that they can easily withstand the heat they will be exposed to.
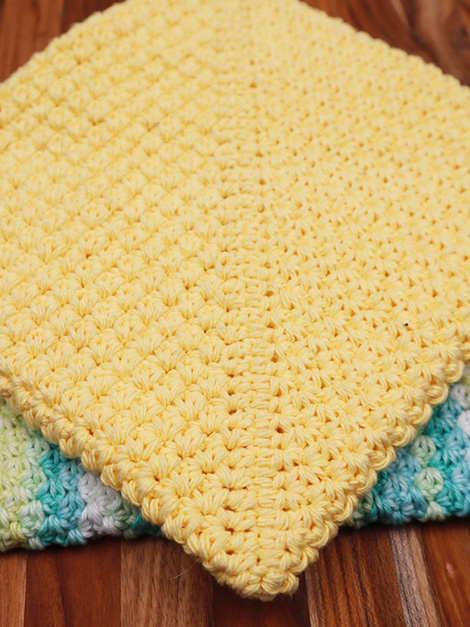
There are many different types of yarn to choose from that are heat resistant, as well as a lot of different color options. When it comes to the colors, feel free to use whatever colors you like whether it’s a plain cream cotton yarn, contrasting colors mixed together, bold colors, or different strands of yarn woven together. You could even select a main color, with complimentary colors mixed in.
There are different ways to make these pot holders, different color combinations you can choose from as well as unique texture options. Thankfully these pot holders are a small project, and don’t need a lot of yarn to make a single pot holder.
Now, let’s jump into the pattern to make these easy and beautiful pot holders!
Easy Crochet Pot Holder PatternSkill Level: Beginner Crocheter
Materials
1 – 2 oz Cotton Yarn Ball (or one for high temperatures)
Size H 5.0 mm crochet hook
Yarn needle
Scissors
Finished Size: 7 to 8 inch square depending on how tight you stitch
Please note that you can increase the size by adding more chain stitches at the beginning, or the size can be decreased by making fewer chain stitches. If you choose to add more stitches, you may need additional yarn. You may also want to increase or decrease the mm hook size that you use depending on how tight or lose you tend to crochet.
Stitch Abbreviations
sch – chain
sl st – slip stitch
sc – single crochet
dc – double crochet stitch
How to Crochet a Potholder: The Hot Pad Pattern
Round 1: Begin by making a ch, you will want to start off by making a string of 44 chain stitches. Then, in the 2nd ch from your hook, make a hdc in that 2nd ch, and in each of the next st using the back loops of the chain only, until you come to the last ch space.
When you come to the last ch space, you are going to make 2 hdc in the chain to make the corner st. When the corner st is made, turn the project over, and continue making hdc st in each of the back loops of the original ch around to the last ch.
Make a second hdc in the first ch space, then join with a sl st to the 1st st. The first round is complete now. The next several rounds will be worked in continual rounds.
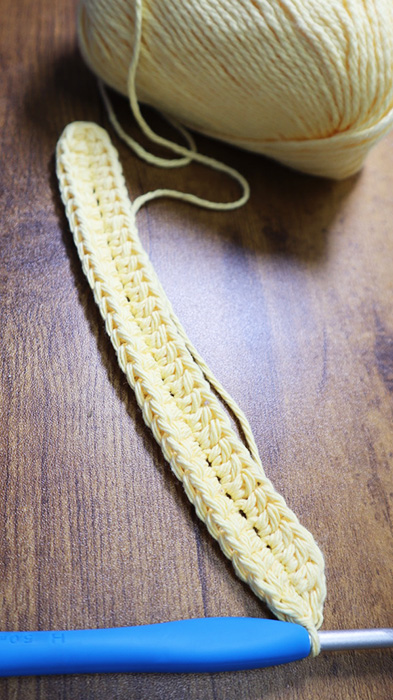
Round one of the potholder using hdc.
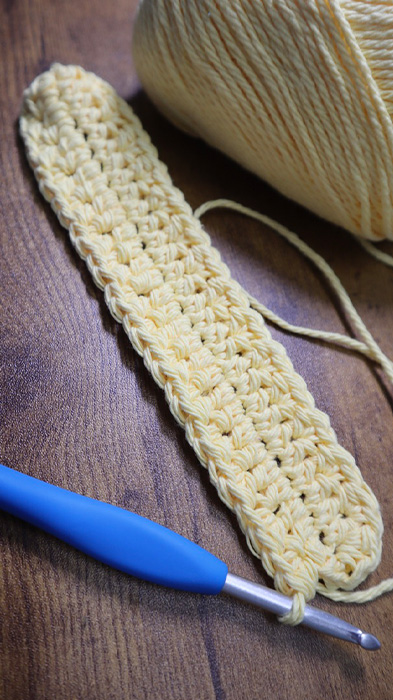
Round two, start working in continuous rounds.
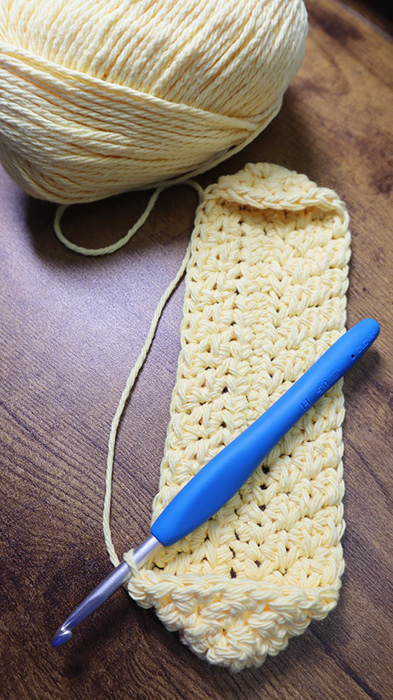
Working in continuous rounds, corners starting to turn in.
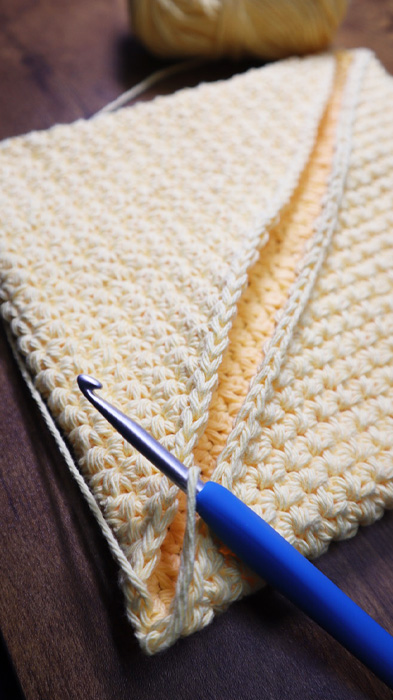
When the centers meet, make a hanging loop, then stitch together.
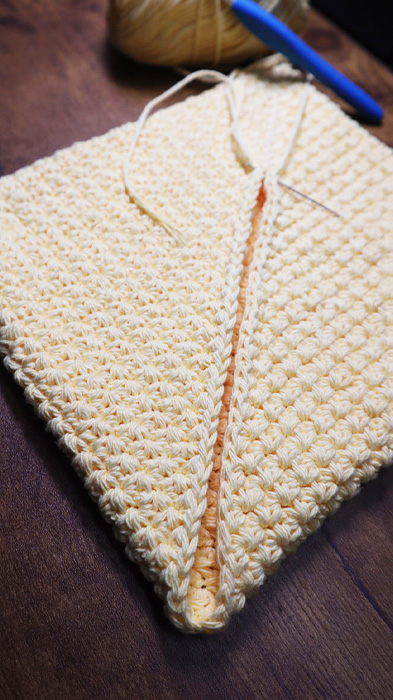
Whip stitch the two sides together to finish off.
Round 2: Next, ch 1, in the 1st st, make a sc and hdc in the same st, skip the next stitch and repeat a sc and hdc both in the next st. Repeat this process around. When you get to the start of round 2, make the next sc and hdc both in the top of the previous rows sc.
You will notice as you work, the pot holder will naturally begin to fold itself into a square as you work in from the corners. When the pot holder forms a square that comfortably meets in the center, chain a few stitches to create a hanging loop, then cut the yarn, leaving a long tail for sewing.
Thread the yarn needle with the long tail, and sew the potholder together, so that it is secured in a square shape. Finish off, and weave in any loose ends of the yarn.
Special Stitches in this Pattern
There are just a few basic stitches used in this easy crochet potholder pattern. Let’s look at the main stitches used.
Chain. The chain stitch is a foundation stitch used in this crochet pattern.
Single Crochet. The single crochet stitch is also a very basic stitch used in the crochet pattern. It is made by pulling up a loop, and then pulling the new loop of yarn through both loops on the hook.
Half Double Crochet. The half-double crochet stitch falls in between a single crochet and a double crochet stitch. To make this stitch you will first want to yarn over, then insert your hook into the stitch indicated and pull up a loop. Then yarn over and pull through all three loops on the hook.
Learn More Basic Crochet Stitches
If you would like to learn more about how to make these basic crochet stitches, please be sure to check out our Learning To Crochet Tutorial, with step-by-step instructions to help you learn.
Join our Mailing List and Receive a…
Pattern Variations
Other Stitches. In the pattern above, I suggested that you use a single crochet and half double crochet stitch both made in the same stitch, then skip the next stitch around. This creates a beautifully finished pot holder. However, it is not necessary to use these stitches.
After the first round is made, you can continue to use a half double crochet, or even use a single crochet or double crochet to make the pot holder. This is a very easy stitch variation.
Add Insulation. Another great option is to add insulation inside of the potholder before you sew it closed. This way it has extra protection from the hot temperatures.
Larger or Smaller Size. This pattern is easily adjustable in size to whatever size you want to make. All you have to do is add more chains or make fewer chains during the very beginning to make a larger or smaller-sized pot holder.
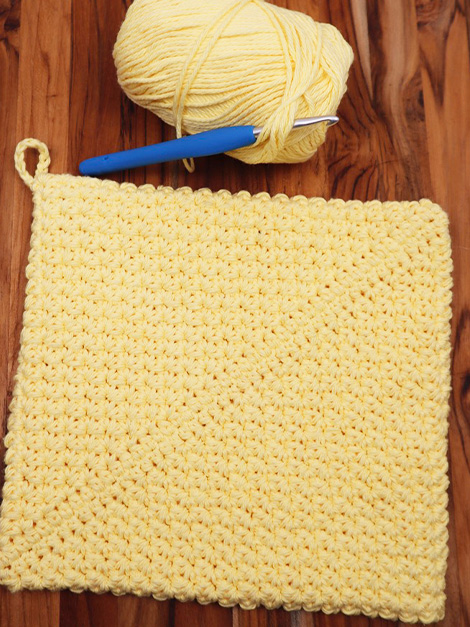
Prefer the PDF version? Get The Free Pattern: PDF Download
I have also made this easy pattern available to you as a PDF download. Please note that this download in the pattern is for your personal use only and not for commercial distribution.
To receive this pattern as a free PDF download, simply enter your email address in the box below, then your free copy, of these free crochet potholder patterns will be sent to your email inbox.
FAQs About Crochet Potholders
What Yarn Works Best for Crochet Potholders?
The best yarn to use for making crochet potholders is going to be 100% cotton yarn. This is the same type you would use for making washcloths because the yarn can withstand high temperatures.
Are Potholders Hard to Crochet?
No, making these crochet pot holders pattern are a great project to start with if you are new to crocheting, or you are looking for an easy project because potholders are not hard to crochet.
What is the Best Stitch for Crochet Potholders?
You can choose to use a variety of stitches when making crochet pot holders if you wish. This pattern is great because it gives you a beautifully textured appearance. However, you can use the same method above and substitute other stitches like a single crochet, half double crochet, or double crochet stitch.
How much yarn do you need for a crochet potholder?
How much yarn you use for this crochet pot holders pattern will depend on the size of your specific skeins and if you want to make your crochet potholder larger or smaller than instructed above. Typically you want to have two to three skeins of yarn for a potholder.
Simple Crochet Potholder
This simple pattern will walk you through the step-by-step process of making double thick crochet pot holders. These pot holders are great for gifts, or to use in your own home. Following the crochet pot holder patterns makes a great project for crocheters of all skill levels.
It is my hope that you enjoy making this simple crochet pattern, and that you are able to enjoy giving these pot holders away or using them in your own home. Thank you so much for taking the time to read and try my pattern! I hope you enjoy it!
Find Us Online!
Be sure to follow us online on your favorite social media platform!
Crochet Pot Holders Pattern
Materials
- 2 2 oz Cotton Yarn Ball or one for high temperatures
- Size H 5.0 mm crochet hook
- Yarn needle
- Scissors
Instructions
- Round 1: Begin by making a ch, you will want to start off by making a string of 44 chain stitches. Then, in the 2nd ch from your hook, make a hdc in that 2nd ch, and in each of the next st using the back loops of the chain only, until you come to the last ch space.
- When you come to the last ch space, you are going to make 2 hdc in the chain to make the corner st. When the corner st is made, turn the project over, and continue making hdc st in each of the back loops of the original ch around to the last ch.
- Make a second hdc in the first ch space, then join with a sl st to the 1st st. The first round is complete now. The next several rounds will be worked in continual rounds.
- Round 2: Next, ch 1, in the 1st st, make a sc and hdc in the same st, skip the next stitch and repeat a sc and hdc both in the next st. Repeat this process around. When you get to the start of round 2, make the next sc and hdc both in the top of the previous rows sc.
- You will notice as you work, the pot holder will naturally begin to fold itself into a square as you work in from the corners. When the pot holder forms a square that comfortably meets in the center, chain a few stitches to create a hanging loop, then cut the yarn, leaving a long tail for sewing.
- Thread the yarn needle with the long tail, and sew the potholder together, so that it is secured in a square shape. Finish off, and weave in any loose ends of the yarn.
Looking for More Crochet Projects?
PIN for Later!
Check out other Craft and DIY projects!
