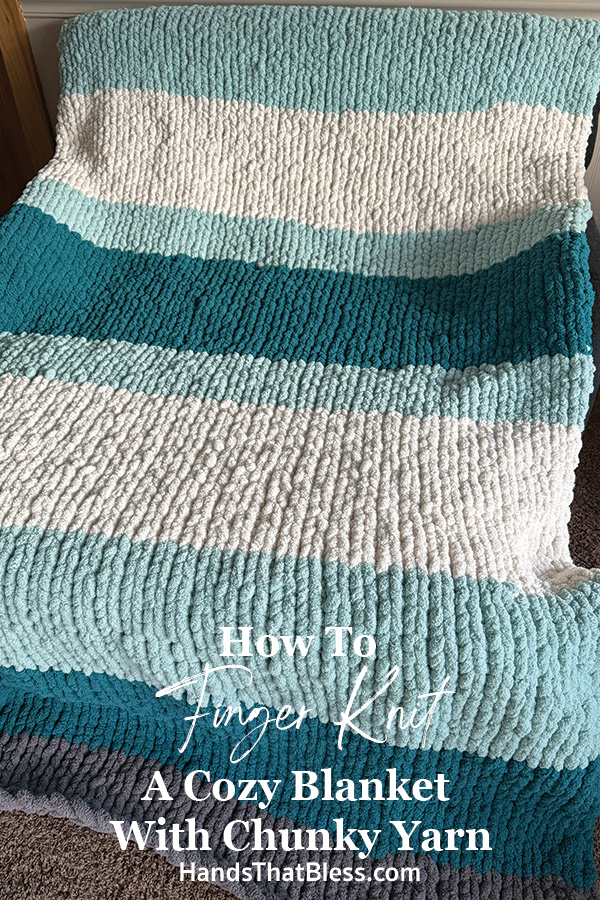
How to Finger Knit a Blanket
Making a chunky blanket with super bulky yarn, and finger knitting it together is a fun way to make a super cozy blanket. In this pattern, I am so excited to walk you through the step-by-step process to learn how to finger knit a blanket. This is a fun project, and one that you can enjoy curling up under to read a good book or giveaway as a very thoughtful gift. However, one word of caution, this is not a cheap project to make, but it is very fun and rewarding when completed.
What is finger knitting?
Finger knitting is a type of knitting that uses very chunky yarn, but does not use any knitting needles, but rather uses your fingers to work the loops in the same manner, as if you were using knitting needles.
The basics of finger knitting is quite easy. You simply use super fat yarn, and work loops of yarn just like you would with knitting only it’s so chunky you don’t need the needles, but rather use your fingers. This is a fun way to make a soft, throw blanket, or whatever size of blanket you prefer.
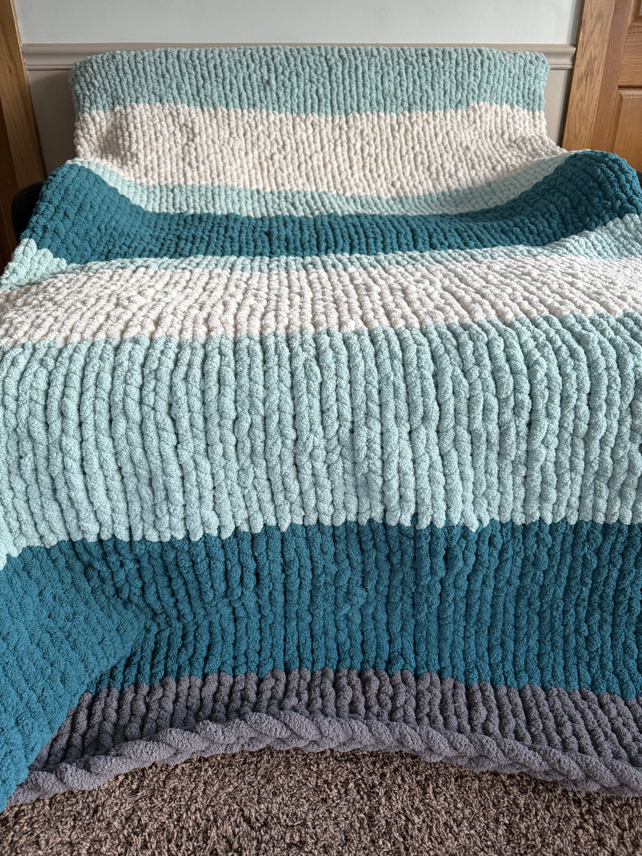
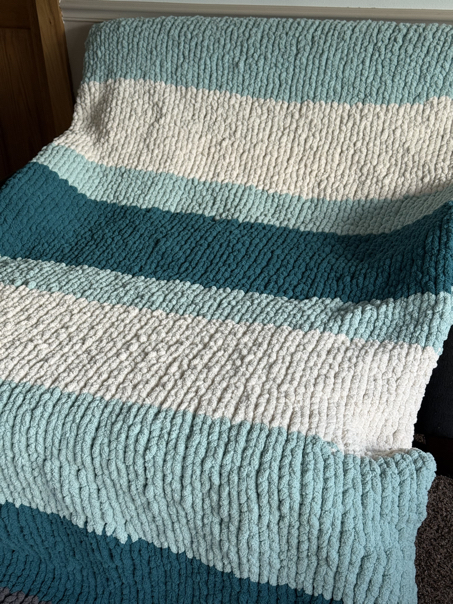
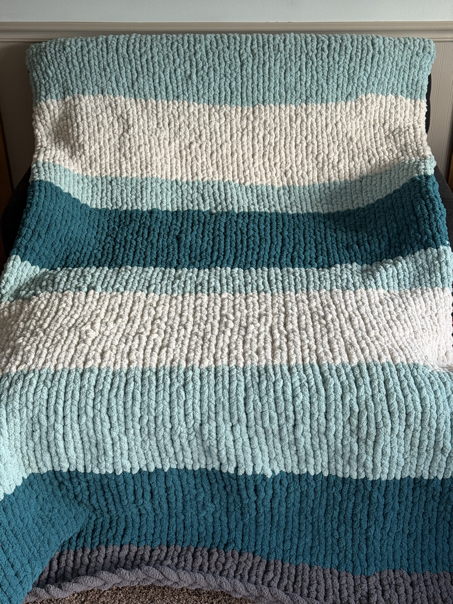
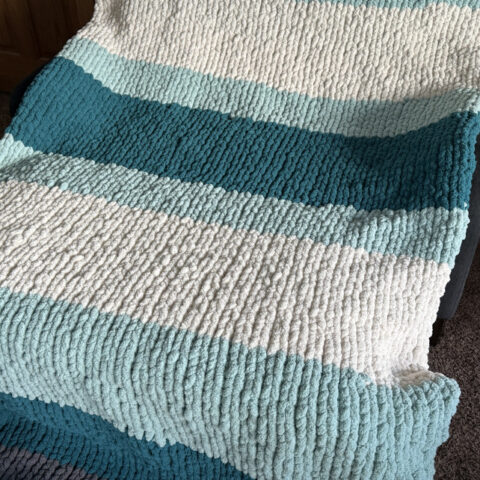
Chunky Hand Knit Blanket
Perhaps you have seen some of the super chunky yarn at your local craft store. This super bulky yarn is exactly what you want to use to make a finger knit blanket. It is so big and fluffy, but working with it with your fingers is super easy and it makes a very plush blanket that you can enjoy.
Let’s get started by jumping into the step-by-step tutorial to learn how to make a finger knitted blanket.
Easy Finger Knit Blanket Pattern
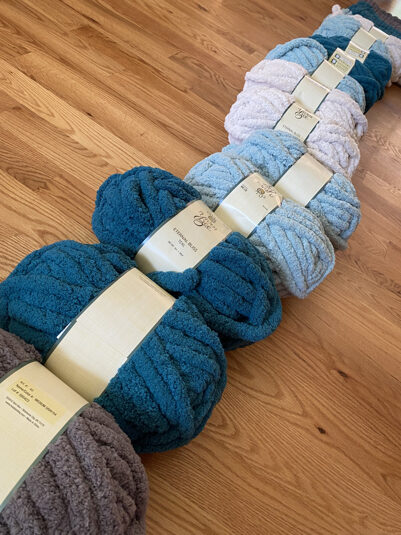
Materials
14 skeins of super bulky yarn
I used the Jumbo super bulky #7 weight yarn from hobby lobby
A large crochet hook (optional) for weaving in the loose ends.
Pair of scissors
Finished Size
60 x 70
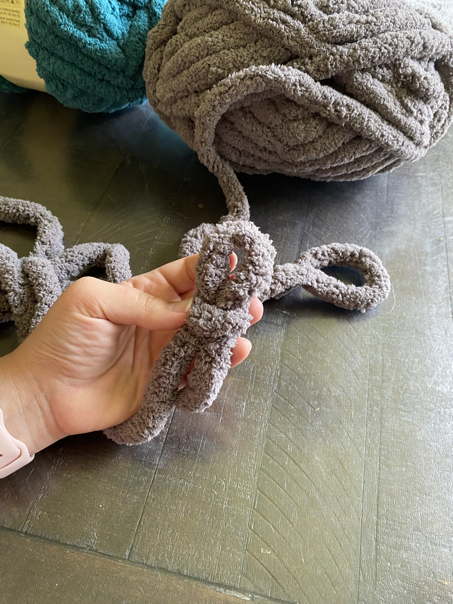
Step 1: Make a slip knot
Start by making a slip knot with the first color of yarn
Step 2: Make the foundation row
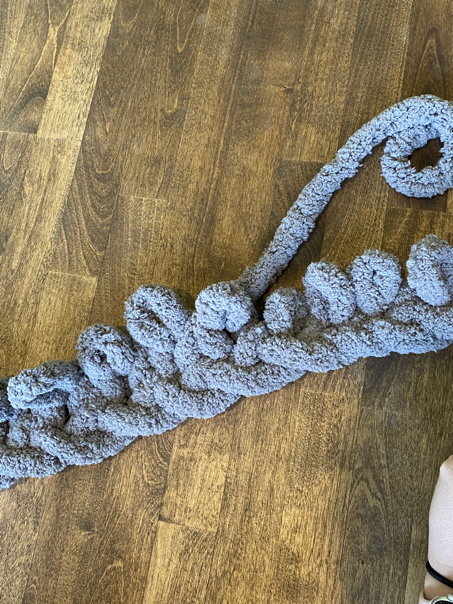
To start off finger knitting, you will first want to make a foundation row out of chain stitches. To do this, take the slipknot that you created, and insert your fingers into the center, pull the working yarn up through the center and then tighten it to create an evenly spaced loop. Repeat this process with the second loop and on, until you have as many stitches as needed to meet your desired measurements. For me, it was 40 chain stitches. (TIP: For the baby version of this same yarn it was about 60 stitches). Then move onto the second row.
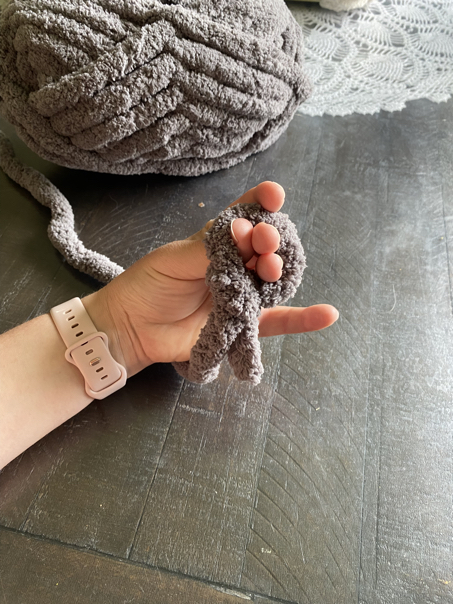
Step 3: Knitting the Blanket
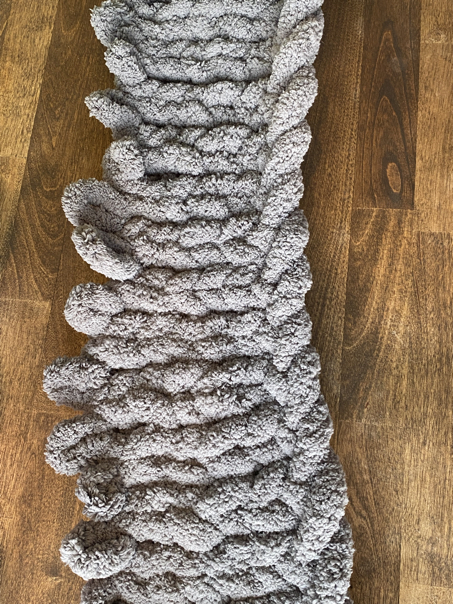
Now, do not turn, but work back across the foundation chain just made. Pull up a loop through the chain stitch and each of the chain stitches acrossed the previous row. You should loop yarn through each of the stitches, that are even in size.
When you reach the end, do not turn the blanket.
Start a new row by moving your working yard in the other direction. Stick your fingers through the first loop, and pull a new loop of yarn through it. Do the same with the next loop. Put your fingers through the previous loop and pull a new loop up through it. Repeat these steps across each of the stitches until you reach the end of the row.
As your work, make sure that the loops stay nice and even in size and don’t get all twisted as the puffy stacks are made, but lay nice and flat on your work surface.
Continue repeating these steps to make your blanket to your desired size.
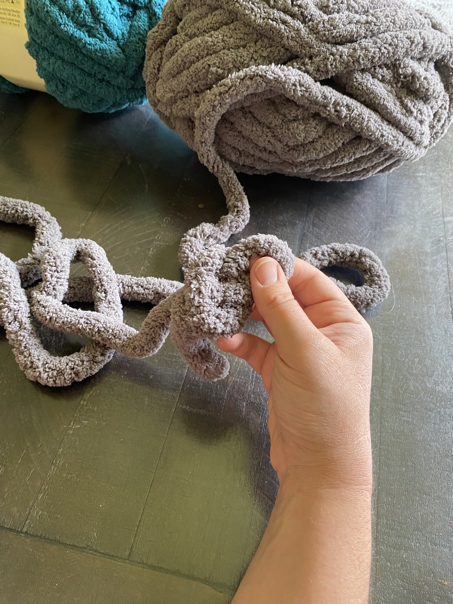
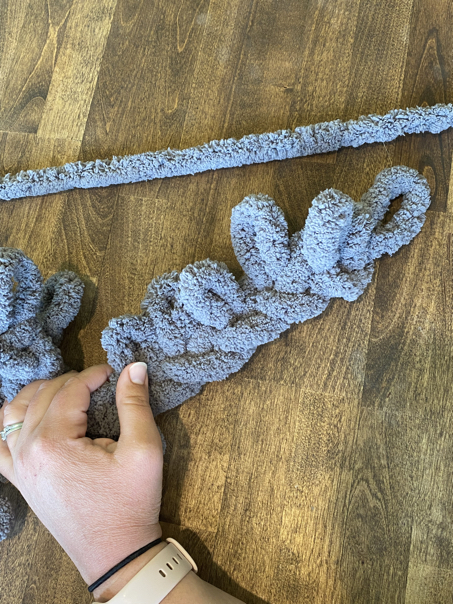
Step 4: casting off & weaving in loose ends.
Once your blanket has reached your desired size it’s time to cast off and we’ve in any loose ends. This process will finish off your blanket.
For those of you who are used to knitting, proceed with your cast off, just like you would with needing needles.
And those of you who are not familiar with the process, let’s walk through it here.
To finish off, pull up a new loop in the first two stitches, then take the second loop and pull it through the first. Pull up a loop in the nest stitch, and pull the new loop through the cast off loop.
Repeat these steps until you come to the last loop. Cut the yarn off, leaving a yarn tail, then pull the tail all the way through the last loop to tie a knot. We’ve in the loose end of yarn so that it is no longer visible.
Tips and Tricks for Finger Knitting
Working the blanket
It works the best when you are working the blanket with finger knitting, to work on a flat surface and try to keep your loops all even sized. This way you will have even spaces for your loops instead of some large and others really small.
Adding on new yarn
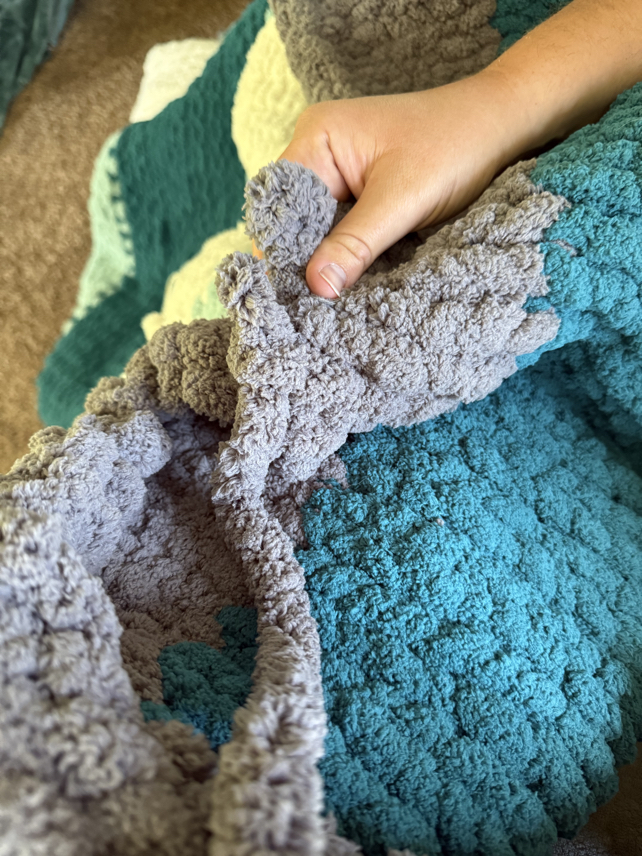
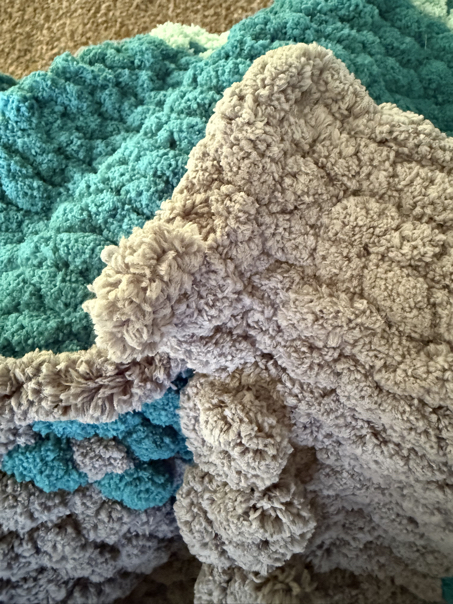
When you add a new ball of yarn, start by looping the new yarn in just as you would with your working yarn of the previous color. Make sure to tie the two ends of the yarn together, and then weave them in using a crochet hook if possible, so that the end of the yarn tail is hidden.
Changing Colors
Changing colors works the best if you can do it at the end of row instead of mid row. When when you do so make sure to tie the two yarn ends together and then weave in any yarn tales with the same color of yarn.
Tip: fold your work!
It is really helpful if you can roll up your completed stitches and blanket so that you’re always working near the end. That way you don’t have to work or stretch awkwardly to work over your completed sections.
What is the best finger knitting blanket yarn
The best finger knitting yarn to use is the jumbo size yarn. Typically, this type of yarn is a yarn weight number seven, but it might also be labeled as jumbo yarn or super chunky. It is nice and soft yarn that can now be found at most craft stores in many different color options.
What to do when you run out of yarn
It is really important to make sure that you have enough yarn when making a blanket. I tend to buy more than I think I will need, and then hang onto my receipt to take it back if needed. However, if you run out of yarn, you can always go back to the store and buy some. There might not be some of the same dye lot available, but you can find something that is fairly close in color.
Make Sure Your Workspace Is Big Enough
Making a hand net blanket is a big project, and it takes up a large amount of space. The yarn is super huge, and your blanket is going to be nice and fluffy. It’s really important that you have a large enough workspace so that you can spread out as you create your finger knit blanket.
Watch for Twisted Stitches
As you are creating your finger, net blanket, make sure that your stitches to stay nice and straight. This will help prevent any twists in the yard as you progress.
Watch the Size of Your Loops
It is really helpful if you are able to create evenly sized loops with your finger knitting. This way, your blanket will look nice and symmetrical without any super tight places or super loose holes.
The Blanket Size
The size of blanket that you want to make will determine how much yarn you will need, and consequently, how much is the blanket cost to make. Below are some estimations on how much yarn you will need for the different size blankets. Please keep in mind that this amount may vary, depending on your stitch tension, and how big your skins of yarn are.
Approximately 6 skeins (28 yards each) of #7 jumbo yarn for a baby blanket
Approximately 8-10 skeins (28 yards each) of #7 jumbo yarn for a throw size blanket
Approximately 12-14 skeins (28 yards each) of #7 jumbo yarn for a twin size blanket

FAQ
What yarn should I use for finger knitting?
The best yarn to use for finger knitting is jumbo yarn, which is a yarn weight of number seven.
Can I make a baby blanket with this pattern?
Yes, you can make a baby blanket with this pattern, but please note that it will be a super fluffy blanket, and you will need to adjust the skis and chain stitches to meet your desired measurements.
Hand Knitting A Blanket – How Much Experience Do You Need?
You don’t need a lot of experience in order to make a hand knit blanket. You do not need to be an idiot expert, you simply need to be able to follow instructions and have a couple of hours to designate towards creating your project.
How to Knit a Chunky Blanket for Beginners: No Needles Required!
Making a chunky hand knit blanket is a lot of fun, and it is a great way to make a cozy blanket in a short period of time. Although this project is not a cheap one to make, it is a lot of fun, works up quickly, and is so cozy to enjoy when it is finished. I love to make finger, knitted blanket, blankets, and I hope that you will give this pattern a try and enjoy it as well.
Thank you so much for stopping by to check out our free tutorial for how to make a finger-knit blanket. This is such a fun craft project to do, you don’t have to be a knitting expert in order to make it. Simply follow a few basic instructions and you will have a warm cozy blanket to enjoy for a long time! Now it’s time for you to get started making your own finger knitted blanket.
Happy finger knitting!
Be sure to follow us online on your favorite social media platform!
More Project Ideas

How to Finger Knit a Blanket
Materials
- 14 skeins of super bulky yarn
- I used the Jumbo super bulky #7 weight yarn from hobby lobby
- Pair of scissors
Instructions
- Step 1: Make a slip knot
Start by making a slip knot with the first color of yarn - Step 2: Make the foundation row
To start off finger knitting, you will first want to make a foundation row out of chain stitches. To do this, take the slipknot that you created, and insert your fingers into the center, pull the working yarn up through the center and then tighten it to create an evenly spaced loop. Repeat this process with the second loop and on, until you have as many stitches as needed to meet your desired measurements. For me, it was 40 chain stitches. Then move onto the second row. - Step 3: Knitting the Blanket
Now, do not turn, but work back across the foundation chain just made. Pull up a loop through the chain stitch and each of the chain stitches acrossed the previous row. You should loop yarn through each of the stitches, that are even in size.
When you reach the end, do not turn the blanket.
Start a new row by moving your working yard in the other direction. Stick your fingers through the first loop, and pull a new loop of yarn through it. Do the same with the next loop. Put your fingers through the previous loop and pull a new loop up through it. Repeat these steps across each of the stitches until you reach the end of the row.
As your work, make sure that the loops stay nice and even in size and don’t get all twisted as the puffy stacks are made, but lay nice and flat on your work surface.
Continue repeating these steps to make your blanket to your desired size. - Step 4: casting off & weaving in loose ends.
Once your blanket has reached your desired size it’s time to cast off and we’ve in any loose ends. This process will finish off your blanket.
For those of you who are used to knitting, proceed with your cast off, just like you would with needing needles.
And those of you who are not familiar with the process, let’s walk through it here.
To finish off, pull up a new loop in the first two stitches, then take the second loop and pull it through the first. Pull up a loop in the nest stitch, and pull the new loop through the cast off loop.
Repeat these steps until you come to the last loop. Cut the yarn off, leaving a yarn tail, then pull the tail all the way through the last loop to tie a knot. We’ve in the loose end of yarn so that it is no longer visible.
PIN for Later!