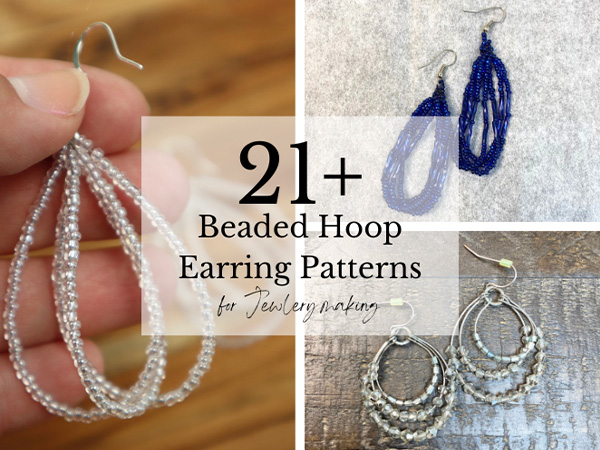
DIY Beaded Hoop Earrings
I am so excited to share these DIY beaded hoop earrings with you! I love to make them, and I hope that you will too! Below we are going to walk through the step-by-step instructions on how you can easily make beaded hoop earrings, for any occasion. They are so much fun to make, I hope that you will enjoy the process.

Before we jump into the step-by-step instructions of how to make these DIY beaded hoop earrings, let’s first look at what type of wire you should use as the base of your hoop earrings. We will also look at the bead types that work best for making these earrings.
Making Earring Hoops
There are many different ways you can make hoop earrings. One way is to string beads to thread and attach them to plain wire hoop earrings. This method that I am excited to share with you may choose to use round wire, small gage wire which will depend on the size of holes in your beads, a coil of memory wire, eye pin wire, or another type of round wire that you can adjust as desired.
For this specific tutorial a coil of wire, or eye pin wire is likely going to work the best. The good thing about these kinds of wire, that you will want to look for is a wire that will allow you to thread the beads directly onto the wire, get your desired size of hoop, and also allow you to determine the specific shape of your hoops.
The Shape of the Hoops
The shape of these hoop earrings turns out to be more of a teardrop hoop shape. You can easily adjust this shape so that it can be specifically as you desire by changing up the type of wire that you use.
Keep in mind that a stiffer wire will hold its shape once set much more than a more flexible kind of wire. You could also use plain wire hoop earrings, to add beads to if you want them to be exact circles.
The Size of the Hoop
The size of your hoop earrings is completely up to your preference. The hoop size will be determined by how long your wire is when you begin. Feel free to make the hoop size as large or as small as you prefer.
The Kinds of Beads
For the size of beads, or bead size combinations that you use will also determine the finished size of your hoop earrings. There are so many different sizes and shapes of beads to choose from. Some are teeny tiny and others are larger beads.
If you are a fan of beads, then you likely have an entire collection of them. You might enjoy using large focal beads arranged on your hoop earrings. Or you might prefer to use all smaller beads as I have done in creating these earrings.
When making these earrings, I used seed beads. These are small types of beads that have smaller holes, so you will want to be sure you use a small gauge wire to fit inside of them. You can find these seed beads at your local bead store, local craft store, or usually in the craft aisle of your larger grocery stores.
Tip: It will also be handy if you have some small long round nose pliers on hand to help you bend the wires once finished adding your desired bead pattern.
Now, let’s look at the step by step instructions on how to make these fun DIY beaded hoop earrings.

How to Make These Easy DIY Beaded Earrings
Materials & Tools For Easy DIY Beaded Earrings
Seed Beads. You may choose to use any color combination of seed beads to make these earrings. I like to use small beads and then add the desired color combinations. You will want to make sure you have enough beads on hand to make the earrings before you begin.
Earring Hook. The earring hooks are the curved part of the wire that goes through your ears to hold the earrings in place. Feel free to select whatever kind of hooks you prefer the best.
Wire. Use whatever type of wire you prefer for these earrings. The most important part is to make sure that the wire is small enough that you can string the seed beads onto it.
Jump Ring. The jump rings are also important to have on hand. These will allow you to hook the hoops to the earring hook.
Pliers. It’s also a good idea some flat-nose pliers, or round-nose pliers on hand to help you bend the wire, and cut it once your earrings are completed.
How to Make Beaded Hoop Earrings
Step 1: Cut Your Wire
The first step to making beaded hoop earrings is the hoop wire. First, determine approximately how big of hoops you want your earrings to have, then measure three times that length, and add a little extra wire to your estimate before cutting the wire off. I like to cut my wire approximately 15 inches long to ensure I have plenty to work with.


Step 2: Slide Beads Onto The Hoops
Holding one end of the wire, so the beads don’t fall off, determine your beading pattern. Add first the jump ring, and the crimp bead, then add your beds to the wire so to create the first hoop. As they form a circular shape, you can determine the exact hoop shape you want for your earrings. It can be a full circle, or more of a teardrop hoop shape.
Thread the wire up back through the crimp bead and over the top of the jump ring. Then go back through the crimp bead to start the next loop.
Step 3: Add Additional Hoops
One of the key features of these beaded hoop earrings is that there is more than one hoop on a single earring. You now have the first loop beaded, and your wire is in place ready to start the second loop. Repeat the steps until you have all of your hoops beaded. I like to add a total of three loops, but you can add as many as you prefer and your crimp bead will allow. Then it’s time to add earring wires.


Step 4: Finish Out the Earrings
Take the ends of the wire, and bend the pointy end over the ear wires, so that the bent ends face down. Use heavy-duty wire cutters to cut off any thread tails of wire. Clamp the bent end together with a finishing ball, to hold all of the bent ends together, so that no sharp edges of wire are exposed.
Repeat these steps as desired to make the second earring so that you have a complete pair of earrings to enjoy!

How To Customise Your Hoop Earring Designs
Beaded Earring Design Ideas
There are many different ways you can enjoy making your own DIY beaded hoop earrings. Here are a few ideas to help get your creativity going.
Multiple Hoops on One Earring
One of my favorite ways to make beaded hoop earrings is to make multiple hoops attached to one earring. In this tutorial, I like to have at least five beaded loops attached to an earring for that pretty beaded look. You can add as many as you prefer!
Bead Patterns
There are also several different patterns you can make up with your beads. No matter if you are using a variety of sizes or all small seed beads, you can design different color combinations for your beads to give your beaded hoop earrings an extra cute flair.
Small Interlocking Hoops
Another idea, rather than attaching each of your hoops all to the earring hook, you might consider making 2-3 interlocking hoops covered in beads, attaching them to themselves, but hooking the last hoop to the earring hook. This is another fun way to make another variation on these beaded hoop earring patterns.

Beaded Hoop Earrings
Now that you have checked out this easy tutorial for beaded hoop earrings, you can get started designing your very own earrings. Feel free to adjust these instructions to fit your desired outcome. After all, half of the fun of creating jewelry is in adding your own custom flair to it.
Thank you so much for stopping in to check out my DIY Beaded Hoop Earrings. I hope that you have enjoyed this tutorial, and now you can get started making your own cute earrings!
Another fun seed bead earring pattern that you might enjoy are these beautiful seed bead earrings using a brick stitch. These are another great pair of earrings that you can enjoy making for any occasion or to give away as gifts. The great part is that the supplies needed are very much similar as these hoop seed bead earrings. To learn more about how to make them, be sure to check out this tutorial!
Follow Us Online!
Be sure to follow us online on your favorite social media platform!
More Ideas For You!
One of my other favorites is this dangle seed bead earring pattern idea! Make sure to check it out today. Plus, you will also enjoy these different ideas to make seed bead bracelets!


DIY Beaded Hoop Earrings
Materials
- seed beads
- earring fish hooks
- wire or thread
- jump rings
- pliers
Instructions
Step 1: Cut Your Wire
- The first step to making beaded hoop earrings is the hoop wire. First, determine approximately how big of hoops you want your earrings to have, then measure three times that length, and add a little extra wire to your estimate before cutting the wire off. I like to cut my wire approximately 15 inches long to make sure I have plenty to work with.
Step 2: Slide Beads Onto The Hoops
- Holding one end of the wire, so the beads don’t fall off, determine your beading pattern. Add first the jump ring, and the crimp bead, then add your beds to the wire so to create the first hoop. As they form a circular shape, you can determine the exact hoop shape you want for your earrings. It can be a full circle, or more of a teardrop hoop shape.
- Thread the wire up back through the crimp bead, and over the top of the jump ring. Then go back through the crimp bead to start the next loop.
Step 3: Add Additional Hoops
- One of the key features of these beaded hoop earrings is that there is more than one hoop on a single earring. You now have the first loop beaded, and your wire is in place ready to start the second loop. Repeat the steps until you have all of your hoops beaded. I like to add a total of three loops, but you can add as many as you prefer and your crimp bead will allow. Then it’s time to add earring wires.
Step 4: Finish Out the Earrings
- Take the ends of the wire, and bend the pointy end over the ear wires, so that the bent ends face down. Use heavy-duty wire cutters to cut off any thread tails of wire. Clamp the bent end together with a finishing ball, to hold all of the bent ends together, so that no sharp edges of wire are exposed.
- Repeat these steps as desired to make the second earring so that you have a complete pair of earrings to enjoy!
Love it? Pin it!

