Amigurumi Crochet Elephant Pattern
I am so very excited to share this free crochet elephant pattern with you. This adorable elephant is so much fun to make and is super cute once complete. The little elephant is a great gift or just plain a fun project to make.
Not only is this crochet elephant super cute, but the pattern is also a free pattern with step-by-step instructions on how to make the entire little elephant.
I first created this pattern to make for one of my nieces who absolutely loves elephants. She named this cute little elephant, Lainey. Isn’t that just the cutest?!
Keep in mind that this adorable crochet elephant would make an adorable gift for a baby shower, a birthday, or a Christmas gift for any little person in your life. There’s nothing that can match the sweet thoughtfulness of receiving a handmade crochet gift, like this crochet elephant.

Perhaps I am a little biased, but I think that this crochet elephant is a great pattern because the finished project is just adorable, and the steps to make each part of the body aren’t too difficult! It is my hope that you will enjoy making this cute crochet elephant and be very happy with how this project turns out!
Free Elephant Crochet Pattern
Making this cute amigurumi elephant is not super difficult. The primary stitches used in this pattern are the single crochet stitch, but you will need to know how to increase and decrease the overall number of stitches, to make the elephant shape. If you are brand new to crocheting, then I might recommend trying a few other projects before you try to tackle this one. Otherwise, this is an easy crochet toy pattern.
The finished size of this crochet project, made by following this large crochet elephant pattern is approximately eight inches tall by ten inches long. These are measuring the elephant’s entire body size, after assembling the elephant. Making this crochet elephant is such fun, and I hope you will be delighted with the finished amigurumi toy.
I have followed several different crochet elephant amigurumi patterns in all the years I have been crocheting. I think that this crochet pattern incorporates all the good aspects, making it into one of the best cute crochet elephants out there. Plus, it’s a great gift to make and give away too!
Let’s take a look at some of the basic crochet stitches used to make this crochet elephant pattern. I will also give you a quick explanation of how to make each stitch, just in case you need a refresher.

Basic Stitches Used in this Crochet Elephant Pattern
There are just a few basic crochet stitches you will need to know in order to make this crochet elephant pattern. Let’s look at each of these stitches, including the step-by-step instructions on how to make each stitch.
Magic Ring (aka Magic Circle). A magic circle or magic ring is the base stitch for any round project. This will allow you to be able to pull it tight after your stitches are made, giving you a firm circle to start your project. For a detailed tutorial on how to make a magic ring, check out this tutorial.
Chain Stitch. A chain stitch is another basic stitch you will need to know. To make a chain stitch, you will perform what is called a “yarn over”. This is done by wrapping the yarn from the back of your crochet hook over the top towards yourself. Then, pull the new loop of yarn through the loop previously on your hook to make a chain stitch.
Single Crochet Stitch. A single crochet stitch is made by first inserting the hook into the next stitch indicated, yarn over, and pull up a loop. There are now two loops on your hook. Yarn over and pull the new loop through the previous two loops on your hook to make a single crochet stitch.
Join our Mailing List and Receive a…
Increase. An increase stitch is when you make two stitches in the same stitch to increase the overall number of stitches. In this pattern, increase stitches should be two single crochet stitches made in the same stitch on the previous round.
Decrease. As opposed to an increase stitch, a decrease stitch is when a single stitch is made over two stitches to decrease the overall number of stitches in the round. In this pattern, a decrease stitch should also be a single crochet.
To make a single crochet decrease, insert hook into the stitch, yarn over, and pull up a loop. There are now two loops on the hook. Insert the hook into the next stitch, yarn over, and pull up another loop. There are now three loops on the hook. Yarn over again, and pull through all three loops on the hook to make a single crochet decrease stitch.
Invisible Decrease. An invisible decrease stitch will help the decrease stitch not be quite so obvious when looking at it. In this pattern, you can choose to use a regular decrease or an invisible decrease.
To make an invisible decrease stitch, insert your hook into the front loop only of the first stitch, then maneuver the hook to insert it into the front loop only of the second stitch. There are now two loops on your hook. Yarn over and pull through the first two loops on your hook. Yarn over and pull through the remaining two loops on the hook to make an invisible decrease stitch.
How to work in Flat Rows:
If you are wondering how the crochet elephant appears to be completely flat without any ridges from the different stitch rounds, this is done by working your crochet stitches in both loops of your project, or when making an invisible decrease, in the front loops only. By doing this, there are no apparent ridges in the crochet elephant.

Type of Yarn to Use
You can choose to use whatever color of yarn you prefer for this crochet elephant. The most common color is gray yarn, or light gray for an elephant, but there are so many different colors to choose from, feel free to mix things up! I used purple velvet, mostly because I had a specific person in mind who loves purple elephants, so you can get creative too!
To make this small elephant, I would recommend using soft velvet yarn. This will give you a nice soft elephant when you are finished. To make this elephant, I used two skeins of Hobby Lobby’s Baby Bee Adore-A-Ball Yarn, in the color “sugarplum”.
The yarn weight for these skeins was 3.5 oz each, or 92 yards long per skein. Please note that Bernat also has some great velvet yarn both in regular and baby yarn weight. If you decide to use this type of yarn, you will want to be aware that the super fine yarn will work, but your finished elephant will be much smaller, than if you choose to use thicker yarn.
Hook Size
For this crochet project, you will want to be sure and use a larger crochet hook size if possible. The skein of yarn you choose to use will have a recommended mm crochet hook size, for that specific yarn.
When making this pattern, I used a size I or 5.5 mm hook, but you might also like to use a size J or 6.0 mm hook. Using this size of crochet hook will let you make big stitches, but still have them be tight enough together that the elephant doesn’t have any holes in it.

Assembling in Different Parts
I have designed this pattern so that you will first create separate pieces for each of the body parts. Then, once each piece is created, you can sew them all together, to make the finished crochet elephant.
Now, without any further ado, let’s jump into the step-by-step instructions to make this adorable crochet elephant pattern!
Free Elephant Crochet Pattern
Skill Level: Intermediate
Abbreviations:
ch – chain
mr – magic ring (magic circle)
st / sts – stitch / stitches
sl st – slip stitch
sc – single crochet
sc inc – single crochet increase
dec – decrease
inv dec – invisible decrease
hdc – half double crochet
dc – double crochet
tr – treble crochet
Needed Materials and Tools
2 Skeins Baby Bee Adore – A – Ball yarn (92 yards each)
Size I or 5.5 mm hook
2 Safety Eyes (approximately 9 mm in diameter)
Tapestry Needle
Scissors
Stitch Marker (optional)

Recommended Sequence
When making this crochet elephant pattern, I prefer to start with the elephant’s trunk and head. Then make the ears, followed by its body, legs, and finally, it’s tail. This way I know that each part will fit together nicely.
Elephant’s Trunk and Head
Round 1: make a mr, in the mr make 6 sc sts. Pull the mr tight, and join with a sl st to the first sc. (6 st)
Round 2: ch 1, inc x 6 around. Join with a sl st to the first sc st. (12 st)
Round 3: ch 1, work in BLO sc in each st around. Join with a sl st. (12 st)
Round 4-10: ch 1, sc in each st around, join with a sl st. (12 st)
Round 11: ch 1, 5 sc, inc x 2, 5 sc sts. Join with sl st to the first sc st. (14 st)
Round 12: ch 1, sc in each st around. Join with a sl st to the first sc st. (14 st)
Round 13: ch 1, 5 sc around, inc x 4, 5 sc. Join with a sl st to the first sc st. (18 st)
Round 14: ch 1, sc in each st around. Join with a sl st to the first sc st. (18 st)
Round 15: ch 1, 5 sc, inc x 8, 5 sc sts. Join with a sl st to the first sc st. (26 st)
Round 16: ch 1, sc in each st around. Join with a sl st to the first sc st. (26 st)
Round 17: ch 1, 5 sc, (inc, sc) x 8, 5 sc sts. Join with a sl st to the first sc st. (34 st)
Round 18: ch 1, 5 sc, (inc, 2 sc) x 8, 5 sc sts. Join with a sl st to the first sc st. (42 st)
Round 19 – 26: ch 1, sc in each st around. Join with a sl st to the first sc st. (42 st)
Round 27: ch 1, (inv dec, 5 sc) x 6. Join with a sl st to the first sc st. (36 st)
Round 28: ch 1, (inv dec, 4 sc) x 6. Join with a sl st to the first sc st. (30 st)
Round 29: ch 1, (inv dec, 3 sc) x 6. Join with a sl st to the first sc st. (24 st)
Round 30: ch 1, (inv dec, 2 sc) x 6. Join with a sl st to the first sc st. (18 st)
Round 31: ch 1, (inv dec, sc) x 6. Join with a sl st to the first sc st. (12 st)
Round 32: ch 1, dec around, join with a sl st to the first sc st. (6 st)
Round 33: weave the circle tight. Finish off and weave in the ends.
The Big Ears (Make 2)
Round 1: ch 5, sc in 2nd ch from the hook. Sc in next 2 sts, in last make 3 sc sts, turn. Sc in next 2 sts, 2 sc in last st. join with sl st. (10 st)
Round 2: ch 1, 3 sc, inc, inc, 3 sc, inc, inc. join with sl st to the first sc. (14 st)
Round 3: ch 1, 3 sc, inc x 4, 3 sc, inc x 4. Join with sl st to the first sc st. (22 st)
Round 4 – 7: ch 1, sc in each st around. Join with sl st. (22 st)
Round 8: ch 1, 9 sc sts, dec, 9 sc sts, dec. join with sl st. (20 st)
Round 9: ch 1, dec, 6 sc, dec, dec, 6 sc, dec. join with sl st. (16 st)
Round 10: ch 1, dec, 2 sc, dec, dec, 4 sc, dec. join with sl st. (12 st)
Round 11: ch 1, 4 sc, dec, 4 sc, dec. join with sl st. (10 st)
Finish off and leave a long tail for sewing.
Elephant’s Body
Round 1: make mr, in the mr, make 8 sc sts. Join with sl st to the first sc st. (8 st)
Round 2: ch 1, inc x 8, join with sl st to the first sc st. (16 st)
Round 3: ch 1, (inc, sc) x 8, join with sl st to the first sc st. (24 st)
Round 4: ch 1, (inc, 2 sc) x 8, join with sl st to the first sc st. (32 st)
Round 5: ch 1, (inc, 3 sc) x 8, join with sl st to the first sc st. (40 st)
Round 6: ch 1, (inc, 4 sc) x 8, join with sl st to the first sc st. (48 st)
Round 7: ch 1, (inc, 5 sc) x 8, join with sl st to the first sc st. (56 st)
Round 8: ch 1, (inc, 6 sc) x 8, join with sl st to the first sc st. (64 st)
Round 9 – 15: ch 1, sc in each st around. Join with sl st to the first sc st. (64 st)
Round 16: ch 1, (dec, 6 sc) x 8, join with sl st to the first sc st. (56 st)
Round 17: ch 1, (dec, 5 sc) x 8, join with sl st to the first sc st. (48 st)
Round 18: ch 1, (dec, 4 sc) x 8, join with sl st to the first sc st. (40 st)
Round 19: ch 1, (dec, 3 sc) x 8, join with sl st to the first sc st. (32 st)
Round 20: ch 1, (dec, 2 sc) x 8, join with sl st to the first sc st. (24 st)
Round 21: ch 1, (dec, sc) x 8, join with sl st to the first sc st. (16 st)
Round 22: ch 1, dec x 8, join with sl st to the first sc st. (8 st)
Round 23: ch 1, weave around and finish off. Weave in the end of the yarn tail.
Elephant Legs (Make 4)
Round 1: make mr, in the mr make 8 sc sts. Join with sl st to the first sc st. (8 st)
Round 2: ch 1, inc x 8, join with sl st to the first sc st. (16 st)
Round 3: ch 1, (inc, sc) x 8, join with sl st to the first sc st. (24 st)
Round 4: ch 1, in BLO, (2 sc, dec) repeat around. Join with sl st to the first sc st. (18 st)
Round 5: ch 1, sc in each st around. Join with sl st to the first sc st. (18 st)
Round 6: ch 1, (dec, 3 sc) x 3, 3 sc. Join with sl st to the first sc st. (15 st)
Round 7 – 10: ch 1, sc in each st around. Join with sl st to the first sc st. (15 st)
Round 11: ch 1, (inc, 3 sc) x 5. Repeat around, join with sl st to the first sc st. (18 st)
Round 12: ch 1, sc in each st around. Join with sl st to the first sc st. (18 st)
Elephant Tail
Row 1: chain 12 st
Row 2: in the 2nd ch, make hdc, ch 2, hdc in the 2nd ch from hook, ch 2, hdc once more in the 2nd ch from the hook. Hdc in each ch space back to the beginning. Leave a yarn tail for sewing.

Final Assembly
To make the finished elephant you will need to use the tapestry needle and yarn to sew each of the body parts together. First, sew the ears as desired to the head. Then sew the four legs to the bottom of the body. Once attached, sew the head to the body. Finally, sew the tail to the butt. Make sure that each body part is sewn securely so that it won’t fall off.
Finished Measurement
My finished elephant measured eight inches tall, at its tallest point, and approximately ten inches long, at its longest point. Please keep in mind that your finished size might vary slightly.
Finishing Touches
If your elephant is a baby girl elephant, or you are making it for a little girl, you might enjoy adding a flower crown like you see pictured. After all, it’s the details that take an average crochet toy and make it absolutely irresistible.
I used a mint green a light pink crochet thread for these accents. This is a very thin crochet thread that is perfect for small accent items like this. Here are the instructions to make the small crochet roses, and the crochet leaf wreath for her head.

Small Crochet Roses (Make 3)
Row 1: ch 30 sts
Row 2: in the 3rd st from hook, make hdc, hdc in next st, ch 2, sl st in next st, ch 2, dc in next 3 sts, ch 2, sl st, ch 2, dc in next 3 sts, ch 2, sl st, ch 2, dc in next 3 sts, ch 2, sl st, ch 2, dc in next 4 sts, ch 2, sl st, ch 2, dc in next 4 sts, ch 2, sl st. Finish off, but leave a long yarn tail for sewing.
Roll the flower between your fingers, starting with the hdc end, until the flower is rolled onto itself. Use the yarn tail and a sewing needle to sew the bottom of the flower together. Finish off and attach the small flowers to the crochet leaf headband once completed.
Crochet Leaf Headband
Row 1: ch 16 sts,* in the 2nd ch from the hook, make a sl st, sc in next st, hdc in next, dc, and tr. This makes one side of the leaf.
Ch 1, sl st in the top of the leaf at the biggest part, ch 1, and tr opposite the previous tr made, working down the opposite side, make dc, hdc, sc, and sl st.
When you reach the point of the leaf, ch 1, and slip stitch down the center of the leaf. Chain 16 sts.* Repeat from * to * until the leaf wreath is your desired size. I made 9 leaves total. To finish, ch 5 sts, and join with a sl st to the first ch space. Finish off.
FAQ
How long does it take to crochet an elephant?
The answer to how long does it take to crochet an elepehant is that it really depends. It depends on how fast you work your stitches, how experiecned you are, and how much time you have to dedicate to this project.
As an estimate, I can make one of these cute crochet elephants using this pattern in a day, if I spend most of the day working on the crochet project.
What stuffing should I use for my crochet elephant?
I would reccomend using a basic fiberfill stuffing. You can find this at your local craft store, in the sewing section of your local Walmart.
Can I make this a small crochet elephant?
Yes, you can. The easiest way to turn this elephant pattern into a small crochet elephant is to use thinner yarn. You can use baby yarn (#3 light weight) for a small crochet elephant, or even crochet thread for a micro version.
Keep in mind, that when you are using smaller yarn to crochet your elephant, you will also want to use a smaller crochet hook.
Is this pattern suitable for small children?
Yes, small children will love the elephants you make with this crochet pattern! The only thing I would consider changing is the type of eyes you use for the crochet elephant pattern.
Rather than using the safety eyes, I would suggest sewing or embroidering eyes onto the elephant, so that you don’t have a possible choking hazard if something goes wrong and the eyes fall off.
Can I work this pattern in continuous rounds?
Yes! If you would rather not join each round as you go, you can use a stitch marker to mark where each round starts and stops. Then work the pattern as instructed above, only without joining together with a slip stitch.
Fun and Whimsical Elephants
Making crochet stuffed animal patterns is so much fun. I hope that you enjoy creating your own version of this crochet elephant pattern. This adorable crochet elephant is so much fun to make and is the perfect gift for any occasion.
Thank you so much for stopping by to check out my free crochet elephant pattern. It has been a privilege getting to create this pattern for you. I hope you enjoy it!
Find Us Online!
Be sure to follow us online on your favorite social media platform!
Be sure to check out more free crochet patterns!
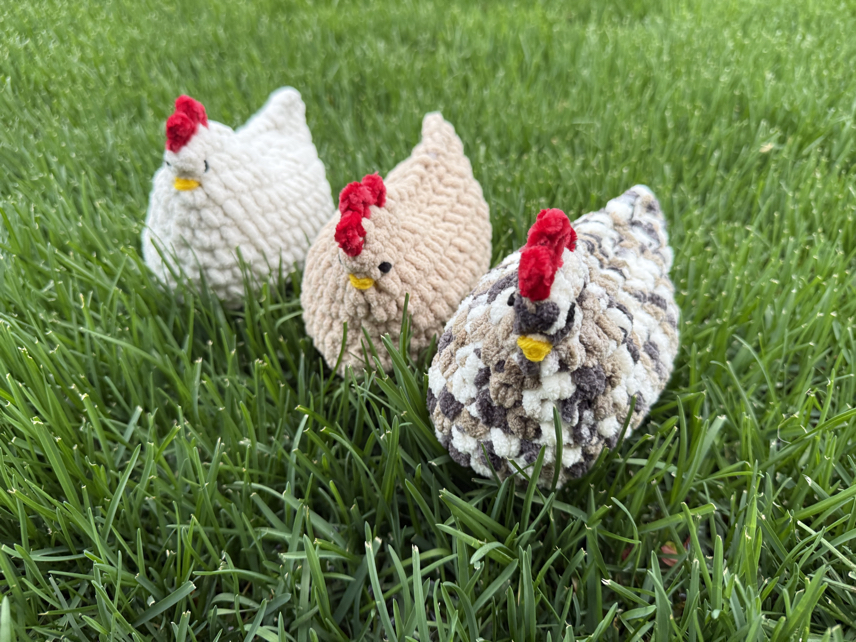
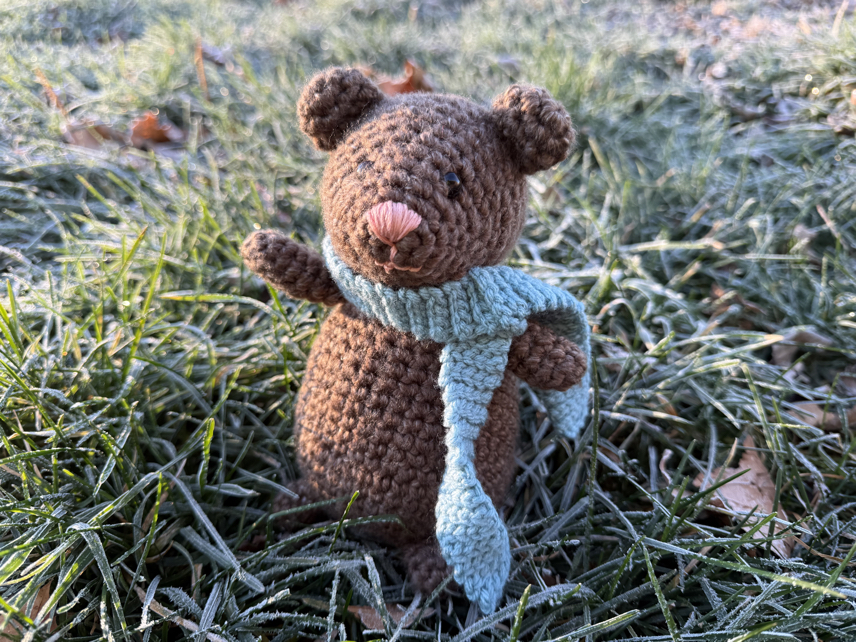
Other Cute Animals


Crochet Elephant Pattern
Materials
- 2 Skeins Baby Bee Adore – A – Ball yarn 92 yards each
- Size I or 5.5 mm hook
- 2 Safety Eyes approximately 9 mm in diameter
- Tapestry Needle
- Scissors
- Stitch Marker optional
Instructions
Elephant’s Trunk and Head
- Round 1: make a mr, in the mr make 6 sc sts. Pull the mr tight, and join with a sl st to the first sc. (6 st)
- Round 2: ch 1, inc x 6 around. Join with a sl st to the first sc st. (12 st)
- Round 3: ch 1, work in BLO sc in each st around. Join with a sl st. (12 st)
- Round 4-10: ch 1, sc in each st around, join with a sl st. (12 st)
- Round 11: ch 1, 5 sc, inc x 2, 5 sc sts. Join with sl st to the first sc st. (14 st)
- Round 12: ch 1, sc in each st around. Join with a sl st to the first sc st. (14 st)
- Round 13: ch 1, 5 sc around, inc x 4, 5 sc. Join with a sl st to the first sc st. (18 st)
- Round 14: ch 1, sc in each st around. Join with a sl st to the first sc st. (18 st)
- Round 15: ch 1, 5 sc, inc x 8, 5 sc sts. Join with a sl st to the first sc st. (26 st)
- Round 16: ch 1, sc in each st around. Join with a sl st to the first sc st. (26 st)
- Round 17: ch 1, 5 sc, (inc, sc) x 10, 5 sc sts. Join with a sl st to the first sc st. (34 st)
- Round 18: ch 1, 5 sc, (inc, 2 sc) x 10, 5 sc sts. Join with a sl st to the first sc st. (42 st)
- Round 19 – 26: ch 1, sc in each st around. Join with a sl st to the first sc st. (42 st)
- Round 27: ch 1, (inv dec, 5 sc) x 6. Join with a sl st to the first sc st. (36 st)
- Round 28: ch 1, (inv dec, 4 sc) x 6. Join with a sl st to the first sc st. (30 st)
- Round 29: ch 1, (inv dec, 3 sc) x 6. Join with a sl st to the first sc st. (24 st)
- Round 30: ch 1, (inv dec, 2 sc) x 6. Join with a sl st to the first sc st. (18 st)
- Round 31: ch 1, (inv dec, sc) x 6. Join with a sl st to the first sc st. (12 st)
- Round 32: ch 1, dec around, join with a sl st to the first sc st. (6 st)
- Round 33: weave the circle tight. Finish off and weave in the ends.
The Big Ears (Make 2)
- Round 1: ch 5, sc in 2nd ch from the hook. Sc in next 2 sts, in last make 3 sc sts, turn. Sc in next 2 sts, 2 sc in last st. join with sl st. (10 st)
- Round 2: ch 1, 3 sc, inc, inc, 3 sc, inc, inc. join with sl st to the first sc. (14 st)
- Round 3: ch 1, 3 sc, inc x 4, 3 sc, inc x 4. Join with sl st to the first sc st. (22 st)
- Round 4 – 7: ch 1, sc in each st around. Join with sl st. (22 st)
- Round 8: ch 1, 9 sc sts, dec, 9 sc sts, dec. join with sl st. (20 st)
- Round 9: ch 1, dec, 6 sc, dec, dec, 6 sc, dec. join with sl st. (16 st)
- Round 10: ch 1, dec, 2 sc, dec, dec, 4 sc, dec. join with sl st. (12 st)
- Round 11: ch 1, 4 sc, dec, 4 sc, dec. join with sl st. (10 st)
- Finish off and leave a long tail for sewing.
Elephant’s Body
- Round 1: make mr, in the mr, make 8 sc sts. Join with sl st to the first sc st. (8 st)
- Round 2: ch 1, inc x 8, join with sl st to the first sc st. (16 st)
- Round 3: ch 1, (inc, sc) x 8, join with sl st to the first sc st. (24 st)
- Round 4: ch 1, (inc, 2 sc) x 8, join with sl st to the first sc st. (32 st)
- Round 5: ch 1, (inc, 3 sc) x 8, join with sl st to the first sc st. (40 st)
- Round 6: ch 1, (inc, 4 sc) x 8, join with sl st to the first sc st. (48 st)
- Round 7: ch 1, (inc, 5 sc) x 8, join with sl st to the first sc st. (56 st)
- Round 8: ch 1, (inc, 6 sc) x 8, join with sl st to the first sc st. (64 st)
- Round 9 – 15: ch 1, sc in each st around. Join with sl st to the first sc st. (64 st)
- Round 16: ch 1, (dec, 6 sc) x 8, join with sl st to the first sc st. (56 st)
- Round 17: ch 1, (dec, 5 sc) x 8, join with sl st to the first sc st. (48 st)
- Round 18: ch 1, (dec, 4 sc) x 8, join with sl st to the first sc st. (40 st)
- Round 19: ch 1, (dec, 3 sc) x 8, join with sl st to the first sc st. (32 st)
- Round 20: ch 1, (dec, 2 sc) x 8, join with sl st to the first sc st. (24 st)
- Round 21: ch 1, (dec, sc) x 8, join with sl st to the first sc st. (16 st)
- Round 22: ch 1, dec x 8, join with sl st to the first sc st. (8 st)
- Round 23: ch 1, weave around and finish off. Weave in the end of the yarn tail.
Elephant Legs (Make 4)
- Round 1: make mr, in the mr make 8 sc sts. Join with sl st to the first sc st. (8 st)
- Round 2: ch 1, inc x 8, join with sl st to the first sc st. (16 st)
- Round 3: ch 1, (inc, sc) x 8, join with sl st to the first sc st. (24 st)
- Round 4: ch 1, in BLO, (2 sc, dec) repeat around. Join with sl st to the first sc st. (18 st)
- Round 5: ch 1, sc in each st around. Join with sl st to the first sc st. (18 st)
- Round 6: ch 1, (dec, 3 sc) x 3, 3 sc. Join with sl st to the first sc st. (15 st)
- Round 7 – 10: ch 1, sc in each st around. Join with sl st to the first sc st. (15 st)
- Round 11: ch 1, (inc, 3 sc) x 5. Repeat around, join with sl st to the first sc st. (19 st)
- Round 12: ch 1, sc in each st around. Join with sl st to the first sc st. (15 st)
Elephant Tail
- Row 1: chain 12 st
- Row 2: in the 2nd ch, make hdc, ch 2, hdc in the 2nd ch from hook, ch 2, hdc once more in the 2nd ch from the hook. Hdc in each ch space back to the beginning. Leave a yarn tail for sewing.
Final Assembly
- To make the finished elephant you will need to use the tapestry needle and yarn to sew each of the body parts together. First, sew the ears as desired to the head. Then sew the four legs to the bottom of the body. Once attached, sew the head to the body. Finally, sew the tail to the butt. Make sure that each body part is sewn securely so that it won’t fall off.
Small Crochet Roses (Make 3)
- Row 1: ch 30 sts
- Row 2: in the 3rd st from hook, make hdc, hdc in next st, ch 2, sl st in next st, ch 2, dc in next 3 sts, ch 2, sl st, ch 2, dc in next 3 sts, ch 2, sl st, ch 2, dc in next 3 sts, ch 2, sl st, ch 2, dc in next 4 sts, ch 2, sl st, ch 2, dc in next 4 sts, ch 2, sl st. Finish off, but leave a long yarn tail for sewing.
- Roll the flower between your fingers, starting with the hdc end, until the flower is rolled onto itself. Use the yarn tail and a sewing needle to sew the bottom of the flower together. Finish off and attach the small flowers to the crochet leaf headband once completed.
Crochet Leaf Headband
- Row 1: ch 16 sts,* in the 2nd ch from the hook, make a sl st, sc in next st, hdc in next, dc, and tr. This makes one side of the leaf.
- Ch 1, sl st in the top of the leaf at the biggest part, ch 1, and tr opposite the previous tr made, working down the opposite side, make dc, hdc, sc, and sl st.
- When you reach the point of the leaf, ch 1, and slip stitch down the center of the leaf. Chain 16 sts.* Repeat from * to * until the leaf wreath is your desired size. I made 9 leaves total. To finish, ch 5 sts, and join with a sl st to the first ch space. Finish off.
PIN for Later!

