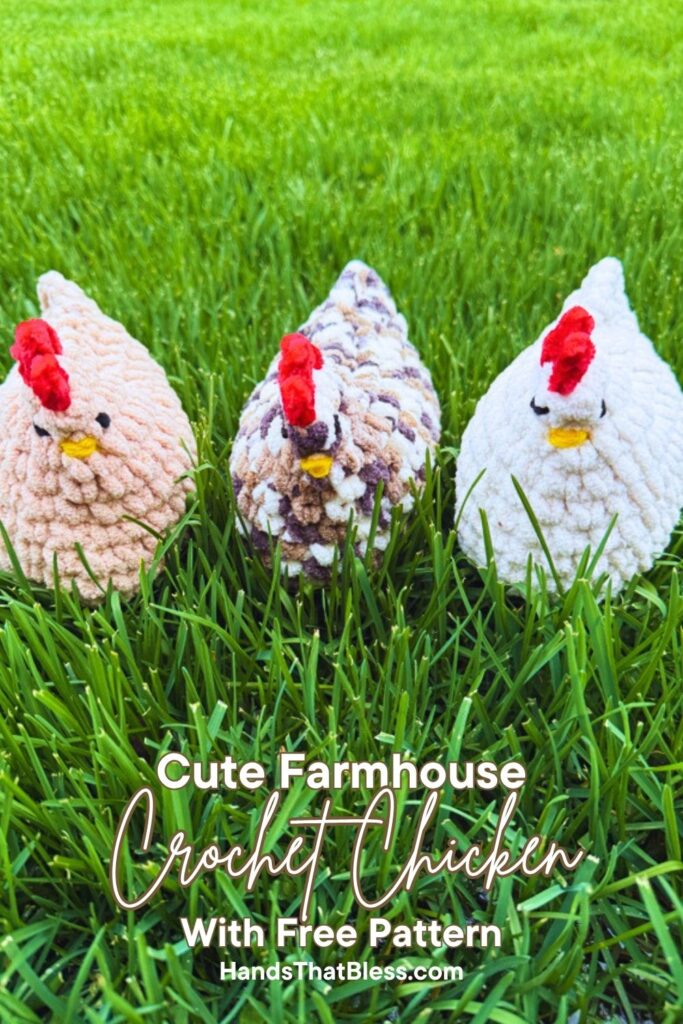
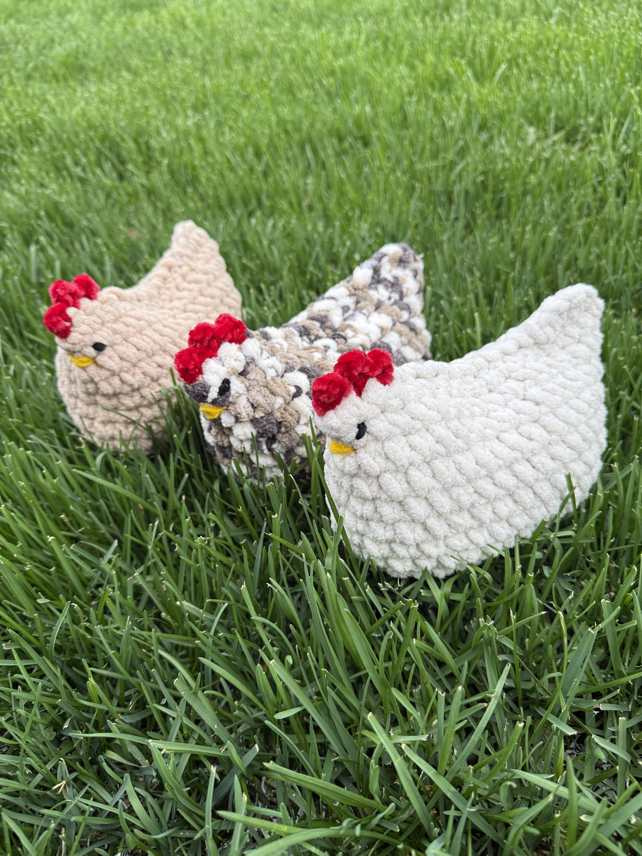
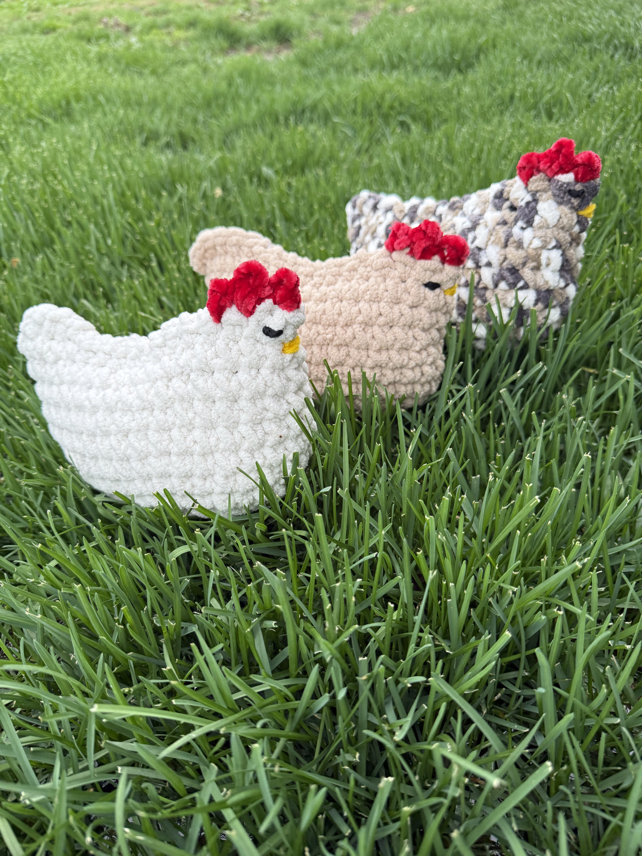
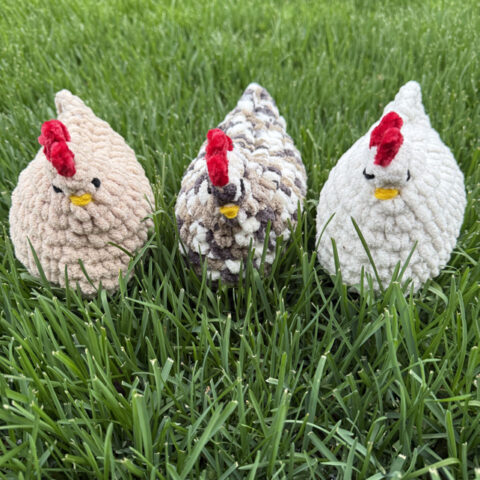
Crochet Chicken Pattern
Learn how to make the cutest chicken with our free crochet chicken pattern! In this easy crochet pattern, I’m excited to walk you through the step by step process to make your own cute chicken. This is a great project to make using our free crochet pattern, if you’re looking for an easy stuffed animal to try making on your own.
Simple Crochet Chicken Pattern
In this free pattern you can learn how to make a simple amigurumi chicken. This is a relatively easy crochet stuffed animal pattern to make, which uses a couple of basic stitches to create the chicken. These chickens are great gifts for the chicken lover, or a fun item to make and sell or give away as gifts. This pattern is also nice because it is a low sew pattern, requiring only a few things to be sewn together.
Let’s get started making this cute crochet chicken pattern by jumping into the step-by-step instructions.
Join our Mailing List and Receive a…
Free Chicken Crochet Pattern
Materials
3 skeins bulky yarn
Black yarn, yellow yarn, and red yarn
8.0 mm crochet hook (size L) and 3.75 mm hook (size F)
Fiber fill stuffing
A yarn needle
A stitch markers (optional)
Scissors
Reccomended skill level: advanced beginner
Please note that this pattern is written in US Terms

Abbreviations
sc – single crochet
sl st – slip stitch
sc inc – single crochet increase
hdc – half double crochet
flo – front loop only
st/sts – stitch / stitches
How to Make a Crochet Chicken
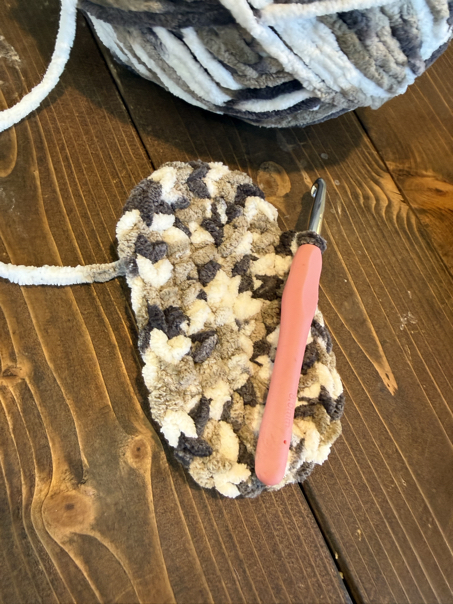
R1. Ch 8 sts
R2. Turn, in the 2nd ch from the hook, make 3 sc sts, sc in the next 5 sts, in the last st make 3 sc sts, turn working in the back loops sc in each st across.
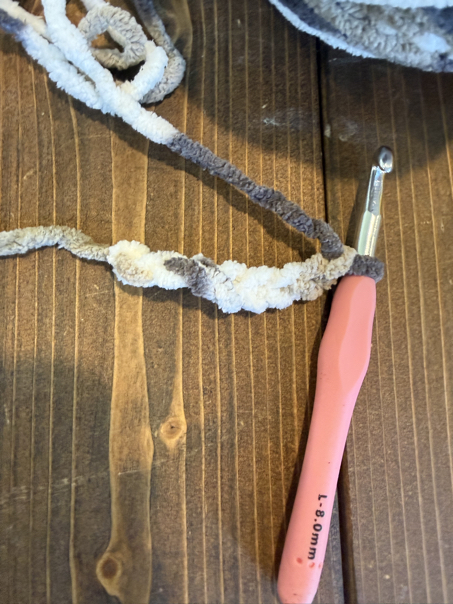

R3. In the next 3 sts, work 2 sc sts in each, sc in the next 5 sts, make 2 sc sts in each of the next 3 sts, sc in the last 8 sts.
R4. In the next 6 sts, work 2 sc sts in each, sc in the next 5 sts, make 2 sc sts in each of the next 6 sts, sc in the last 5 sts.
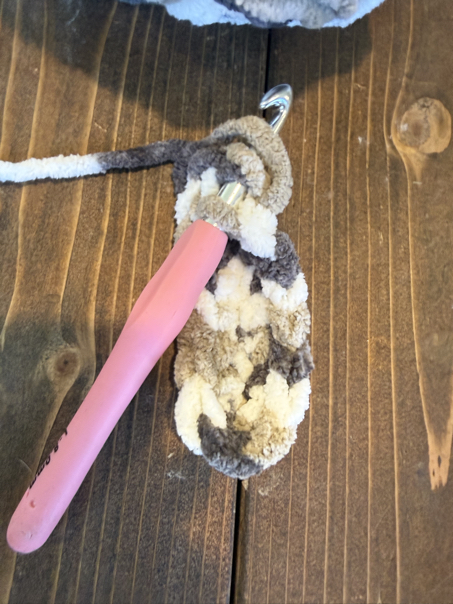
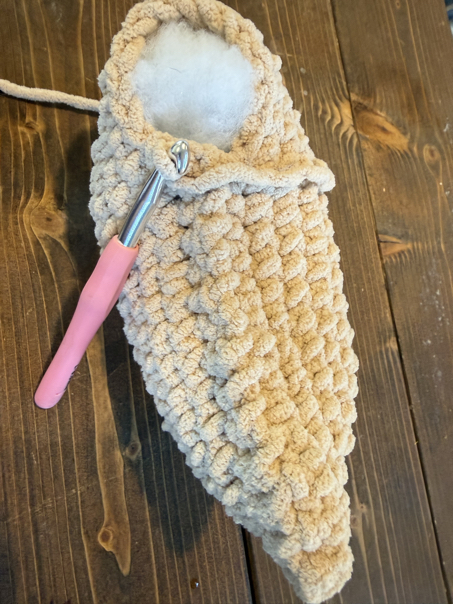
R5-10. Sc in each st around. Do not join at the end of each round but work in continuous rounds.
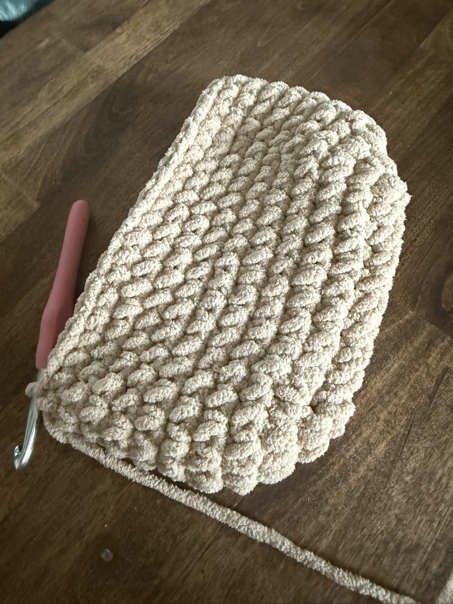
R11. Hdc in the first 3 sts on each side, working one stitch then the next stitch in the other side. Sc in each of the next stitch, working one stitch then the next stitch in the other side, until there are 10 sts left. Sc in each stitch around.
*fill with stuffing
R12. Working in the last 10 sts left, sc across both sides in the first 3 sts. Then hdc across both of the next st, then sc across the last st, to finish the last round of the body.
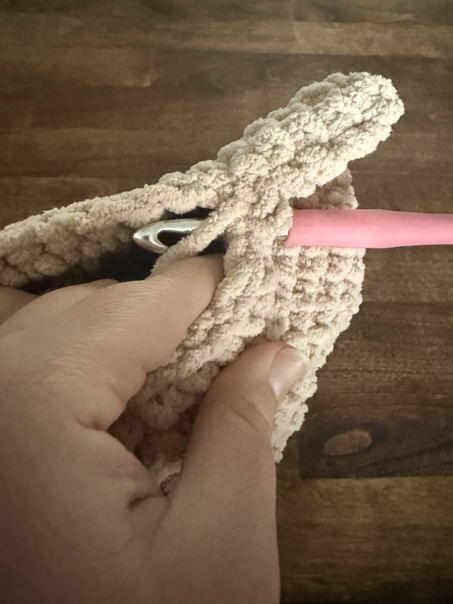

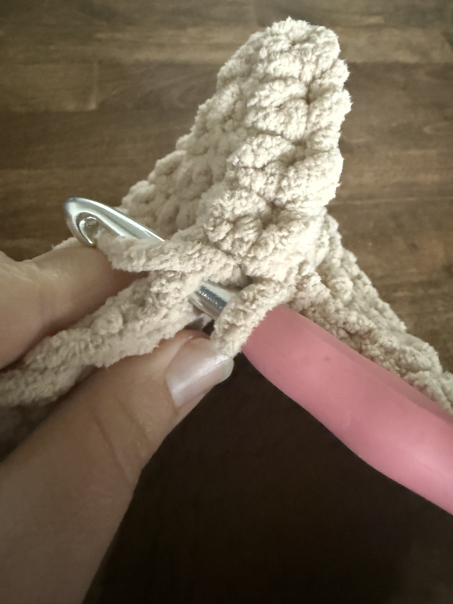
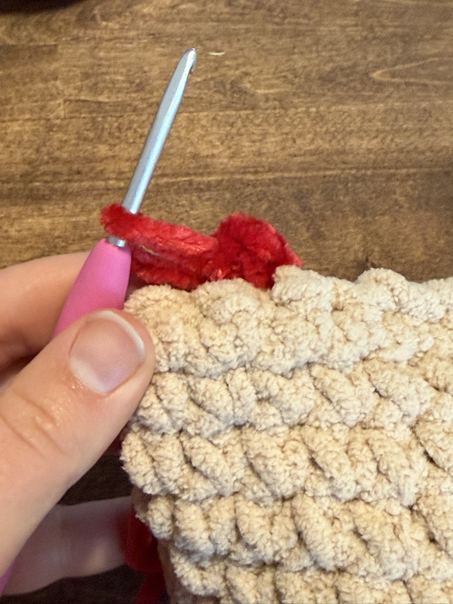
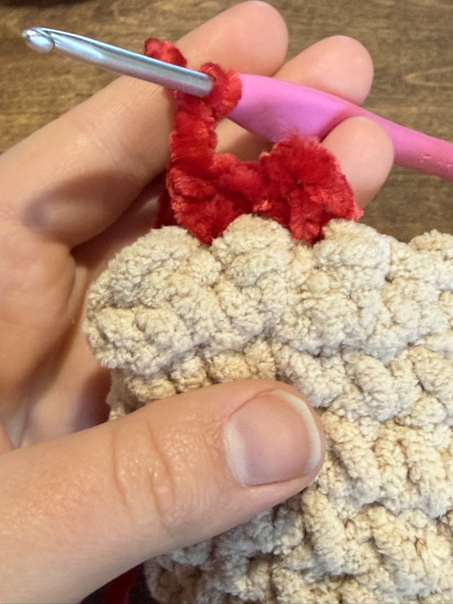
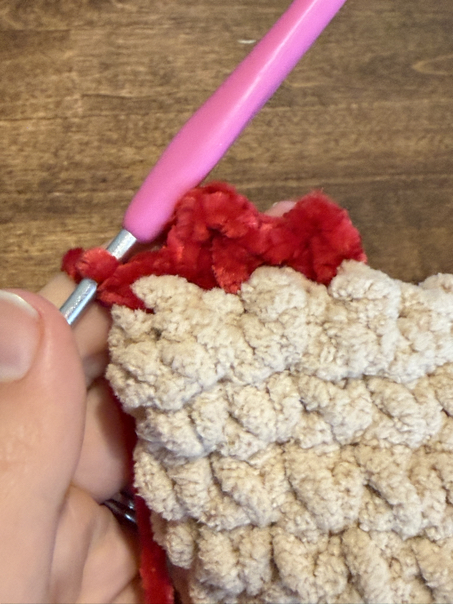
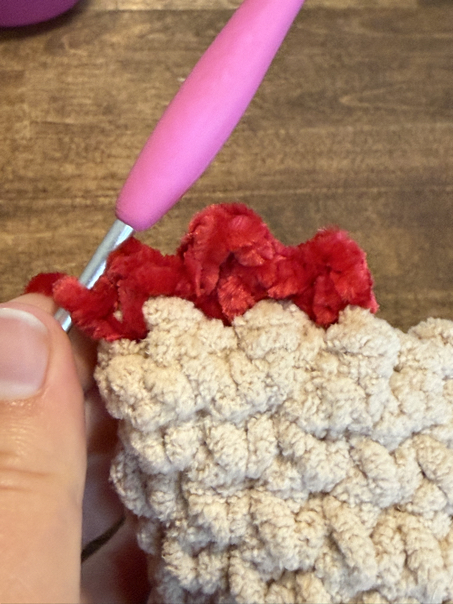
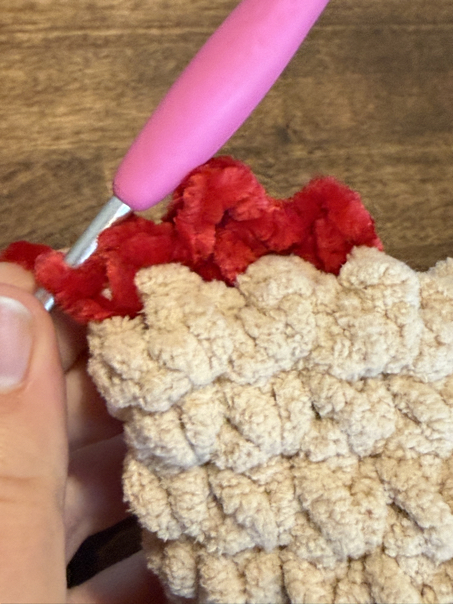
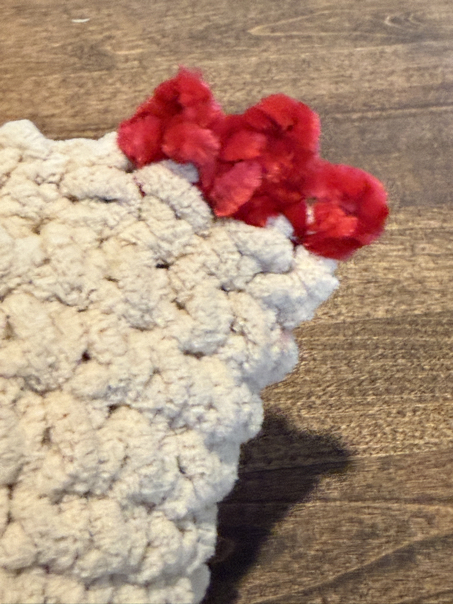
Adding the Comb on Top of the Head
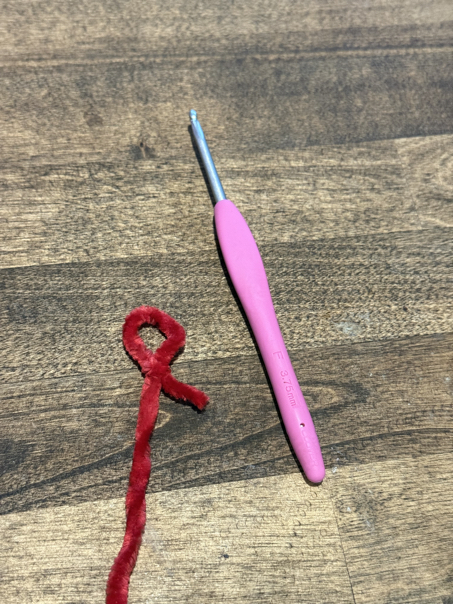
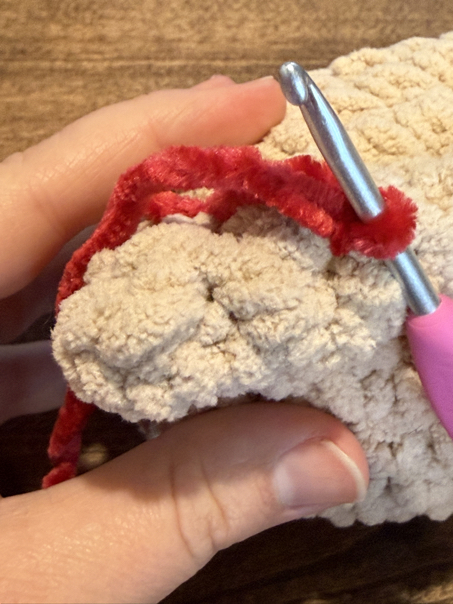
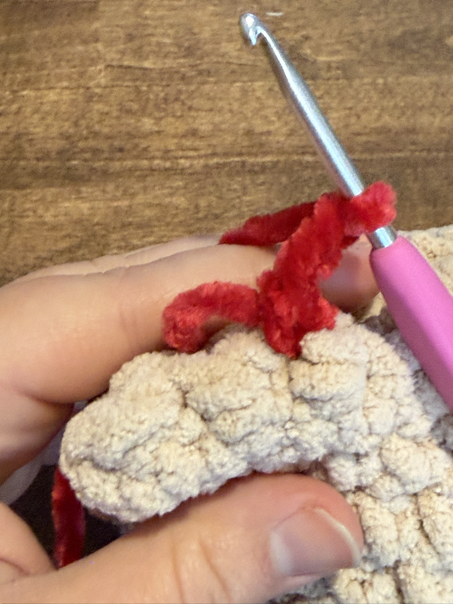
Using red yarn, make a slip knot and join it in the 3rd hdc st. Sc in the same st, ch 1, sc in the same st, in the next st make 2 hdc sts, ch 2, 2 hdc sts in the same st. In the next st, sc, ch 2, sc, sl st then finish off. Weave in any loose ends of yarn.
Adding the Face
Using the black and yellow yarn, thread a yarn needle and stitch the face on as deisred. Be sure to tie off your ends, and weave in any loose ends of yarn.
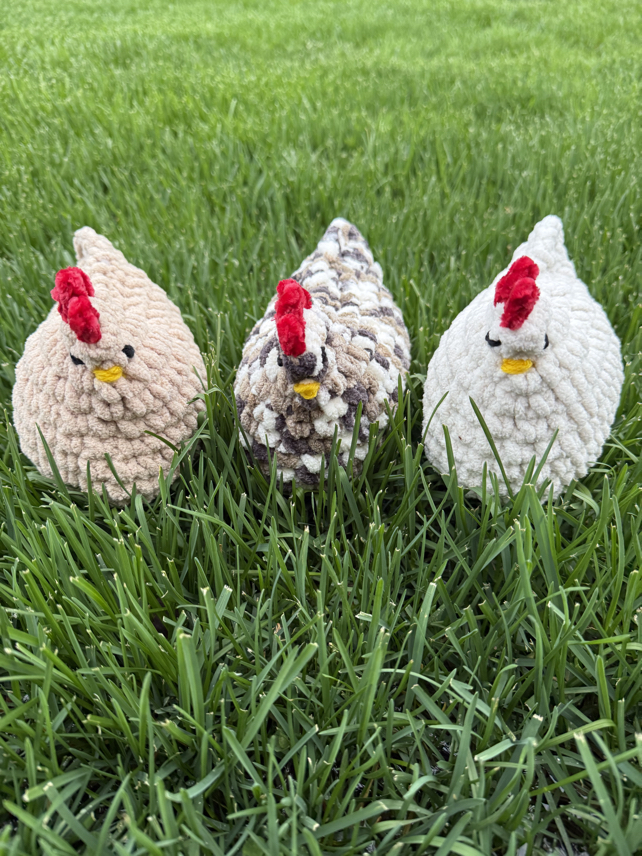
Your finished chicken is now ready to enjoy!
Crochet Chicken Pattern Copyright
Please note that this pattern is intended for personal use only, and is not for commercial distribution. By copyright, unless otherwise noted, you are not authorized to copy or claim my content as your own. You are, however, more than welcome to sell your finished products made with my patterns. I always appreciate it when you link to my patterns so that others can find them too!
Chicken Crochet Pattern Tips and Tricks
Choosing the correct hook size
I have suggested a size of crochet hook to use for this pattern, but you can feel free to adjust it as needed. You can also reference the skein of yarn package to see what mm hook size the manufacturer recommends.
Adding safety eyes
If you’d like, you can use safety eyes on this crochet chicken pattern. Just make sure that you insert safety eyes securely before moving on. If these chickens are for small children, skip the safety eyes and use black yarn to stitch eyes on instead.
Using different yarn
You can feel free to mix it and use different yarn to make these crochet chickens. Try to stay with the same yarn weight if possible. Otherwise you will need to make sure that you change your crochet hook size to match the yarn weight. And remember the finished size of your chicken will be different if using different yarn.
Farmhouse Chicken Crochet Pattern Free
These crochet chickens are a fun and easy crochet project that you can make which are simple to create and don’t require a ton of time to do. These chickens are a fun addition to your farmhouse decoration or they could be the perfect gift for the chicken lover in your life. They are also a fun toy for small children to play with.
Thank you so much for stopping by to check out my free crochet chicken pattern! I hope that you’ll give this pattern a try, and I hope you love making these crochet chickens.
Happy Crocheting!
Be sure to follow us online on your favorite social media platform!
More Free Crochet Projects
Crochet Chicken Pattern
Materials
- 3 different skeins of bulky yarn
- Black yarn, yellow yarn, and red yarn
- 8.0 mm crochet hook (size L) and 3.75 mm hook (size F)
- Fiber fill stuffing
- A yarn needle
- A stitch markers (optional)
- Scissors
Instructions
- R1. Ch 8 sts
- R2. Turn, in the 2nd ch from the hook, make 3 sc sts, sc in the next 5 sts, in the last st make 3 sc sts, turn working in the back loops sc in each st across.
- R3. In the next 3 sts, work 2 sc sts in each, sc in the next 5 sts, make 2 sc sts in each of the next 3 sts, sc in the last 8 sts.
- R4. In the next 6 sts, work 2 sc sts in each, sc in the next 5 sts, make 2 sc sts in each of the next 6 sts, sc in the last 5 sts.
- R5-10. Sc in each st around. Do not join at the end of each round but work in continuous rounds.
- R11. Hdc in the first 3 sts on each side, working one stitch then the next stitch in the other side. Sc in each of the next stitch, working one stitch then the next stitch in the other side, until there are 10 sts left. Sc in each stitch around.
- *fill with stuffing
- R12. Working in the last 10 sts left, sc across both sides in the first 3 sts. Then hdc across both of the next st, then sc across the last st, to finish the last round of the body.
Adding the Comb on Top of the Head
Using red yarn, make a slip knot and join it in the 3rd hdc st. Sc in the same st, ch 1, sc in the same st, in the next st make 2 hdc sts, ch 2, 2 hdc sts in the same st. In the next st, sc, ch 2, sc, sl st then finish off. Weave in any loose ends of yarn.
Adding the Face
Using the black and yellow yarn, thread a yarn needle and stitch the face on as deisred. Be sure to tie off your ends, and weave in any loose ends of yarn.
PIN for Later!