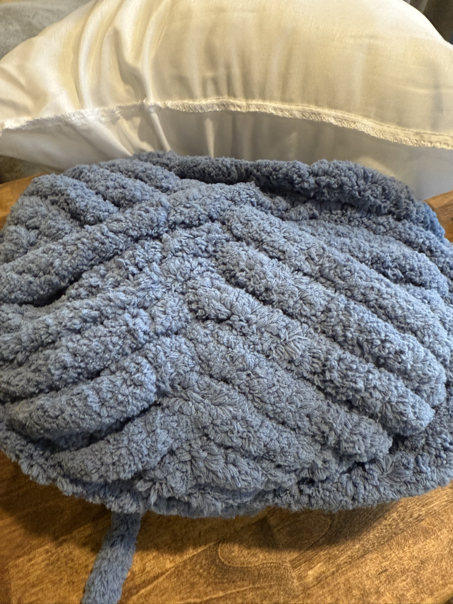
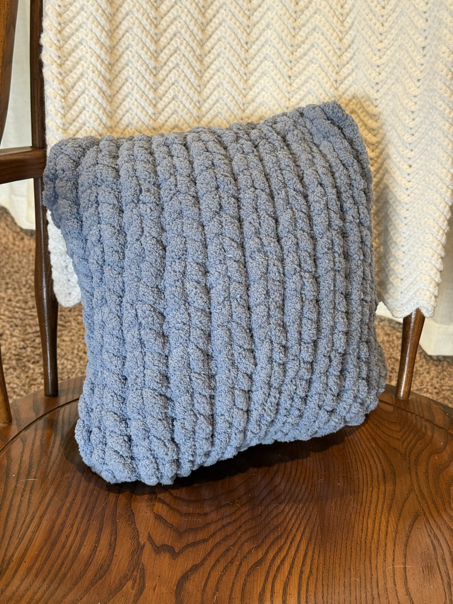
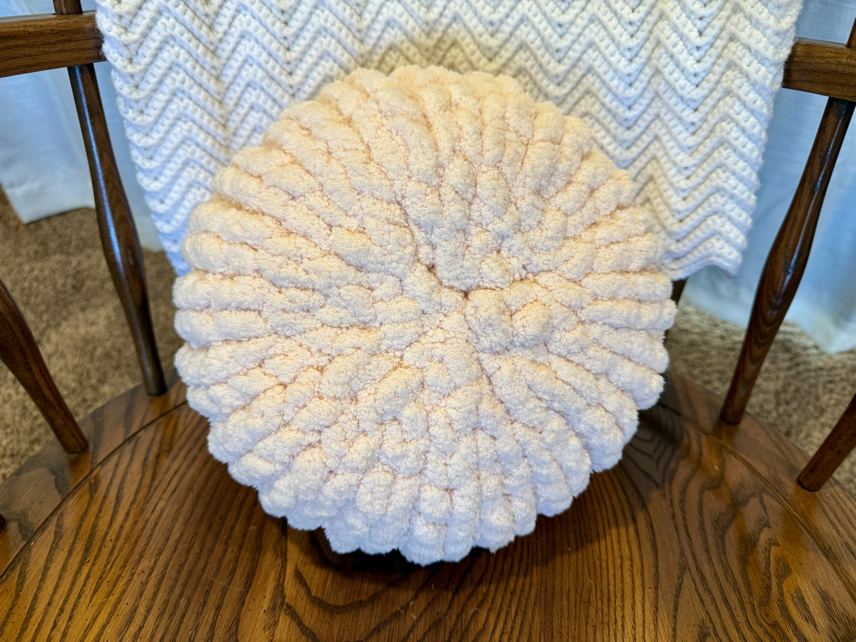
Chunky Knit Pillow DIY
I am so very excited to share this free pattern with you to make a chunky hand knit pillow. This pillow pattern is very easy to make and one that you will love as your next diy craft project!
These pillows are so much fun to make. They are the perfect way to add some cute decor to your living space. No matter if you are looking to make these cute pillows for your living room, bedroom, or another space they are the perfect accent!

Hand Knit Pillow Tutorial
I am so excited to share this free hand knitting pattern with you to show you how to make your own chunky knit pillow diy! When you use to super bulky yarn, this finger knitting project works up very quickly, AND you don’t need any knitting experience or special tools to make it!
Tips to make the Stockinette Stitch
This free pillow knitting pattern naturally makes what is known as the sockinette stitch. You don’t have to do anything special to make this stitch, which is nice. Just keep the working yarn going in the same direction, without turning it. When you don’t turn the project, this naturally makes the stockinette stitch.

How to make a Chunky Knit Pillow by Hand
Materials
2 Skeins jumbo super bulky yarn
A pillow form or stuffing
Step-By-Step Instructions:
Step 1: making the foundation chain
Start making the foundation row by making a slip knot, then pulling a new loop through the previous loop using the working yarn. Repeat these steps to make a chain until you have a total of 10 chain stitches.
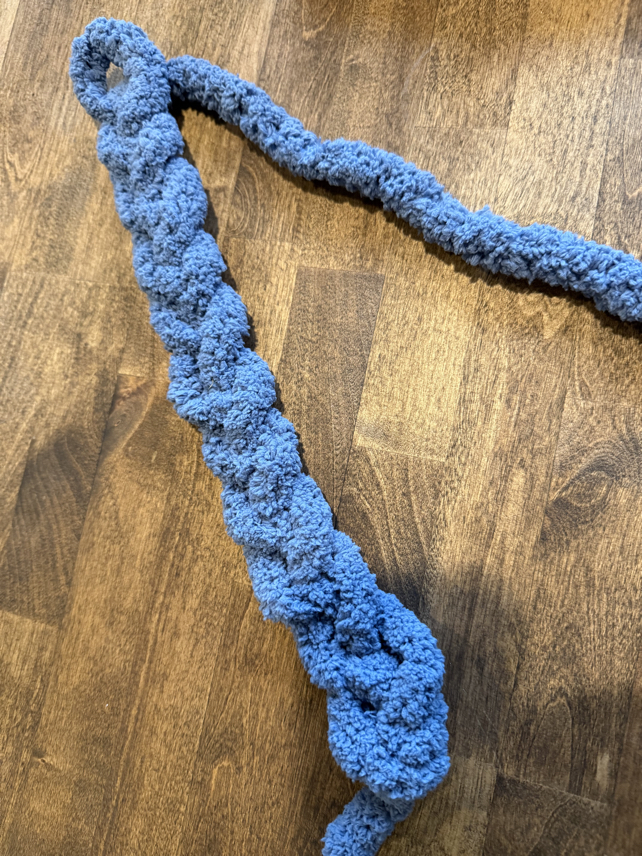
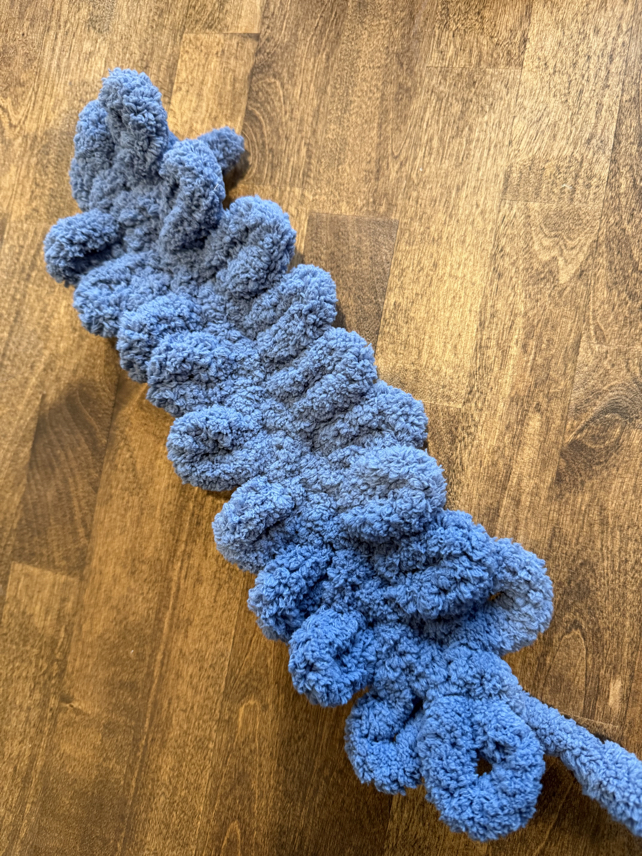
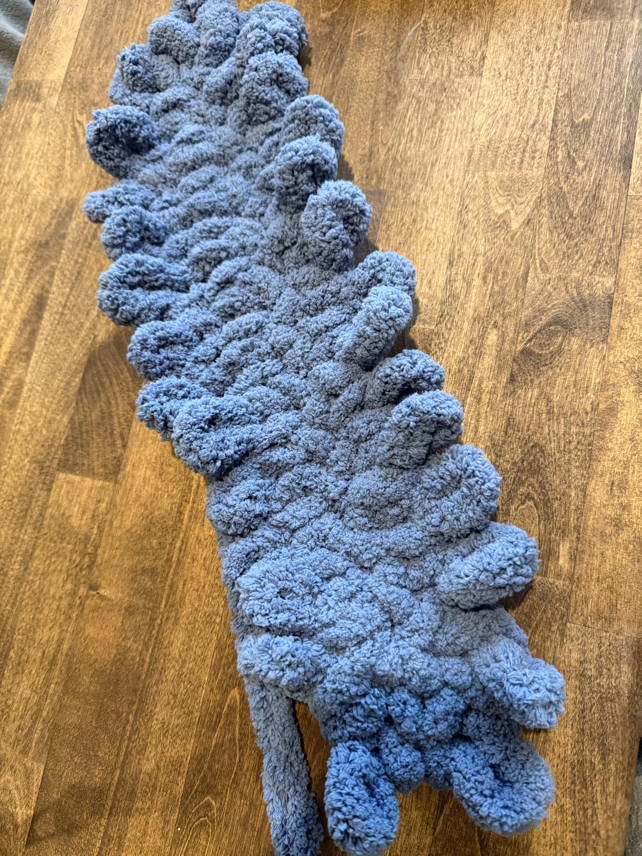
Step 2: making the body
Now, move your working yarn to the left, and pull up a loop through each of the chain stitches. Continue around, and pull up a loop in each of the back loops of the foundation chain.
Now, continue working your way around the project, by pulling a new loop through each of the previous loops created. Work the loops until it is your desired height.
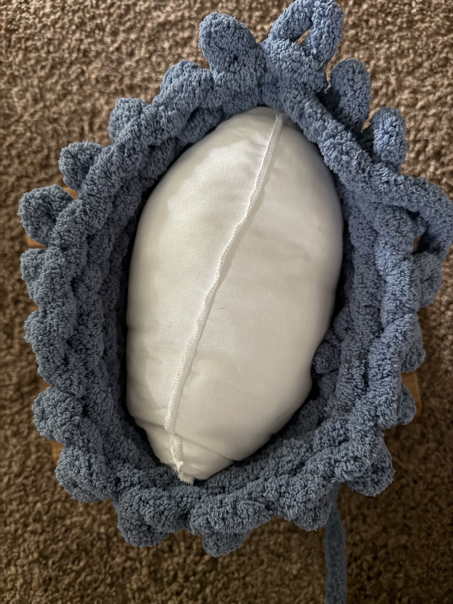
Step 3: finishing the pillow
To finish off the pillow, you will want to cut the yarn, leaving approximately 12 inches or so in a yarn tail. Now, take the yarn tail and weave it through the loops, working from side to side. Pull the space tightly closed, tie a knot and weave in the ends.
Pattern Copyright
Please note that this pattern is intended for personal use only, and is not for commercial distribution. By copyright, unless otherwise noted, you are not authorized to copy or claim my content as your own. You are, however, more than welcome to sell your finished products made with my patterns. I always appreciate it when you link to my patterns so that others can find them too!
Tips and Tricks
Using Bulky Yarns
Using super bulky yarn for this project is very important, in order to get it to turn out as it should. You can find some nice options at Hobby Lobby, or your local craft store.
Using a Pillow Insert
I highly recommend using a firm pillow insert for your project, rather than just filling it with stuffing. You can do either one, but you usually get a nicer finish when a pillow form is used.
Maintaining Tension
The key to getting your pillow to look amazing is going to be to make sure the loop tension stays the same. It works well to use your thumb or fingers as a gauge so that they are approximately the same.

Easy Chunky Knit Pillow DIY
Making your own hand knit pillows are a fun way to create your own diy home decor, I think that these knit pillows are so much fun to make and can be created rather quickly!
Thank you so much for stopping by to learn how to make your own chunky knit pillow diy! It is my hope that you’ll give this finger knitting pattern a try, and I hope you will enjoy it!
Be sure to follow us online on your favorite social media platform!
More Knitting Patterns


Chunky Knit Pillow DIY
Materials
- 2 Skeins super bulky yarn
- A pillow form or stuffing
Instructions
- Step 1: making the foundation chain
Start making the foundation row by making a slip knot, then pulling a new loop through the previous loop using the working yarn. Repeat these steps to make a chain until you have a total of 10 chain stitches. - Step 2: making the body
Now, move your working yarn to the left, and pull up a loop through each of the chain stitches. Continue around, and pull up a loop in each of the back loops of the foundation chain.
Now, continue working your way around the project, by pulling a new loop through each of the previous loops created. Work the loops until it is your desired height. - Step 3: finishing the pillow
To finish off the pillow, you will want to cut the yarn, leaving approximately 12 inches or so in a yarn tail. Now, take the yarn tail and weave it through the loops, working from side to side. Pull the space tightly closed, tie a knot and weave in the ends.
PIN for Later!

