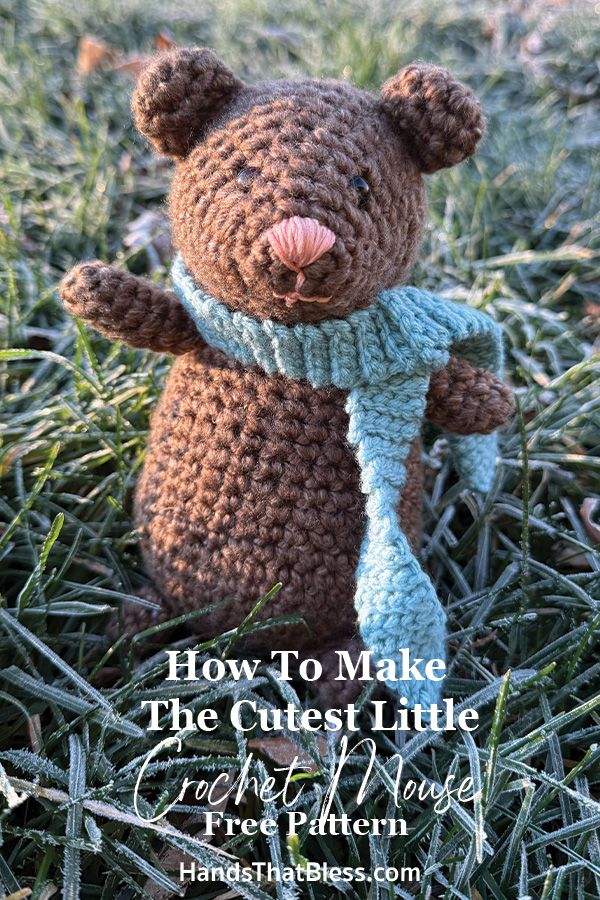
Crochet Mouse Pattern
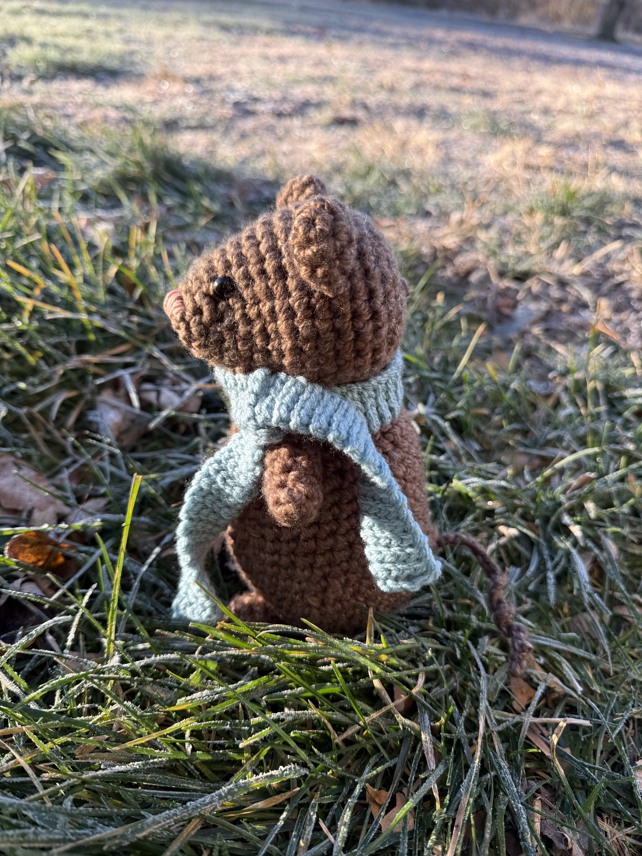
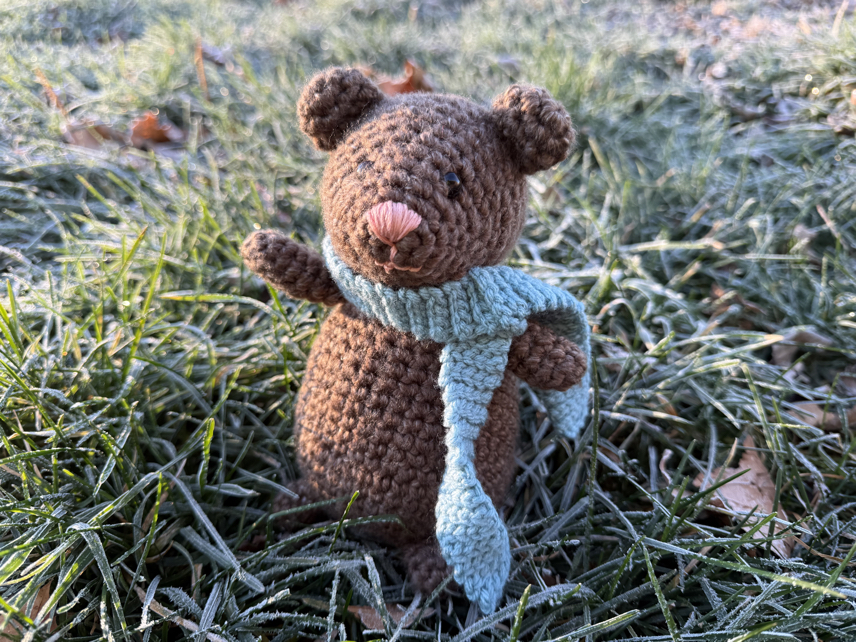
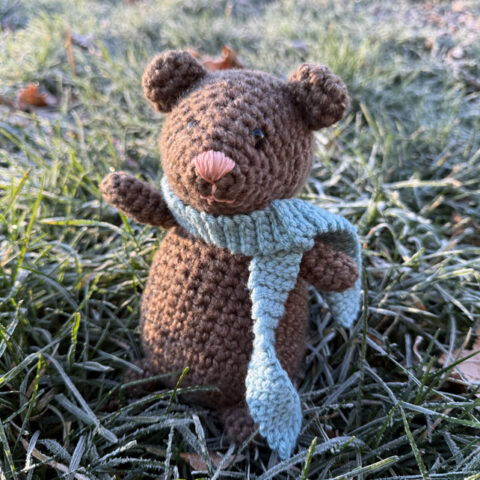
I am so excited to show you how to make this adorable little mouse, with my free crochet mouse pattern. In this free pattern, you will walk through the step by step instructions to make this cute little mouse. I have also included pictures to help you through this crochet pattern tutorial.
No matter if you are a mouse lover or simply want to make a cute crochet animal, this free amigurumi mouse pattern is a fun one to make.
Easy Crochet Mouse Pattern
Making this adorable crochet mouse is so much fun. I can’t say I had thought a lot about making crochet mice before, but this small mouse is surprisingly quite cute, and fun to make.
The great thing about this free crochet pattern is that you don’t need a ton of crochet skills in order to get started. You will need some yarn, a crochet hook, a stitch marker if it helps you, some scissors, and a couple other items to make this mouse.
Then you just need some basic knowledge, such as how to make a chain, slip stitch, single crochet stitch, and how to increase and decrease the single crochet stitch, and basic knowledge of how to read a crochet pattern. When you have this basic knowledge, you are ready to get started making this cute crochet mouse pattern.
Let’s jump into the free crochet mouse pattern!
Free Crochet Mouse Pattern
Materials
1 skein brown yarn
A little bit of light weight pink yarn or embroidery floss
A little bit of light weight black yarn or embroidery floss
Fiber fill stuffing
4.0 mm crochet hook (size G crochet hook)
mm safety eyes
A stitch marker
A yarn needle
Scissors
Abbreviations – US terms
sc – single crochet
mr – magic ring (aka magic circle)
sl st – slip stitch
inc – single crochet increase
dec – single crochet decrease
How to make the Crochet Mouse Pattern
Hands (Make 2)
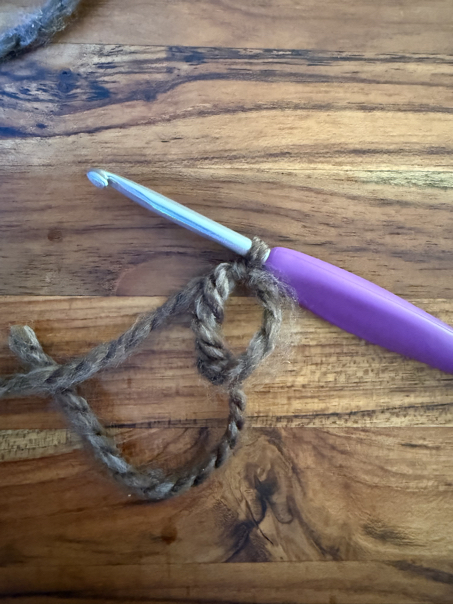
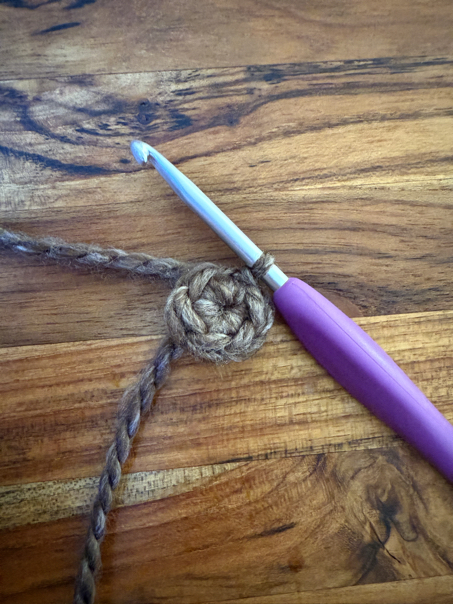
R1. Mr, 6 sc
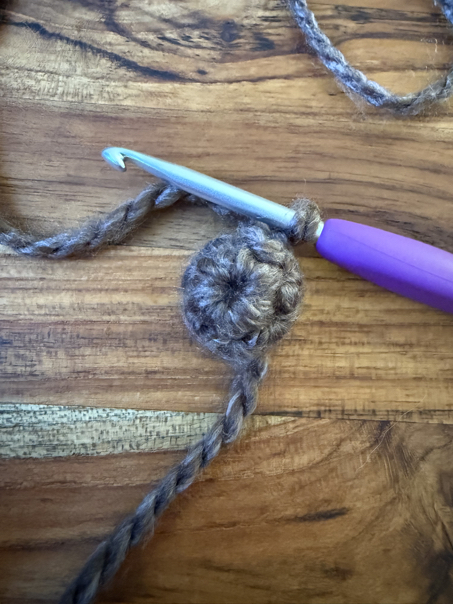
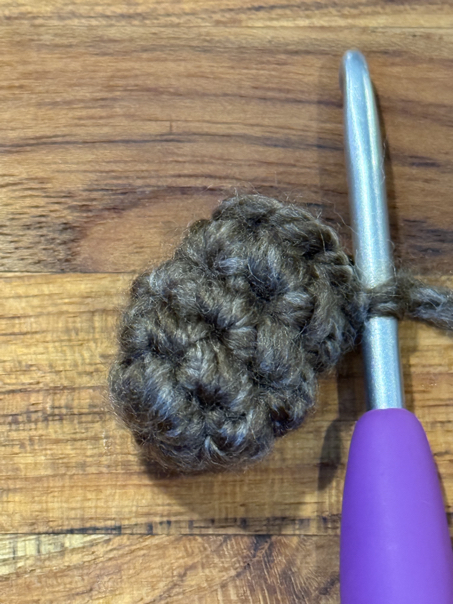
R2-7. Ch 1, sc around (6)
Finish off leaving a long tail for sewing
Legs (Make 2)
R1. Mr, 6 sc
R2-4. Ch 1, sc around (6)
Finish off leaving a long tail for sewing
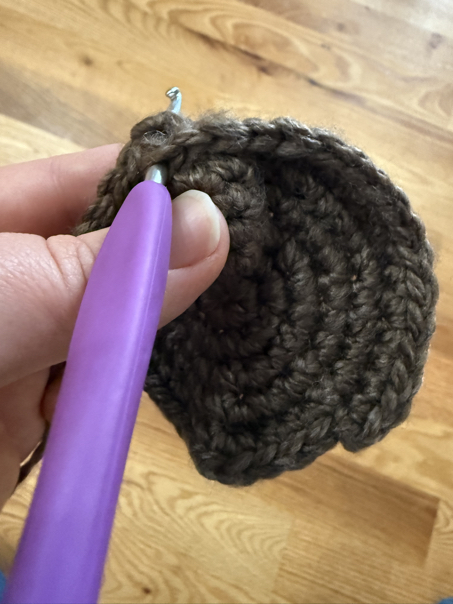
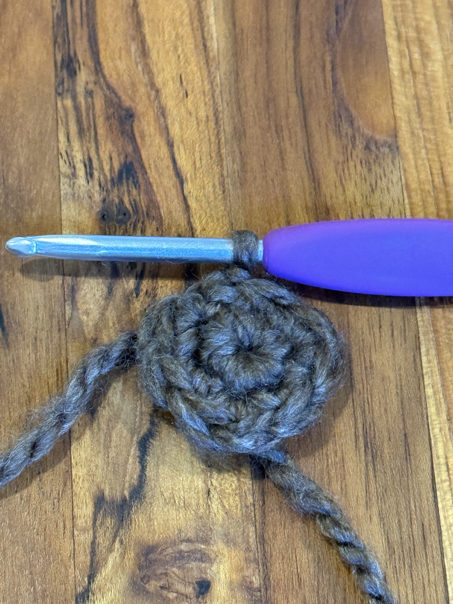
Body of the Mouse
R1. Mr, ch 8 (8)
R2. Ch 1, inc around (16)
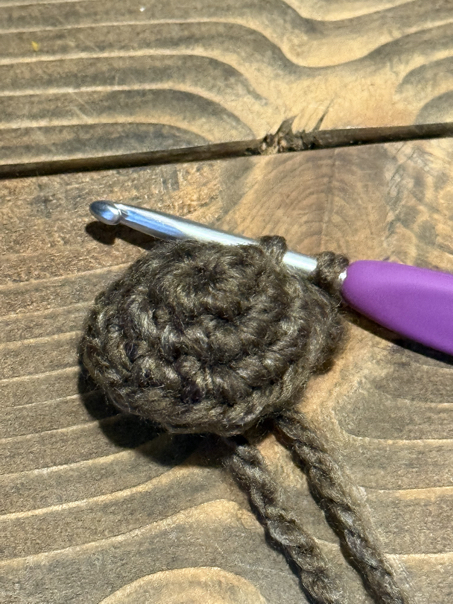
R3. Ch 1,(inc, sc), around (24)
R4. Ch 1, (inc, 2 sc), around (32)
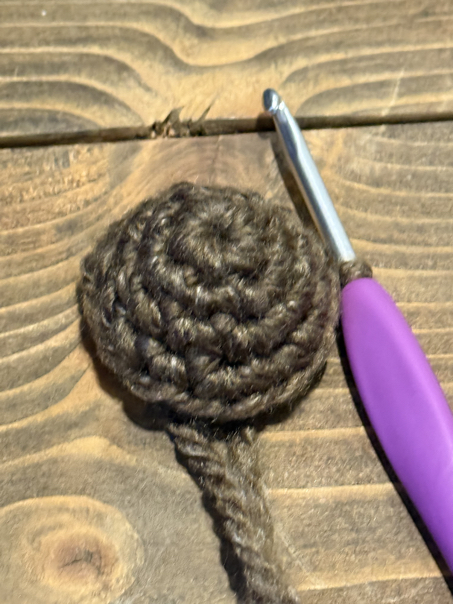
R5. Ch 1, (inc, 3 sc), around (40)
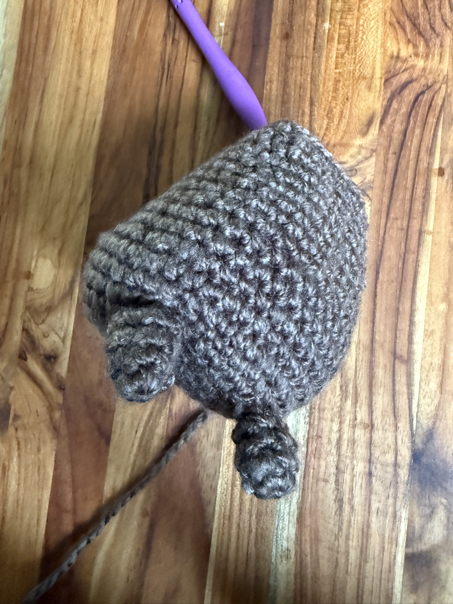
R6. Ch 1, 14 sc, flatten the first leg and sc through that and the body for the next 3 sc sts, 6 sc, flatten the second leg and sc through that and the body for the next 3 sc sts, sc in the remaining 14 sts. (40)
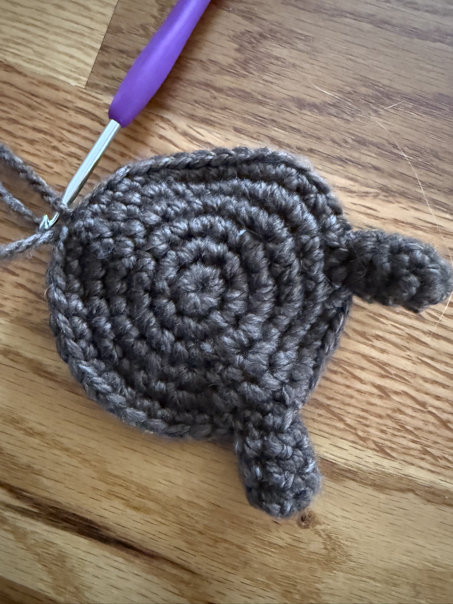
R7-8. Ch 1, sc around (40)
R9. Ch 1, 15 sc, (inc, sc) x5, sc in the last 16 sts. (45)
R10. Ch 1, sc around (45)
R11. Ch 1, sc, dec, 3sc, dec, 3sc, dec, sc in the next 18 sts, dec, 3sc, dec, 3sc, dec, 2sc. (39)
R12-13. Ch 1, sc around
R14. Ch1, 13 sc, dec, 12 sc, dec, 10 sc (37)
R15. Ch1, sc around
R16. Ch 1, 13 sc, dec, 10 sc, dec, 10 sc (35)
R17. Ch1, sc around
R18. Ch 1, 13 sc, dec, 8sc, dec, 10sc (33)
R19. Ch1, sc around (33)
R20. Ch 1, 5 sc, dec, 5 sc, dec, 8 sc, dec, 5 sc, dec, 2 sc (29)
R21. Ch1, 4 sc, dec, 4 sc, dec, 8 sc, dec, 4 sc, dec, sc (25)
R22. Ch 1, sc around (25)
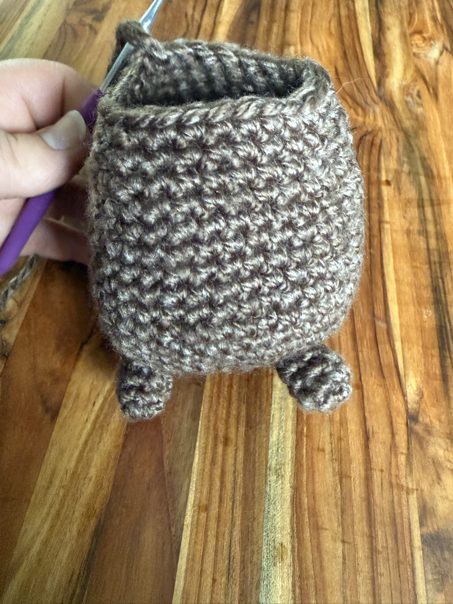
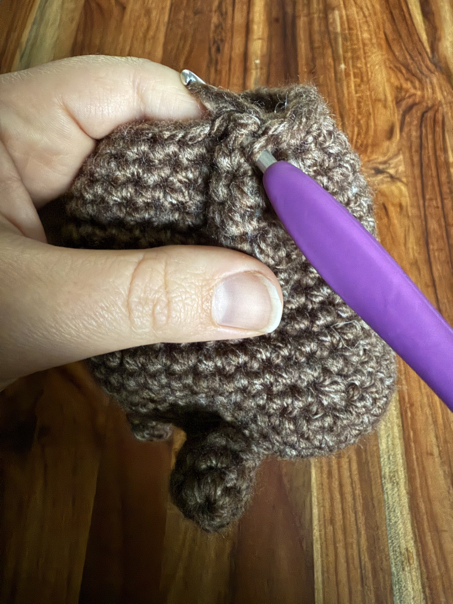
R23. Ch 1, 8 sc, for the first arm fold it in half, and sc through those 3 sts as well as the next 3 sts around. Sc in the next 8 sts. Fold the second arm in half and sc through those sts as well as the next 3 sts. Sc in the last 3 sts around. (25)
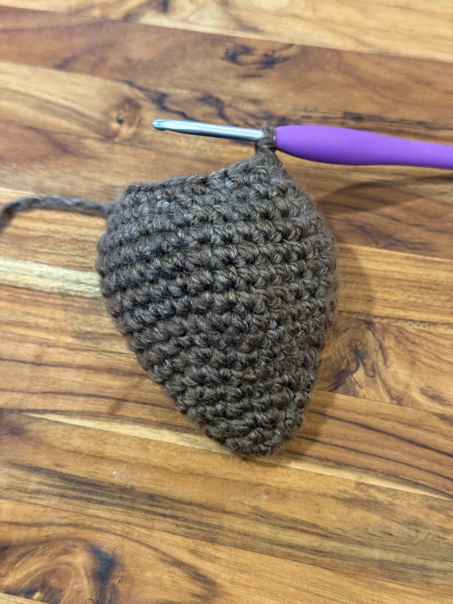
R24. Ch 1, (Dec, 3 sc) around (20)
*Stuff the body
Finish off but leave a long tail of yarn for sewing;

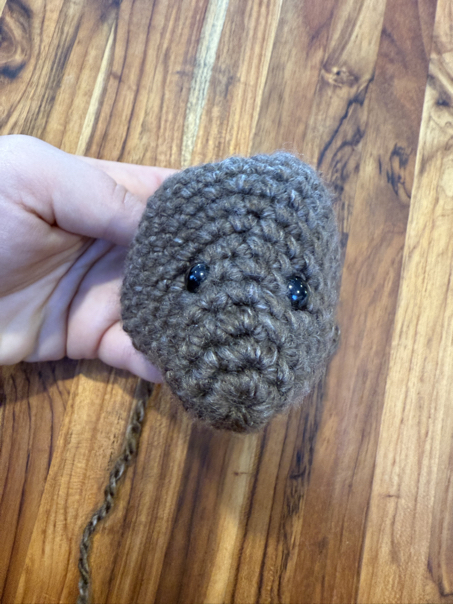
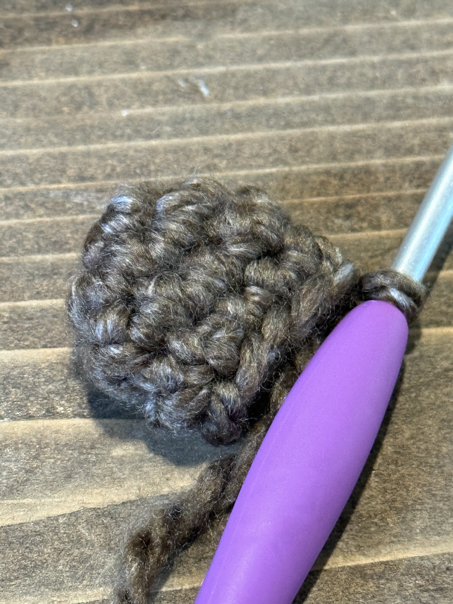
Head
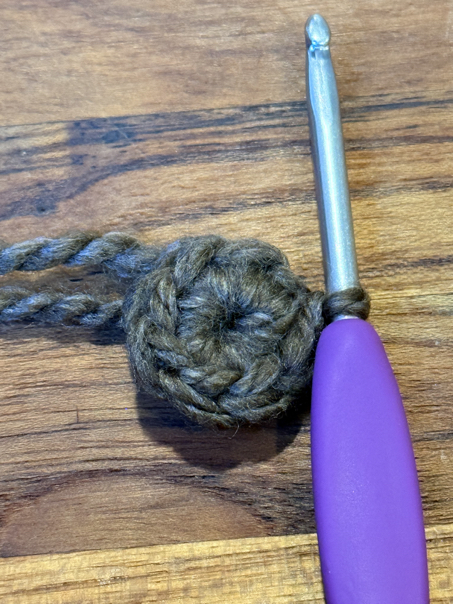
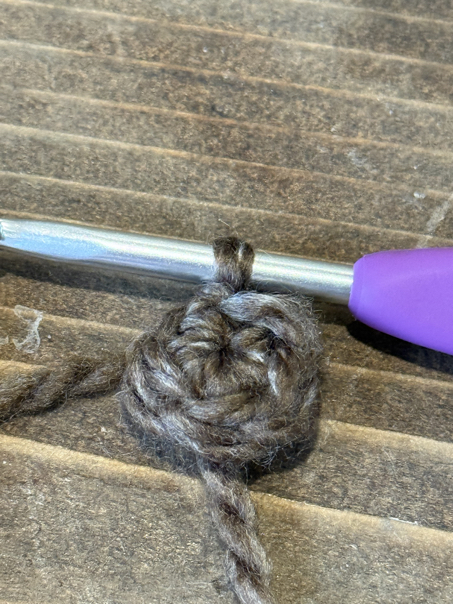
R1. Make a mr, in the mr, make 6 sc sts (6)
R2. Ch 1, (inc, sc) around (12)
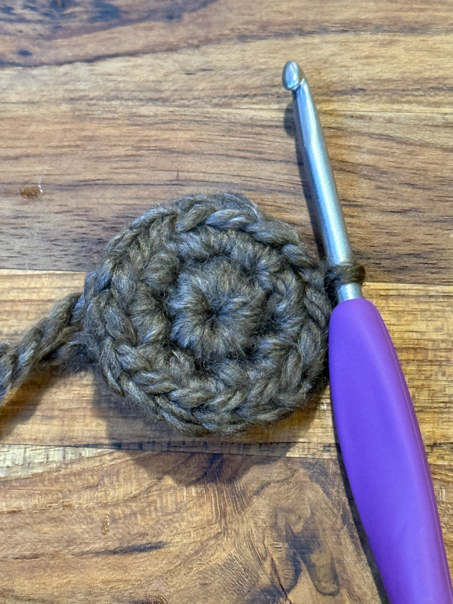
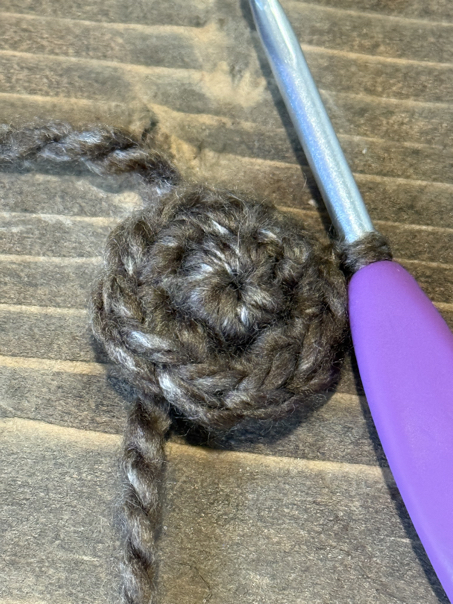
R3. Ch 1, (inc, 2 sc) around (15)
R4. Ch 1, (inc, 3 sc) around (18)
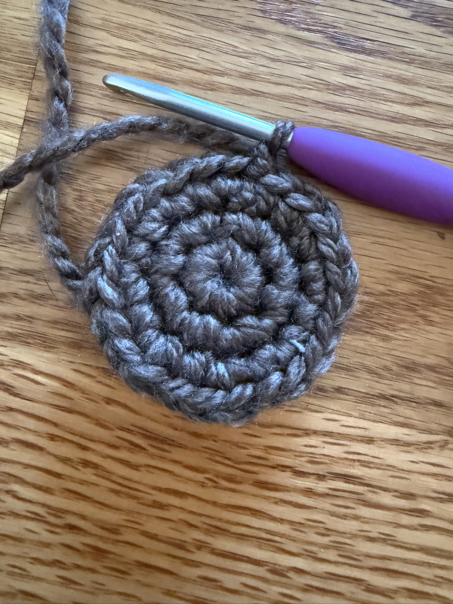
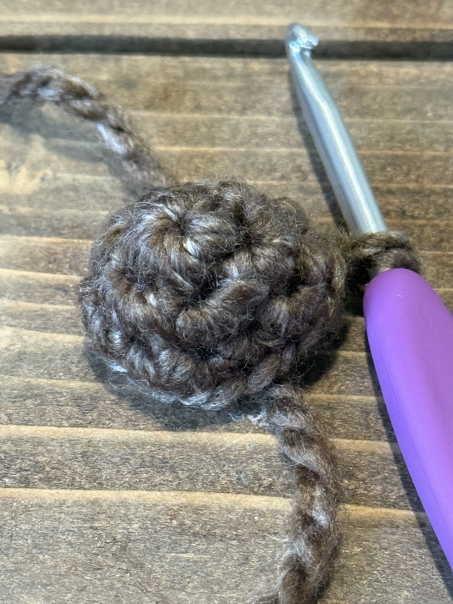
R5. Ch 1, (inc, 4 sc) around (21)
R6. Ch 1, (inc, 5 sc) around (24)
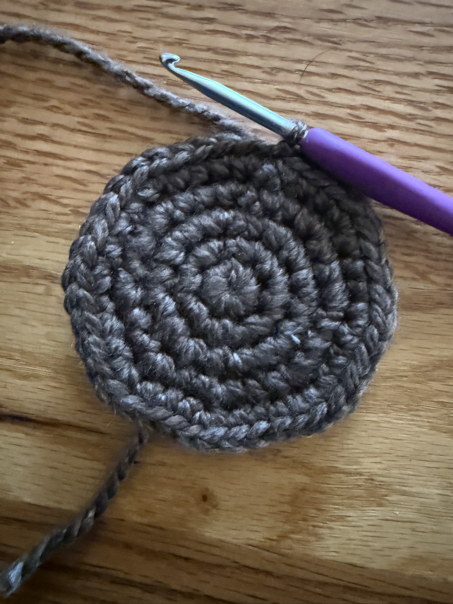
R7. Ch 1, (inc, 6 sc) around (27)
R8. Ch 1, (inc, 7 sc) around (30)
R9. Ch 1, (inc, 8 sc) around (33)
R10-14 ch 1, sc around (33)
R 15. Ch 1, (dec, 4 sc) around
*insert safety eyes and stuffing
R16. Ch 1, (dec, 3 sc) around
R17. Ch 1, (dec, 2 sc) around
R18. Ch 1, (dec, 1 sc) around
R19. Ch 1, (dec) around
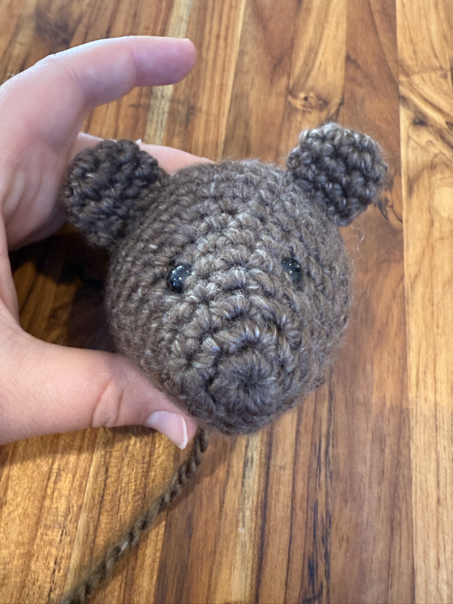
Finish off and leave a long tail of yarn. Weave that yarn tail through the remaining stitches and pull it tight, then weave the remaining yarn to the bottom of the head. This will be used to sew the head to the body.
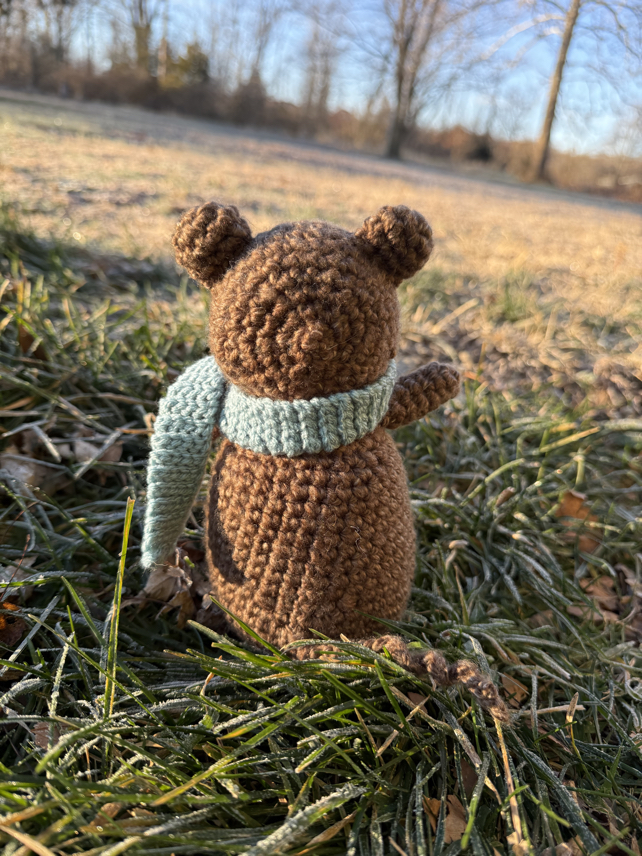
Ears (Make 2)
R1. mr, 5 sc (5)
R2. Ch 1, inc x 5 (10)
R3. Ch 1, sc in each st around (10)
R4. Ch 1, dec, 3sc, dec, 3sc (8)
Leave a long tail of yarn for sewing.
Tail
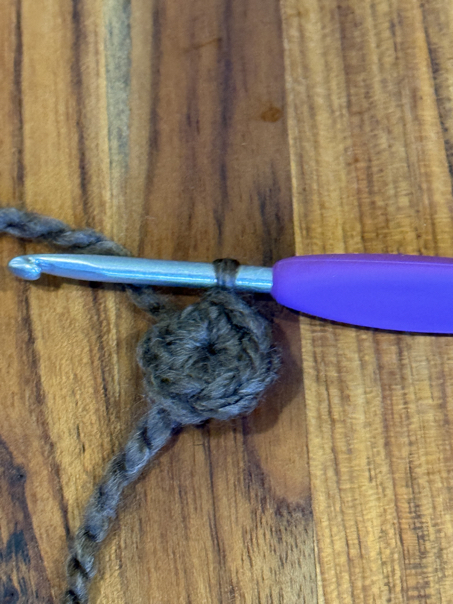
Make a slip knot in the yarn, but don’t put it on the hook yet. Turn the mouse over and insert the hook into the back of the mouse’s butt, in the center back of the body. Using the hook, pull the slip knot through the back of the mouse. Make 45 chain stitches. Finish off and make a few slip stitches back up the tail then weave in the end of the yarn.
Assembly
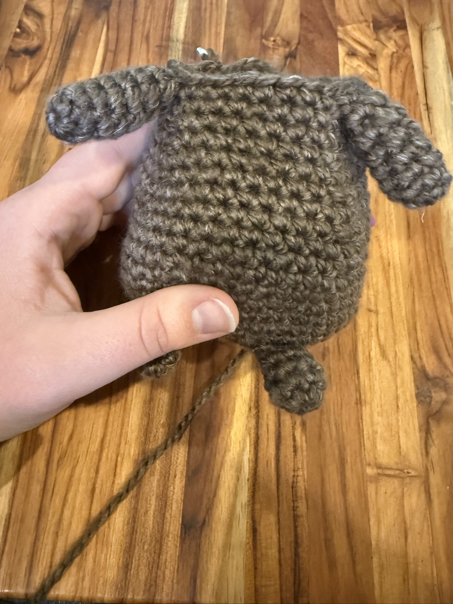
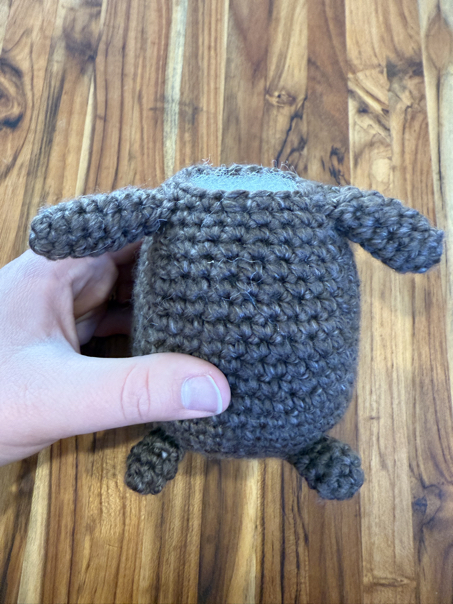
At this point, you should have the mouse’s body with the hands, feet, and tail attached to it. You will also have the mouse’s head and ears.
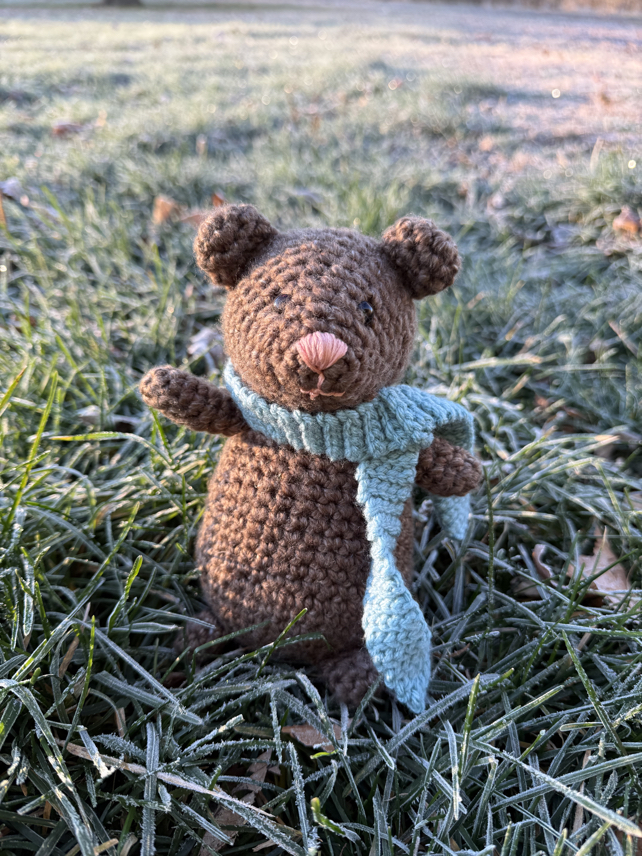
I like to start off by attaching the ears to the mouse’s head. You can add them anywhere you prefer. I attached mine between rounds 11 and 12. As you sew them to the head using a yarn needle and the yarn tails left on the ears, make sure that you sew them securely in place. Then tie a knot and weave in any remaining yarn tails. Do this for both ears.
Now you have the head completely assembled, and the body. All that is left is to sew the mouse’s head onto the body. I like to do this by using a yarn needle, and threading the needle with the yarn tail from the mouse body. Use the stitches at the top of the body, and then sew around the base of the head. Make sure that your stitches are very secure before finishing off and weaving in the yarn tail.
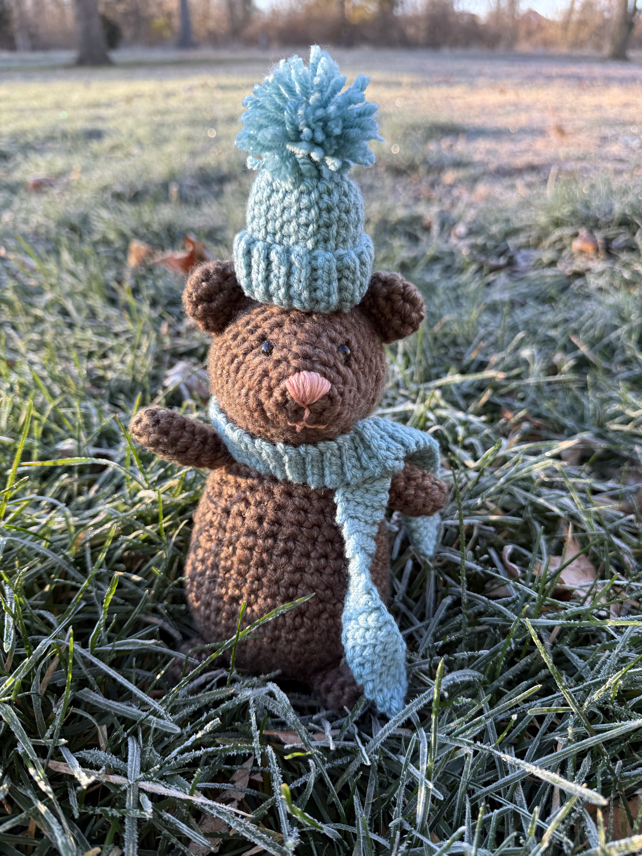
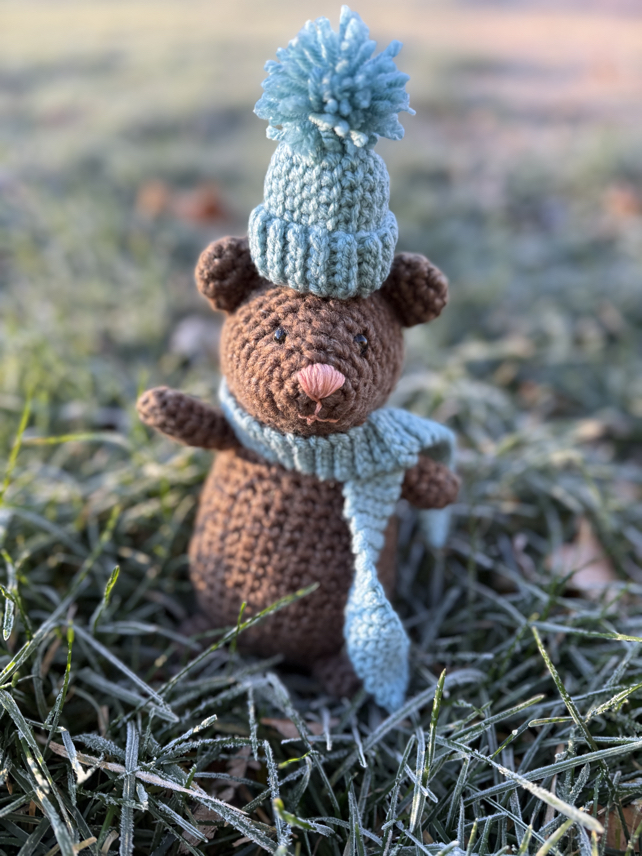
Stocking Hat
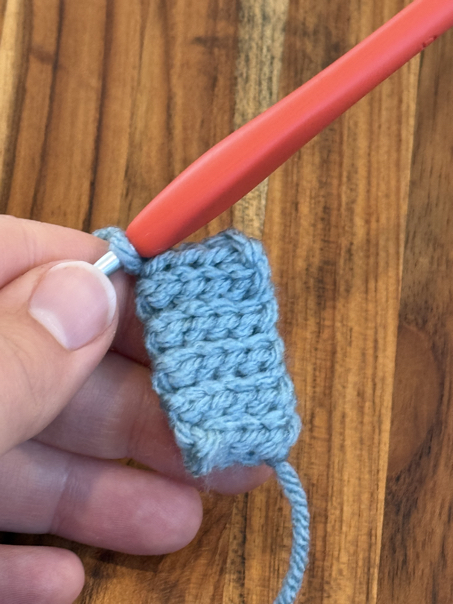
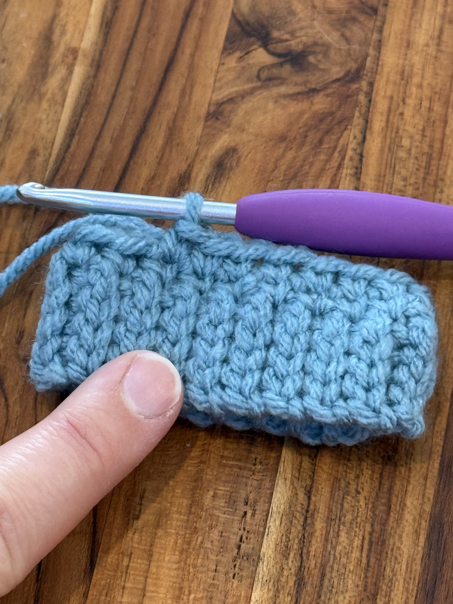
R1. ch 5
R2-41. turn, in the 2nd ch from the hook make a sl st. sl st in each st across.
R42. join the band into a circle by making a sl st in each st to secure the ends together in a circle.
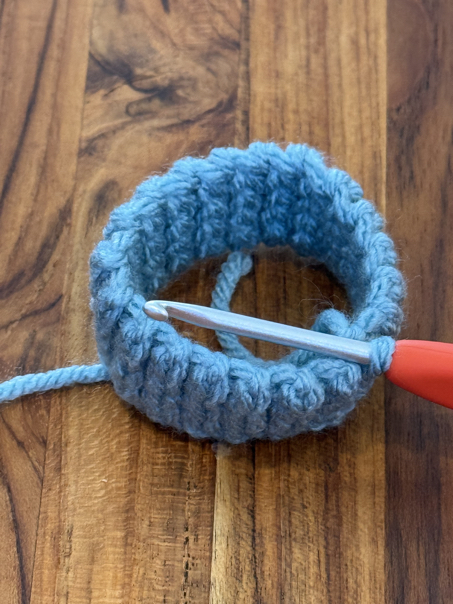
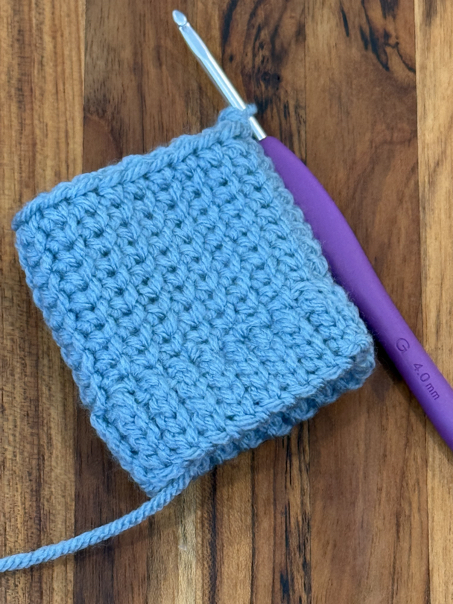
R43. ch 1, sc in every other st around. Join with a sl st. (about 20 sc sts)
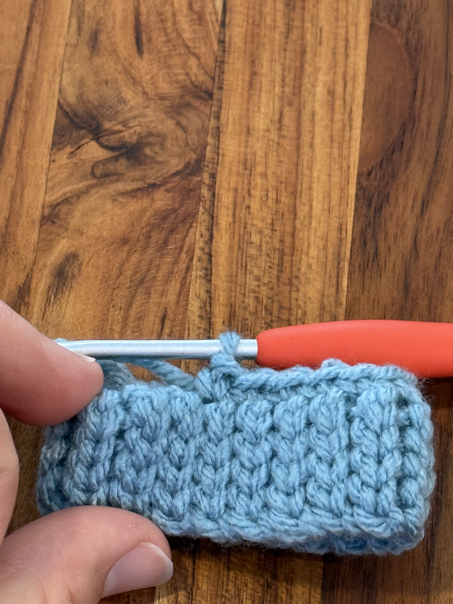
R44. ch 1, sc through the center of the previous rounds sc sts, inserting your hook where the “v” shape forms. Join with a sl st.
Repeat round 44 until your hat is approximately 2 ½ inches tall.
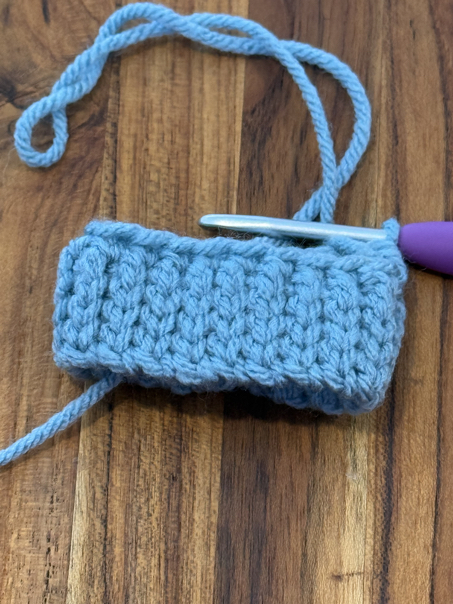
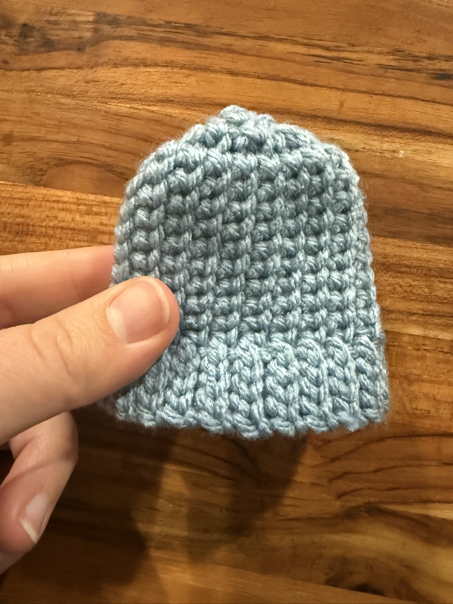
R45. ch 1, dec around. (10)
R46. ch 1, dec around. (5)
Finish off and weave through all of the remaining stitches. Turn the hat inside out and pull the yarn tight to close the opening. Tie a knot inside the hat and weave in the yarn tail.
Turn the hat right side out.
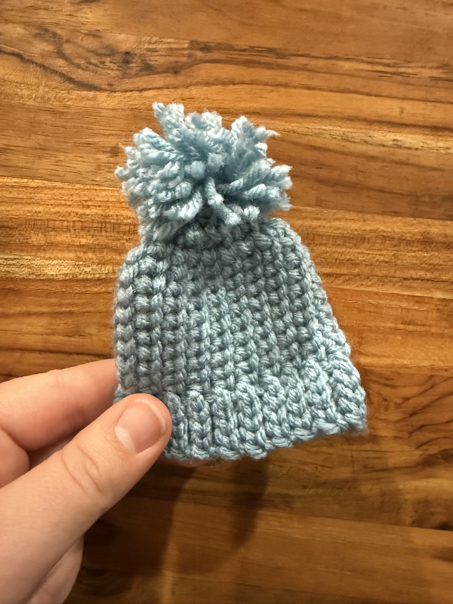
If desired, you can make a small yarn pom pom, by twisting yarn around two of your fingers many times, then tie it together in the center before cutting the ends. Secure the yarn pom pom tightly to the top of your little hat.
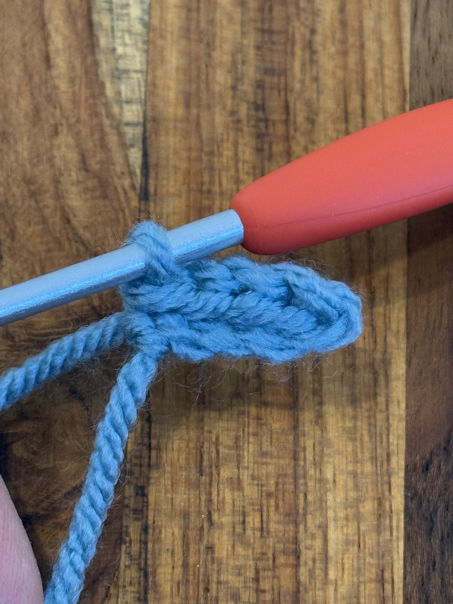
Scarf
R1. ch 5
R2. turn, in the 2nd ch from the hook make a sl st. sl st in each st across.
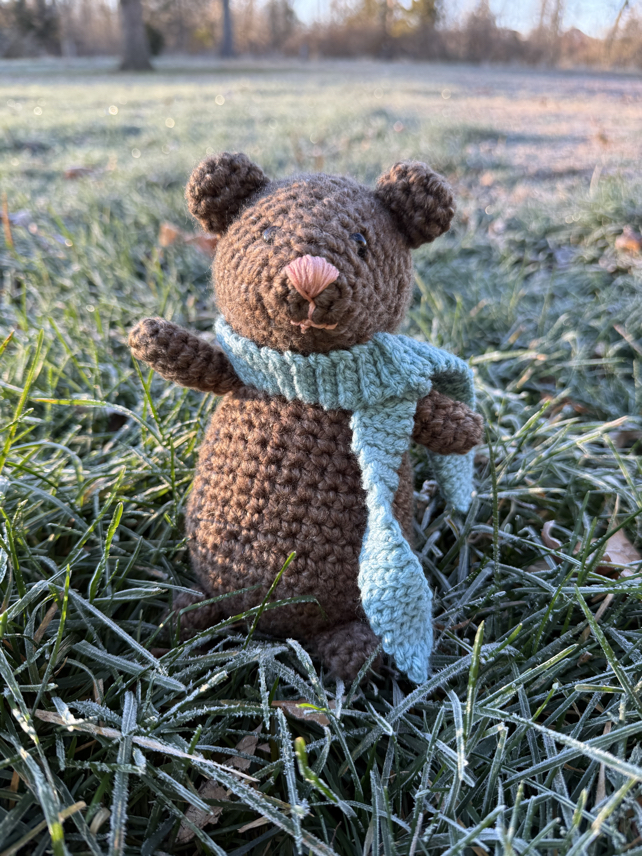
Repeat row 2 until the scarf is as long as you want it. I made mine about 8 inches long, so that it can nicely wrap around the mouse’s neck. Then to secure it in place, I made a chain that was 15 ch sts long and joined them in a circle with a slip stitch. I then slid this over both ends of the scarf to hold it in place on the mouse.
Adding Facial Features
If you want, you can also add other facial features. I like to use colored embroidery thread and stitch the nose and mouth to the mouse’s face. You can also use a light weight yarn and yarn needle if you prefer. Make sure that you secure any loose ends of thread very well, and tuck the ends under before finishing.
Crochet Mouse Pattern Copyright
Please note that this pattern is intended for personal use only, and is not for commercial distribution. By copyright, unless otherwise noted, you are not authorized to copy or claim my content as your own. You are, however, more than welcome to sell your finished products made with my patterns. I always appreciate it when you link to my patterns so that others can find them too!
Crochet Mouse Pattern Tips and Tricks
Choosing the right hook size
When you are making a crochet stuffed animal, it is really important that you use the right size crochet hook for the project. In most cases, you will want to use a hook that is slightly smaller than what the manufacturer recommends for the yarn. But at the same time, you don’t want to go too small or you will have other problems.
Ideally you want to use a crochet hook that allows you to make nice, even stitches without any holes. Holes when you are making crochet stuffed animals are a very bad thing. If needed, please feel free to adjust your crochet hook size until you get the right stitching tension.
Working in continuous rounds
In this pattern, I recommend that you join each round when it is completed by using a slip stitch to join the first and last stitches in the round. However, if you prefer, you can work this pattern with continuous rounds, but it may slightly change the placement of the stitches on the mouse.
Using different colors of yarn
I chose a nice mousey brown color of yarn from Hobby Lobby for this project. However, if you would like to mix things up and make your mouse a different color, please feel free! A nice grey yarn might also be a good option for a crochet mouse. Feel free to mix it up and use any color of yarn you enjoy for your crochet mouse.
Making a bigger mouse
If you would like to adjust this pattern to make a bigger mouse, the easiest way to do this is by using different yarn. If you change out the yarn to a bulky yarn weight, and a larger crochet hook, you can use the pattern as outlined above, and your mouse will turn out much larger than it otherwise would with a smaller weight yarn.
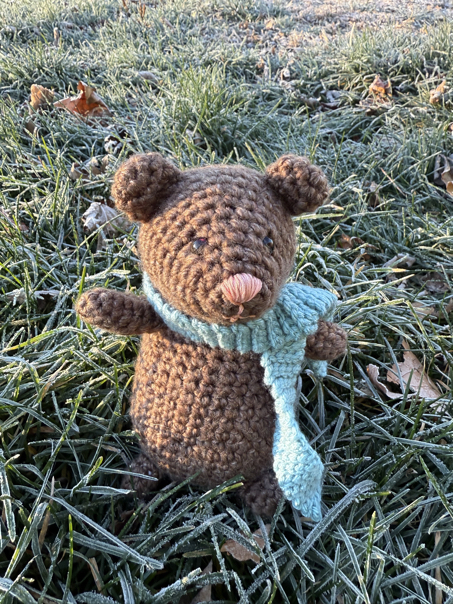
Simple Crochet Mouse Pattern
This free amigurumi crochet pattern to make a cute little mouse is so much fun to do, and the mouse is surprisingly cute when it is finished. No matter how you feel about mice, this little crochet mouse is quite cute once it is bundled up in its scarf and hat.
Thank you so much for stopping by to check out my free crochet mouse pattern! I hope that you will give this free crochet mouse pattern a try, and I hope you will enjoy making this cute little amigurumi mouse.
Happy Crocheting!
Be sure to follow us online on your favorite social media platform!
More crochet patterns
If you love this crochet mouse pattern, you might also enjoy our other free amigurumi patterns to make all kinds of crochet stuffed animals!

Crochet Mouse Pattern
Materials
- 1 skein brown yarn
- A little bit of light weight pink yarn or embroidery floss
- A little bit of light weight black yarn or embroidery floss
- Fiber fill stuffing
- 4.0 mm crochet hook (size G crochet hook)
- safety eyes
- A stitch marker
- A yarn needle
- Scissors
Instructions
- R1. Mr, 6 sc
- R2-7. Ch 1, sc around (6) Finish off leaving a long tail for sewing
- R1. Mr, 6 sc
- R2-4. Ch 1, sc around (6) Finish off leaving a long tail for sewing
- R1. Mr, ch 8 (8)
- R2. Ch 1, inc around (16)
- R3. Ch 1,(inc, sc), around (24)
- R4. Ch 1, (inc, 2 sc), around (32)
- R5. Ch 1, (inc, 3 sc), around (40)
- R6. Ch 1, 14 sc, flatten the first leg and sc through that and the body for the next 3 sc sts, 6 sc, flatten the second leg and sc through that and the body for the next 3 sc sts, sc in the remaining 14 sts. (40)
- R7-8. Ch 1, sc around (40)
- R9. Ch 1, 15 sc, (inc, sc) x5, sc in the last 16 sts. (45)
- R10. Ch 1, sc around (45)
- R11. Ch 1, sc, dec, 3sc, dec, 3sc, dec, sc in the next 18 sts, dec, 3sc, dec, 3sc, dec, 2sc. (39)
- R12-13. Ch 1, sc around
- R14. Ch1, 13 sc, dec, 12 sc, dec, 10 sc (37)
- R15. Ch1, sc around
- R16. Ch 1, 13 sc, dec, 10 sc, dec, 10 sc (35)
- R17. Ch1, sc around
- R18. Ch 1, 13 sc, dec, 8sc, dec, 10sc (33)
- R19. Ch1, sc around (33)
- R20. Ch 1, 5 sc, dec, 5 sc, dec, 8 sc, dec, 5 sc, dec, 2 sc (29)
- R1. Make a mr, in the mr, make 6 sc sts (6)
- R2. Ch 1, (inc, sc) around (12)
- R3. Ch 1, (inc, 2 sc) around (15)
- R4. Ch 1, (inc, 3 sc) around (18)
- R5. Ch 1, (inc, 4 sc) around (21)
- R6. Ch 1, (inc, 5 sc) around (24)
- R7. Ch 1, (inc, 6 sc) around (27)
- R8. Ch 1, (inc, 7 sc) around (30)
- R9. Ch 1, (inc, 8 sc) around (33)
- R10-14 ch 1, sc around (33)
- R 15. Ch 1, (dec, 4 sc) around *insert safety eyes and stuffing
- R16. Ch 1, (dec, 3 sc) around
- R17. Ch 1, (dec, 2 sc) around
- R18. Ch 1, (dec, 1 sc) around
- R19. Ch 1, (dec) around Finish off and leave a long tail of yarn. Weave that yarn tail through the remaining stitches and pull it tight, then weave the remaining yarn to the bottom of the head. This will be used to sew the head to the body.
- R1. mr, 5 sc (5)
- R2. Ch 1, inc x 5 (10)
- R3. Ch 1, sc in each st around (10)
- R4. Ch 1, dec, 3sc, dec, 3sc (8) Leave a long tail of yarn for sewing.
- R1. ch 5
- R2-41. turn, in the 2nd ch from the hook make a sl st. sl st in each st across.
- R42. join the band into a circle by making a sl st in each st to secure the ends together in a circle.
- R43. ch 1, sc in every other st around. Join with a sl st. (about 20 sc sts)
- R44. ch 1, sc through the center of the previous rounds sc sts, inserting your hook where the “v” shape forms. Join with a sl st. Repeat round 44 until your hat is approximately 2 ½ inches tall.
- R45. ch 1, dec around. (10)
- R46. ch 1, dec around. (5) Finish off and weave through all of the remaining stitches. Turn the hat inside out and pull the yarn tight to close the opening. Tie a knot inside the hat and weave in the yarn tail. Turn the hat right side out.
- R1. ch 5
- R2. turn, in the 2nd ch from the hook make a sl st. sl st in each st across. Repeat row 2 until the scarf is as long as you want it. I made mine about 8 inches long, so that it can nicely wrap around the mouse’s neck. Then to secure it in place, I made a chain that was 15 ch sts long and joined them in a circle with a slip stitch. I then slid this over both ends of the scarf to hold it in place on the mouse.
Hands (Make 2)
Legs (Make 2)
Body of the Mouse
R21. Ch1, 4 sc, dec, 4 sc, dec, 8 sc, dec, 4 sc, dec, sc (25) R22. Ch 1, sc around (25)
R23. Ch 1, 8 sc, for the first arm fold it in half, and sc through those 3 sts as well as the next 3 sts around. Sc in the next 8 sts. Fold the second arm in half and sc through those sts as well as the next 3 sts. Sc in the last 3 sts around. (25) R24. Ch 1, (Dec, 3 sc) around (20) *Stuff the body Finish off but leave a long tail of yarn for sewing
Head
Ears (Make 2)
Tail Make a slip knot in the yarn, but don’t put it on the hook yet. Turn the mouse over and insert the hook into the back of the mouse’s butt, in the center back of the body. Using the hook, pull the slip knot through the back of the mouse. Make 45 chain stitches. Finish off and make a few slip stitches back up the tail then weave in the end of the yarn.
Assembly At this point, you should have the mouse’s body with the hands, feet, and tail attached to it. You will also have the mouse’s head and ears. I like to start off by attaching the ears to the mouse’s head. You can add them anywhere you prefer. I attached mine between rounds 11 and 12. As you sew them to the head using a yarn needle and the yarn tails left on the ears, make sure that you sew them securely in place. Then tie a knot and weave in any remaining yarn tails. Do this for both ears.
Now you have the head completely assembled, and the body. All that is left is to sew the mouse’s head onto the body. I like to do this by using a yarn needle, and threading the needle with the yarn tail from the mouse body. Use the stitches at the top of the body, and then sew around the base of the head. Make sure that your stitches are very secure before finishing off and weaving in the yarn tail.
Stocking Hat
If desired, you can make a small yarn pom pom, by twisting yarn around two of your fingers many times, then tie it together in the center before cutting the ends. Secure the yarn pom pom tightly to the top of your little hat.
Scarf
Adding Facial Features If you want, you can also add other facial features. I like to use colored embroidery thread and stitch the nose and mouth to the mouse’s face. You can also use a light weight yarn and yarn needle if you prefer. Make sure that you secure any loose ends of thread very well, and tuck the ends under before finishing.
PIN for Later!