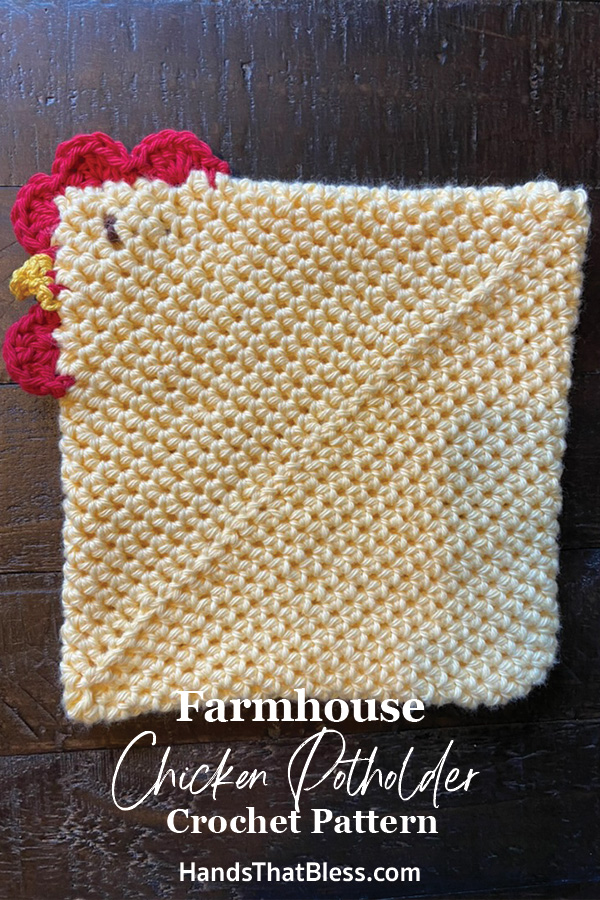
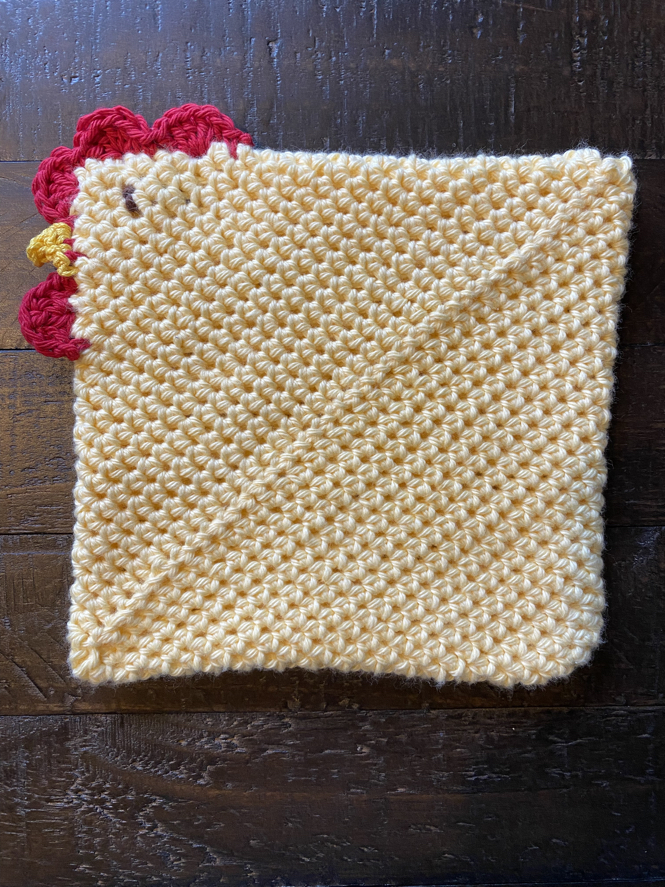
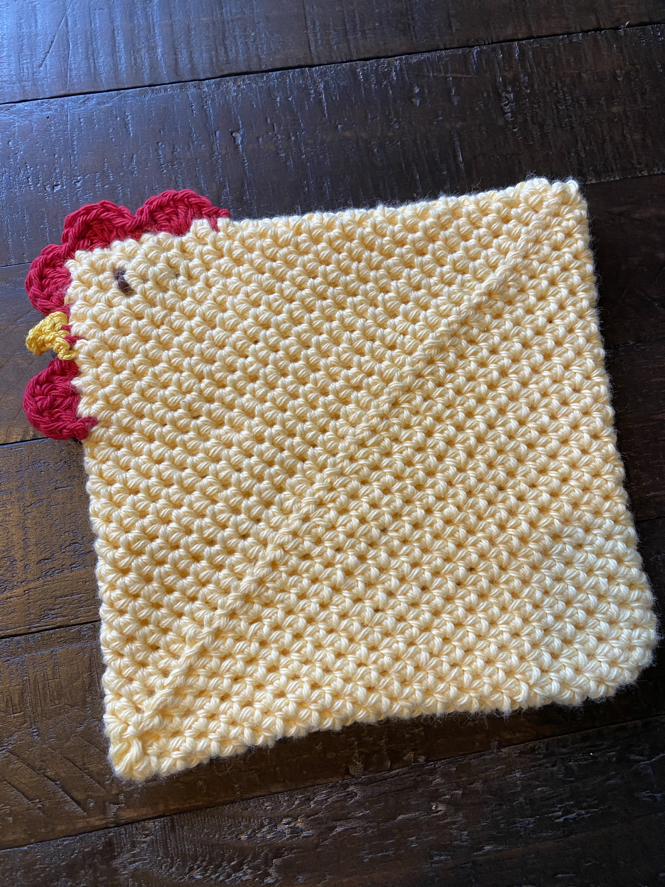
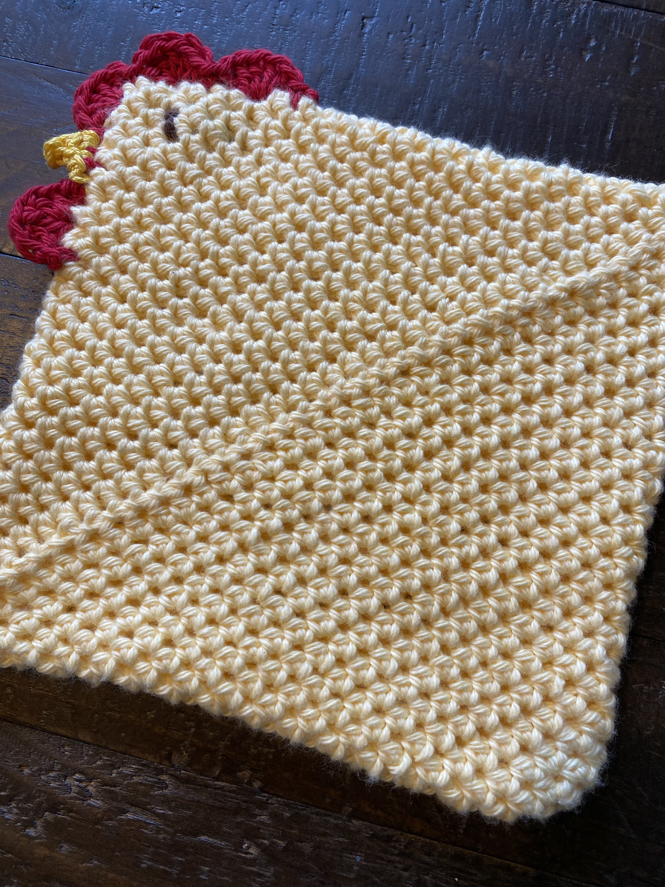
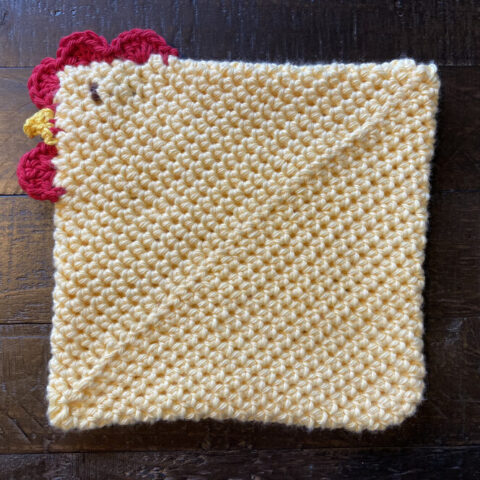
Farmhouse Chicken Potholder
These cute chicken pot holders are a fun project to make using our free crochet pattern. These chicken crochet potholders are an adorable way to jaz up your farmhouse decor and are also a fun take hot pads and turn them into a sweet addition to your kitchen.
Chicken Potholder
In this free pattern, I am so excited to show you how to make an easy chicken potholder pattern. This is a fun project that will spice up your kitchen decor. These chicken potholders are made using a square pot holder that has a double thickness to it. Not only are these potholders cute, for chicken lovers, but they are also practical.
I love this pattern because it is super easy, and you still get to enjoy an adorable chicken as your potholder when you are finished. Let’s get started by jumping into this free pattern with step-by-step instructions.
Crochet Chicken Potholder Pattern
Materials
5.0 mm hook or a size H hook
Yellow yarn (100% cotton)
Red yarn (100% cotton)
Black yarn (100% cotton)
Dark Yellow or Orange yarn (100% cotton)
A yarn needle
Scissors
This pattern is written in US crochet terms
Skill level: beginner to intermediate crocheters
Abbreviations
sl st – slip stitch
sc – single crochet
ch – chain
st/sts – stitch/ stitches
hdc – half double crochet
How to Crochet a Chicken Potholder Pattern
Body
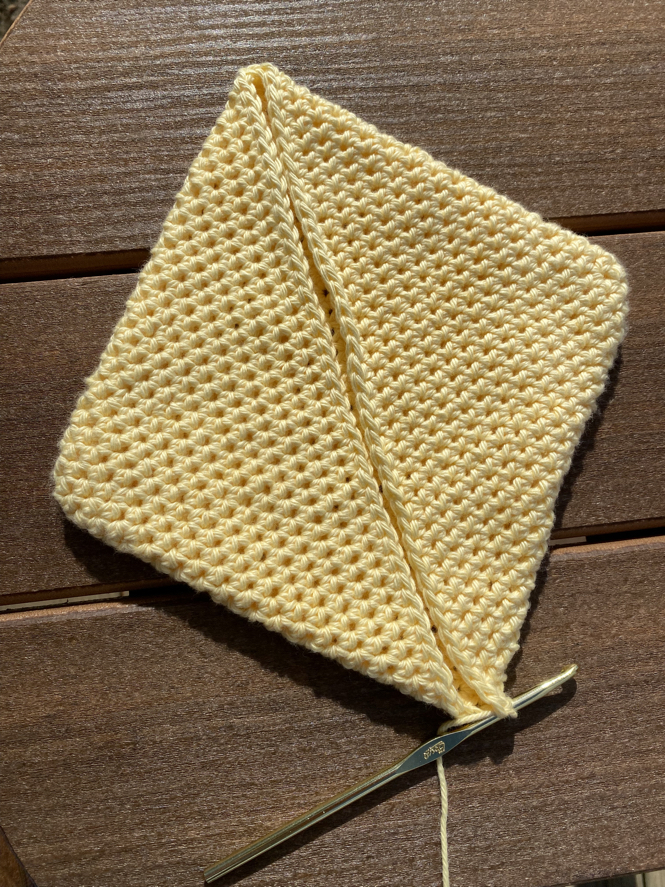
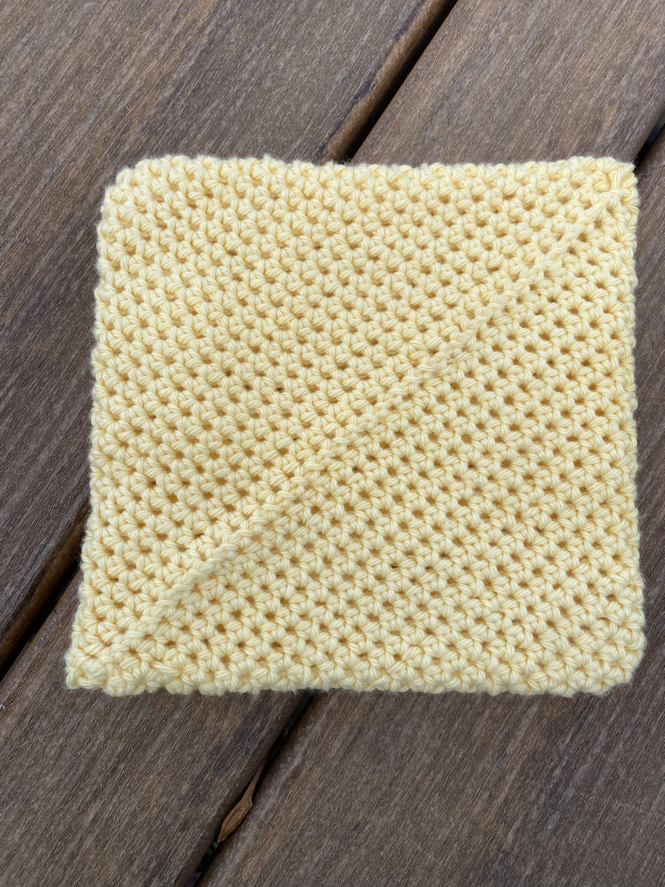
R1: ch 40
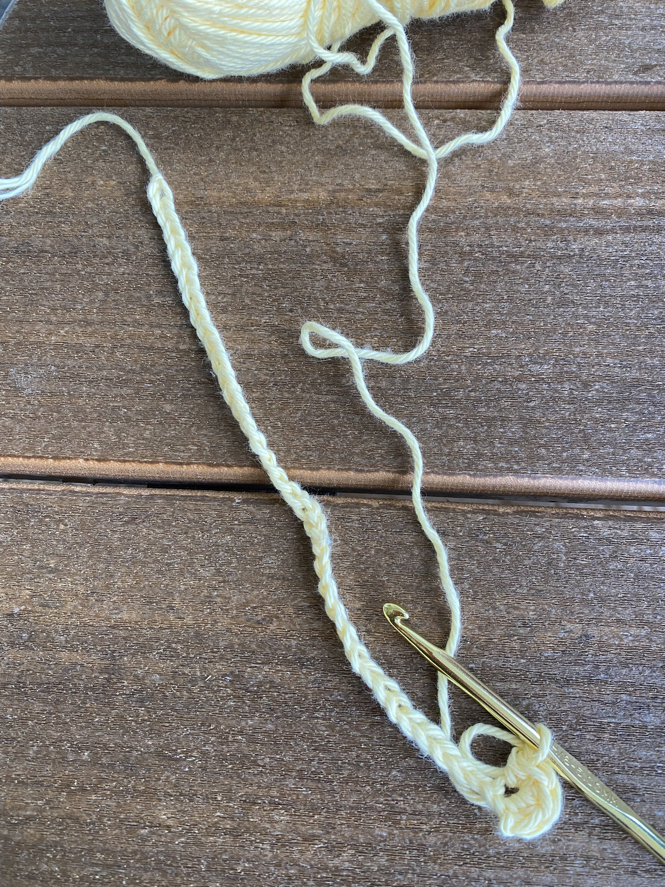
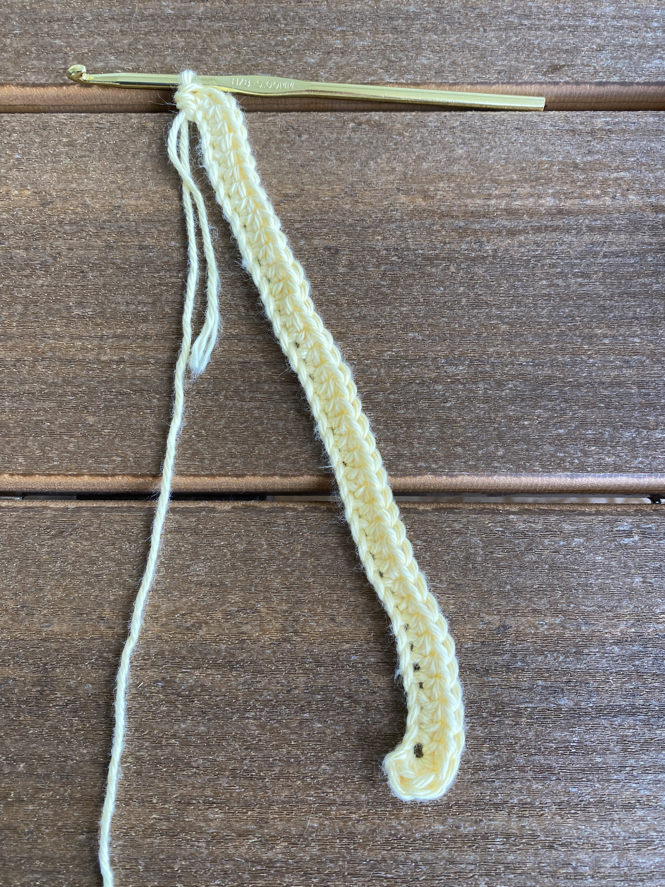
R2: in the 2nd st from the hook, make a hdc st, sc in each st across. When you reach the last st, make 3 hdc sts in it. Turn. Working in the back loops hdc in each st across. When you get back to the first st made, make 2 hdc sts. Join with a sl st.

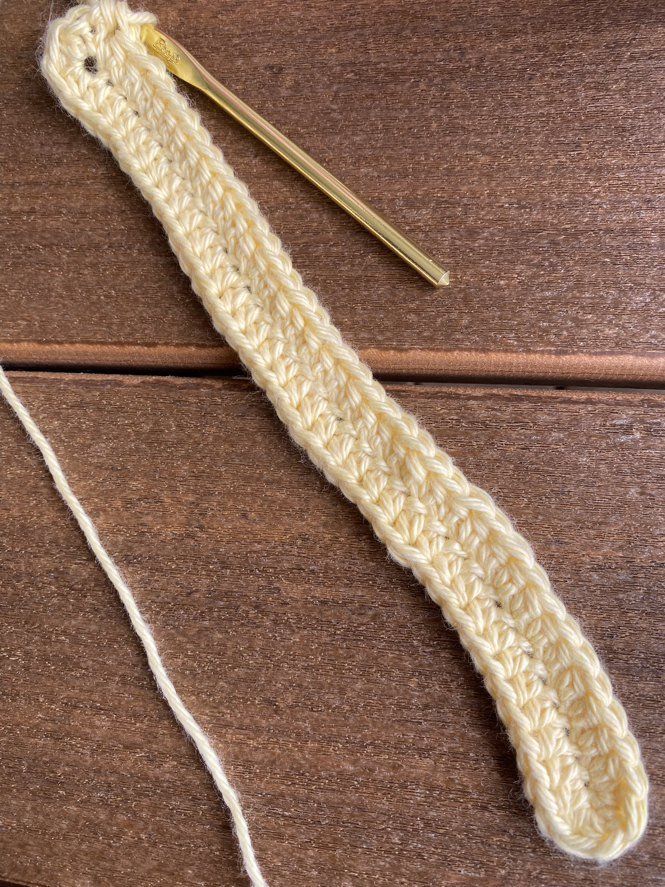
R3: ch 1, hdc in each st around. When you get all of the way around do not join.
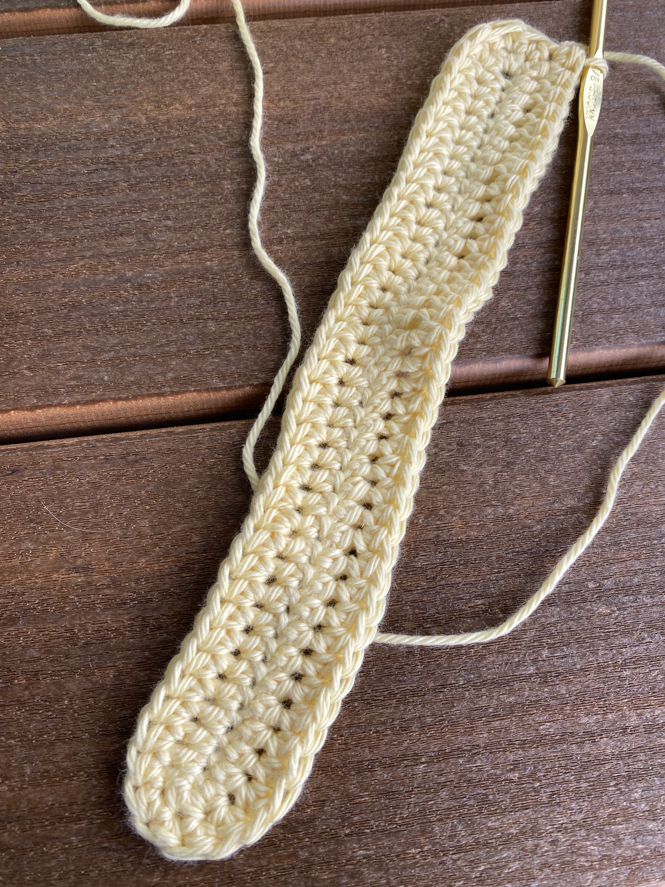
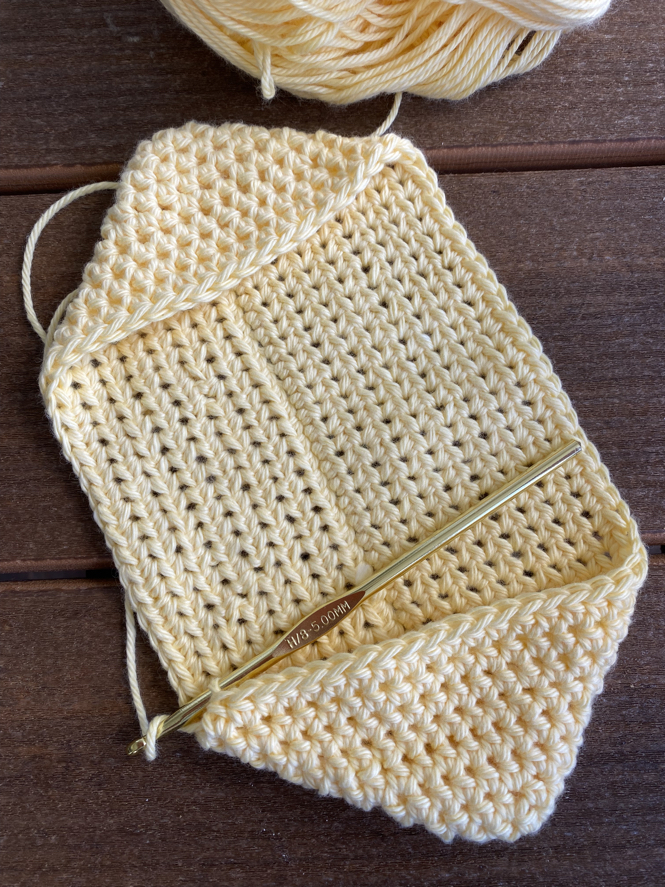
R4: work in continuous rounds, making a half double crochet in stitch around. To tell when you are done, fold the two corners in. When the center seem meets, you ready to sew the powder together. to finish out the main part, use a yarn, needle, and whip stitch the two sides together. Make a hanging loop if desired before finishing off. Weave in any loose end of yarn.
Making the Head
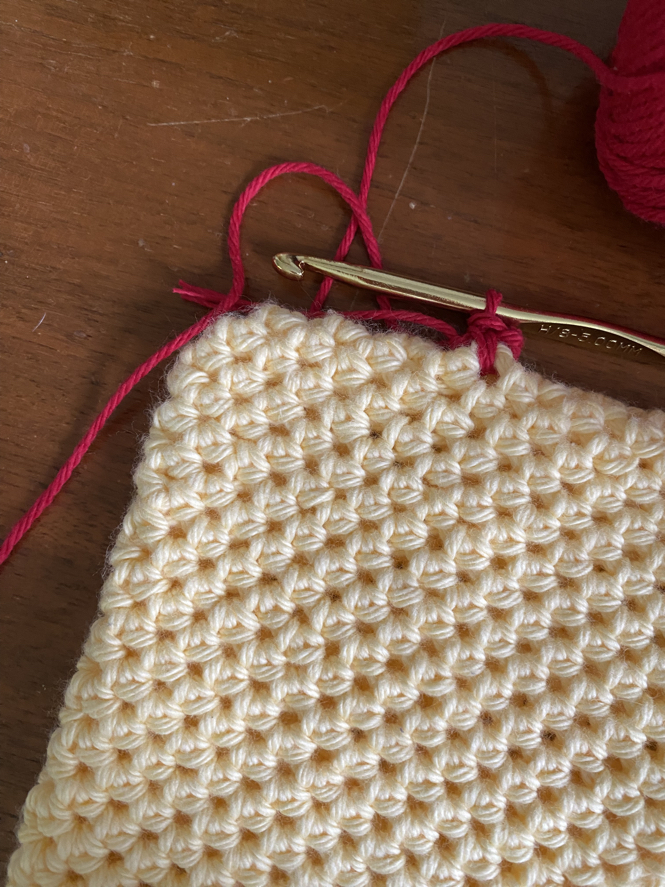
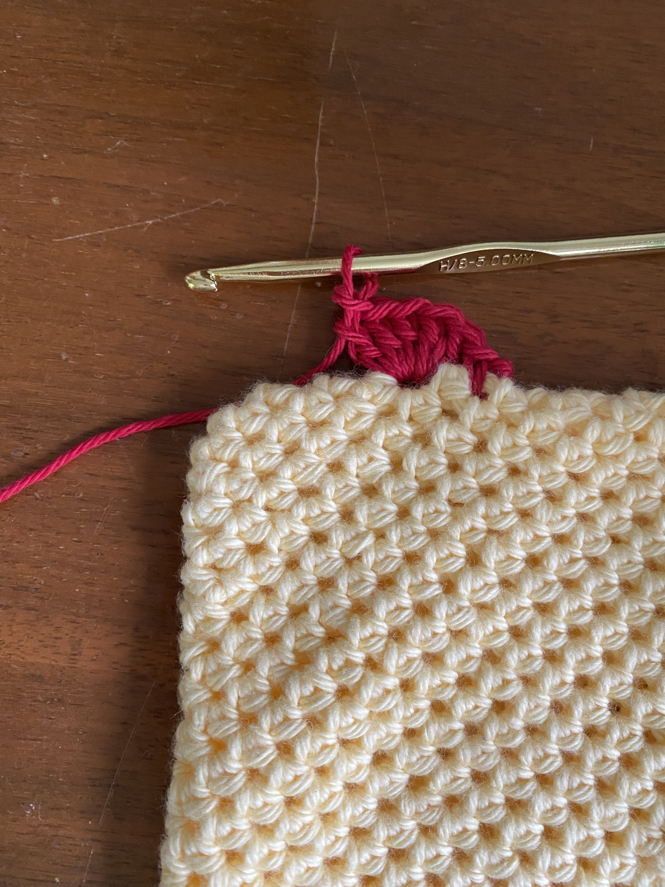
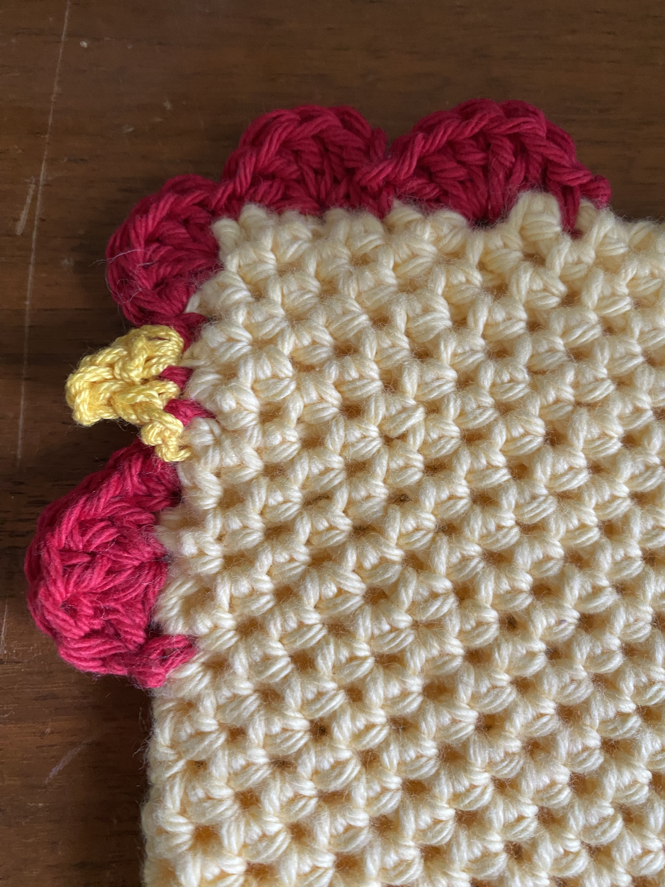
Comb (red)
Counting the diagonal rows, join your red yarn in 4 rows, ch 1, sc in the same st. In the next space, makr 5 dc sts, sc in the next sp, 5 dc sts in the next sp. Sc at the corner, turn, 5 dc in the next st down the side, sc in next st, sl st in the next 2 sts, sc in the next st, 5 dc in the next st, sc in the next st. Finish off and weave in the yarn tails.


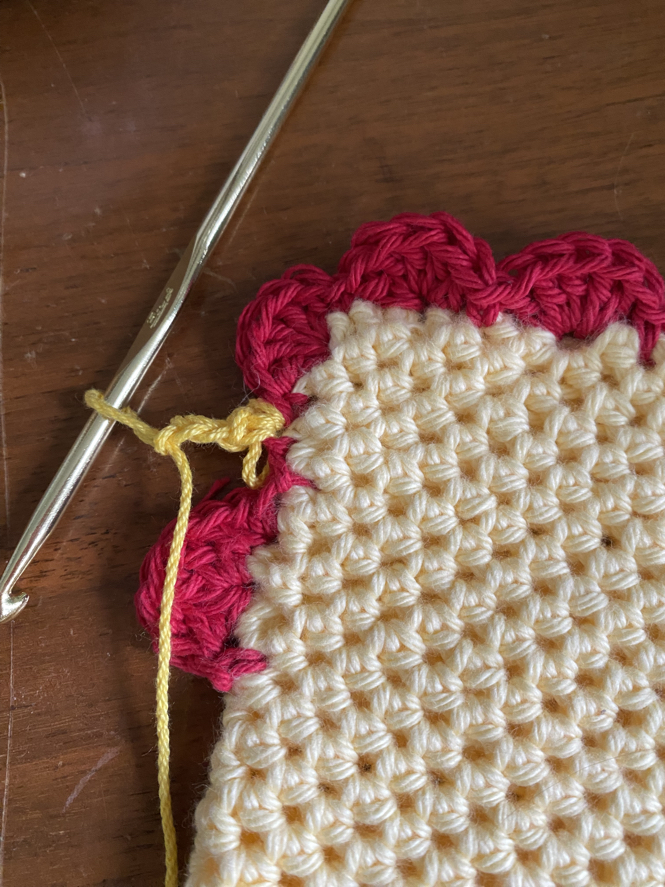
Beak (yellow)
Where you sl st with red, join dark yellow yarn, ch 1, sc in the same st, ch 3, sc over the next sl st. Finish off and weave in the ends.
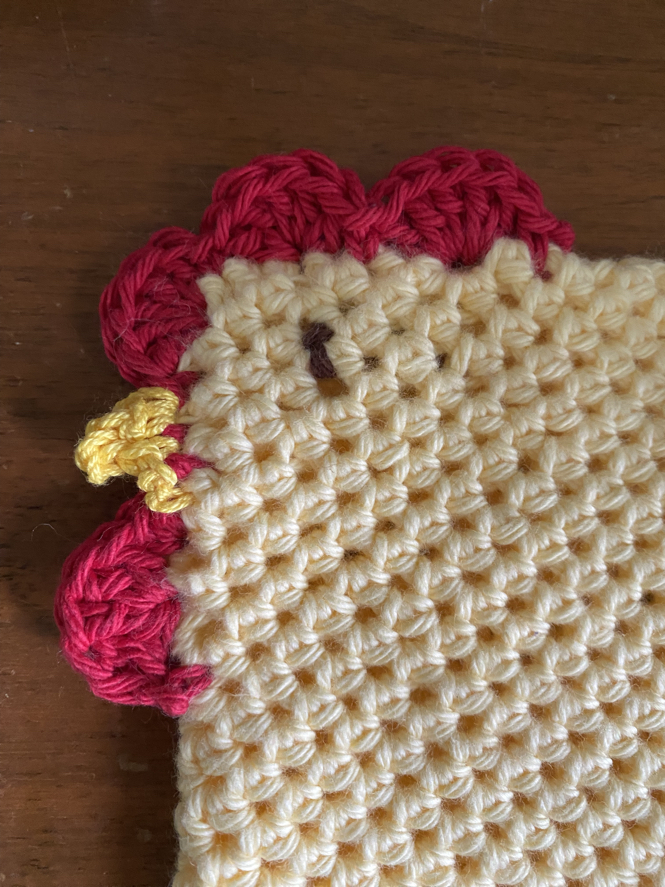
Eyes (black)
Using black yarn, sl st around the front layer of the potholder. Finish off and weave in the yarn ends.
Crochet Chicken Potholders Copyright
Please note that this pattern is intended for personal use only, and is not for commercial distribution. By copyright, unless otherwise noted, you are not authorized to copy or claim my content as your own. You are, however, more than welcome to sell your finished products made with my patterns. I always appreciate it when you link to my patterns so that others can find them too!
Crochet Chicken Potholder Pattern Tips and Tricks
Choosing The Yarn
When you are making a chicken pot holder, the best option for your yarn is going to be a durable cotton yarn. It is extremely important that you use 100% cotton yarn for this project so that the yarn does not melt when it is exposed to the hot temperatures. You can find good 100% cotton yard at Hobby lobby, or in the craft section at Walmart, or your local craft store.
Adding A Hanging Loop
Before you finish off your crocheted chicken pot holder, you might enjoy adding a hanging loop to it. This way when you are not using it on hot pots, you can hang it up so that it is out of the way. The easiest way to add a hanging loop is simply to make a chain, then use your slip stitch to join the chain back to your hot pad, making a hanging loop.
Chicken Potholder Pattern Free
A crochet chicken potholder is a fun and easy project to make using a few basic crochet stitches. This chicken pot holder is a great gift especially for chicken lover. I like this pattern because not only is it a simple potholder to make which provides a nice double thickness to protect your surfaces from hot pots, but the chicken on the hot pad is also super cute and it provides a fun twist to classic potholder.
Thank you so much for stopping by to check out my simple crocheted chicken potholder pattern. I hope that you will enjoy this pattern and have fun making the project. If you love this pattern, make sure to check out our other free crocheted items for your home.
Happy crocheting!
Be sure to follow us online on your favorite social media platform!
More Free Crochet Patterns

Crochet Chicken Potholder Pattern
Materials
- 5.0 mm hook or a size H hook
- Yellow yarn (100% cotton)
- Red yarn (100% cotton)
- Black yarn (100% cotton)
- Dark Yellow or Orange yarn (100% cotton)
- A yarn needle
- Scissors
Instructions
- R1: ch 40
- R2: in the 2nd st from the hook, make a hdc st, sc in each st across. When you reach the last st, make 3 hdc sts in it. Turn. Working in the back loops hdc in each st across. When you get back to the first st made, make 2 hdc sts. Join with a sl st.
- R3: ch 1, hdc in each st around. When you get all of the way around do not join.
- R4: work in continuous rounds, making a half double crochet in stitch around. To tell when you are done, fold the two corners in. When the center seem meets, you ready to sew the powder together. to finish out the main part, use a yarn, needle, and whip stitch the two sides together. Make a hanging loop if desired before finishing off. Weave in any loose end of yarn.
Body
Making the Head
Comb (red)
Counting the diagonal rows, join your red yarn in 4 rows, ch 1, sc in the same st. In the next space, makr 5 dc sts, sc in the next sp, 5 dc sts in the next sp. Sc at the corner, turn, 5 dc in the next st down the side, sc in next st, sl st in the next 2 sts, sc in the next st, 5 dc in the next st, sc in the next st. Finish off and weave in the yarn tails.
Beak (yellow)
Where you sl st with red, join dark yellow yarn, ch 1, sc in the same st, ch 3, sc over the next sl st. Finish off and weave in the ends.
Eye (black)
Using black yarn, sl st around the front layer of the potholder. Finish off and weave in the yarn ends.
PIN For Later!