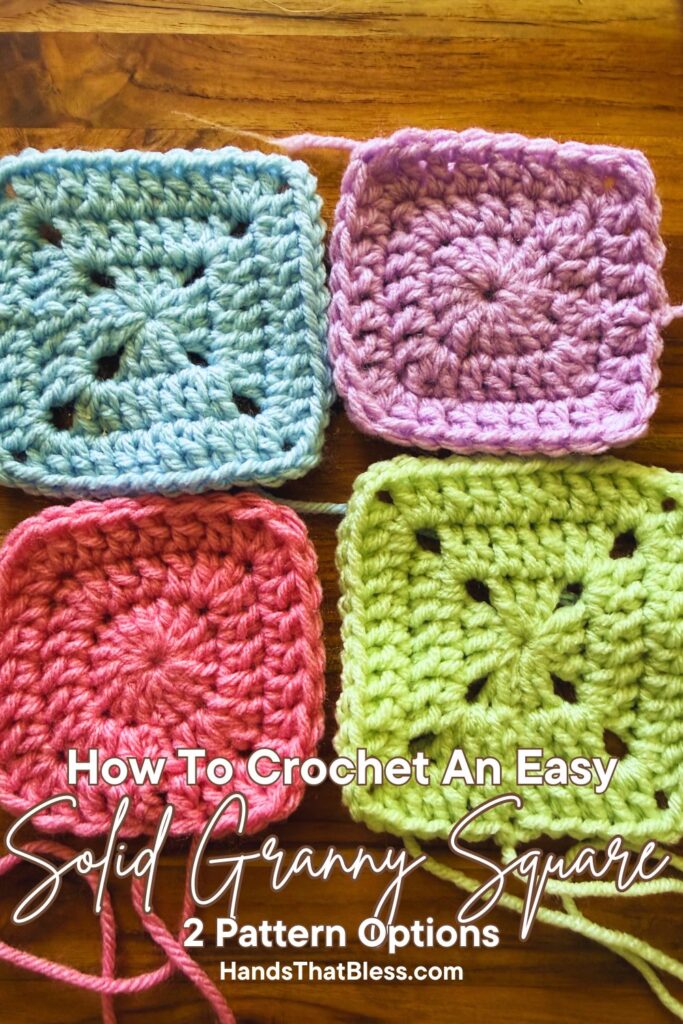
Solid Granny Square Crochet Pattern
I am so excited to show you how to make this crochet granny square pattern. In this free crochet pattern, I am going to walk you through the step by step instructions to make a classic granny square. These solid squares are a type of traditional granny square that uses very simple stitches and can be used in a wide variety of crochet projects.
Once you know how to make this solid granny square crochet pattern, the sky is the limit as to what you choose to create with the squares. These are a great project for crocheters of all skill levels to make for a fun and relaxing crochet project.
Simple Solid Granny Square Crochet Pattern
To make these solid granny squares, you will need to know how to make just a couple of basic stitches. Because you only need to know a couple of easy crochet stitches, it makes this a great crochet project for beginners. Another reason why these solid granny squares are a great crochet project to make is because there are a lot of things you can make using the basic solid granny square pattern.
There are so many different things you can make with these solid granny squares. You might enjoy making a square blanket, using this pattern and simply continue around the square until it is large enough for a blanket. Another fun idea is to make several small granny squares using this solid technique then stitch them together in your desired pattern to make your favorite baby blankets. You might also enjoy using this technique to make other things besides blankets like purses, baby lovies, or even a sweater.
Join our Mailing List and Receive a…
The perfect solid granny square is a great way to learn the basics of crocheting, or to make a wide variety of crochet projects. The crochet granny square is often suggested as a starting place if you are just learning how to crochet, you can enjoy making a cozy blanket or another type of crochet project with this method.
Let’s get started by jumping into the step by step instructions for this solid granny square crochet tutorial. Keep in mind, the following pattern has two different methods for making a solid granny square, depending on your preference for how you want it to look.
Solid Granny Square Crochet Pattern
Materials
Medium weight yarn
5.5 mm hook
Scissors
A stitch marker (optional)
Please note that this pattern is written in US terms
Abbreviations
sl st – slip stitch
ch – chain
dc – double crochet stitches
tr – treble crochet
mr – magic ring or mc – magic circle
st/sts – stitch/stitches
sp – space
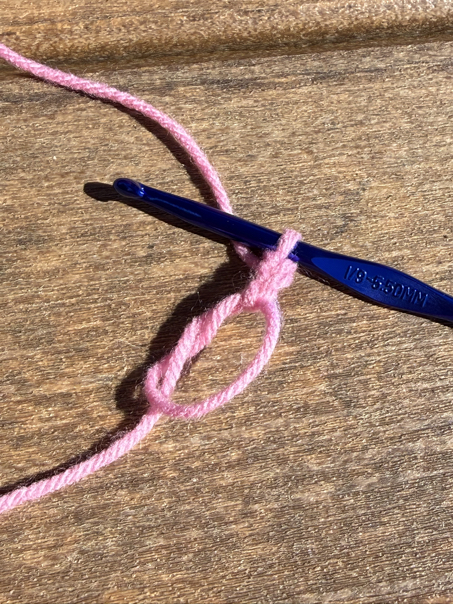
How To Crochet A Granny Square Crochet Pattern
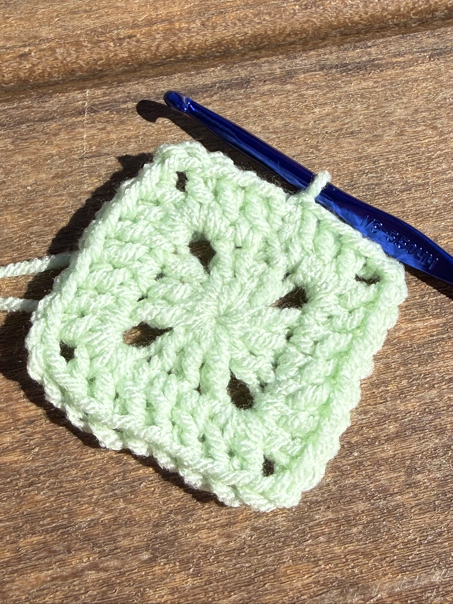
Method 1: The Traditional Granny Square
R1. make a mr, in the mr ch 3, dc, ch 2, 3 dc, ch 2, 3 dc, ch 2, 3 dc, ch 2, dc, join with a sl st. (2 ch 2 spaces)
R2. ch 2 (counts as the first dc), dc in the next st, in the first ch 2 sp, make (2 dc, ch 2, 2 dc), *dc in each of the next dc sts, in the next corner sp work (2 dc, ch 2, 2 dc)*. Repeat from * to * 2 more times. Dc in the last st, join with a sl st.
R3. ch 2 (counts as the first dc), dc in the next st, in the first ch 2 sp, make (2 dc, ch 2, 2 dc), *dc in each of the next dc sts, in the next corner sp work (2 dc, ch 2, 2 dc)*. Repeat from * to * 2 more times. Dc in each of the last dc sts, join with a sl st.
Repeat round 3 until your granny square reaches your desired size.
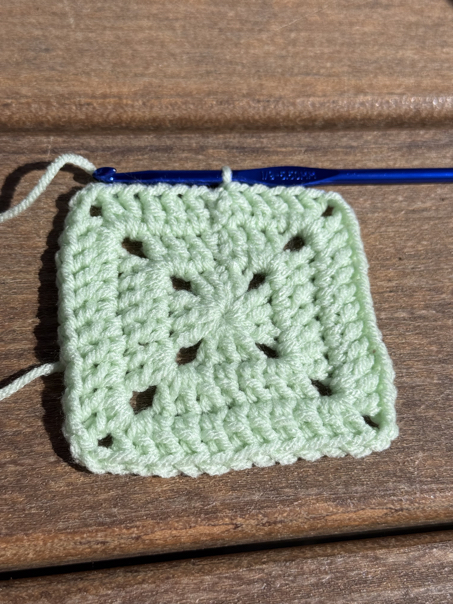
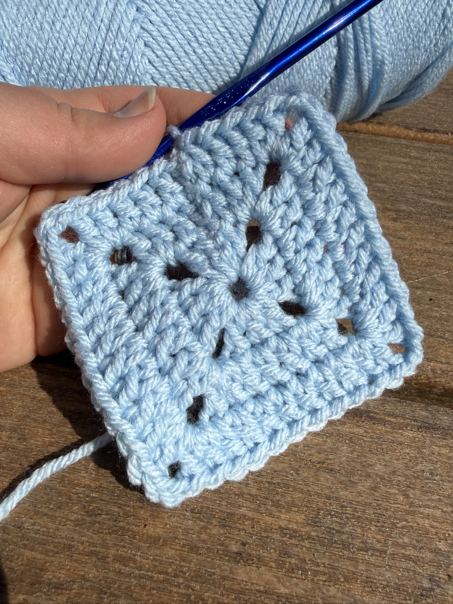
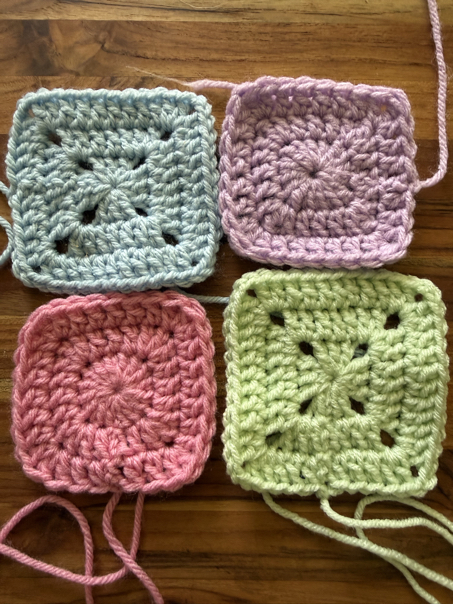
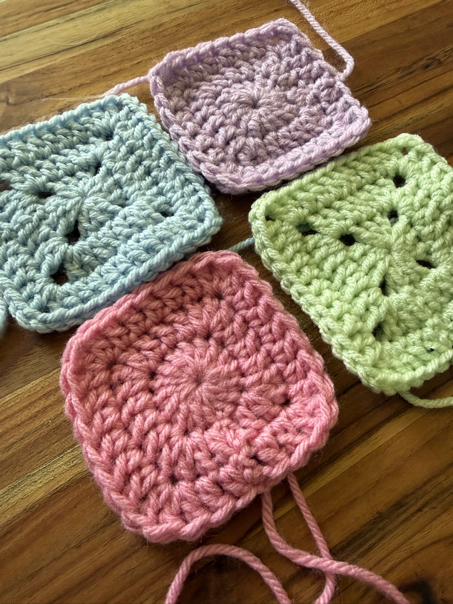
Method 2: No Spaces Granny Square
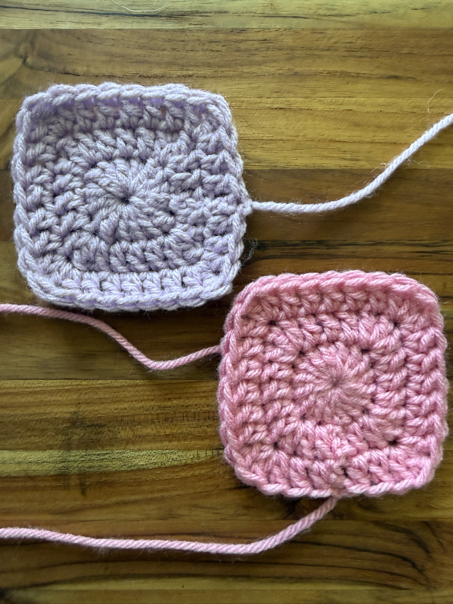
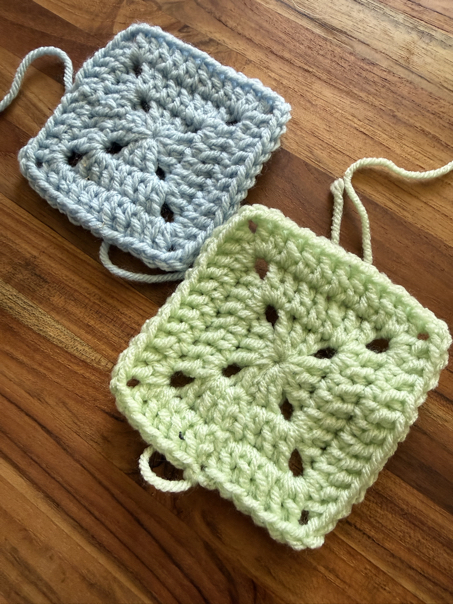
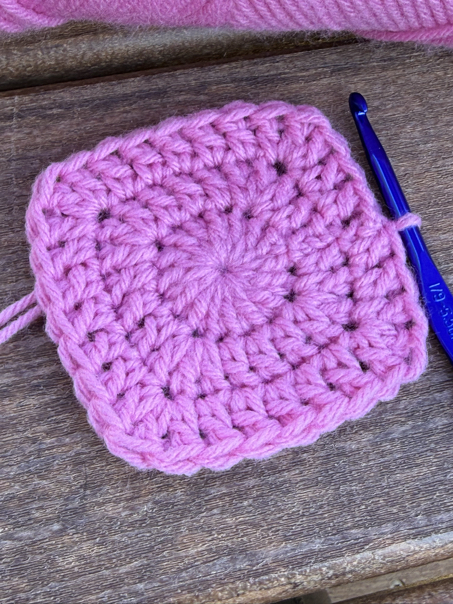
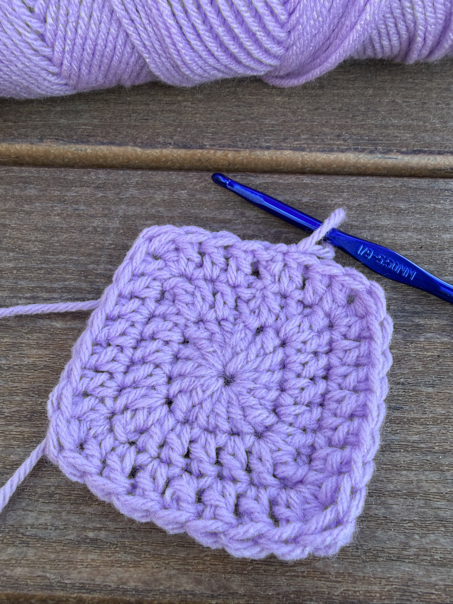
There are two different ways that you can make this granny square. My preference is to use double crochet stitches, but you can also use a treble crochet stitch in each of the corners. In the picture above, the pink granny square is all double crochet, but the purple uses a treble crochet stitch in the corner st.
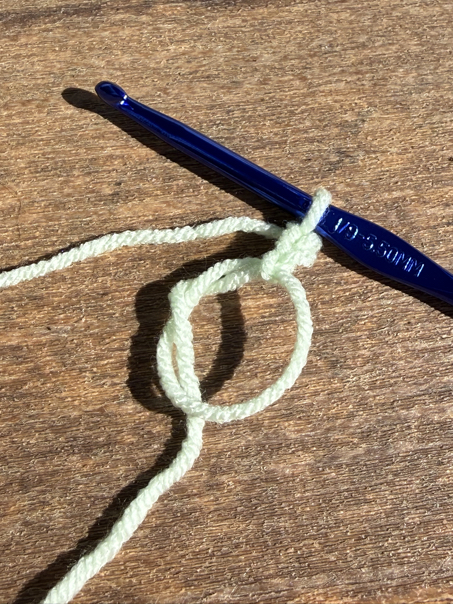
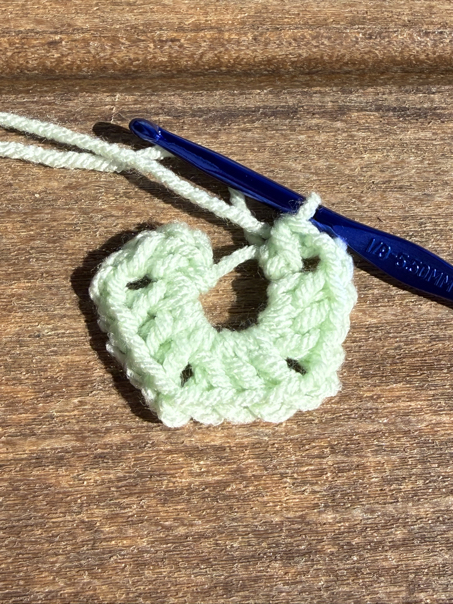
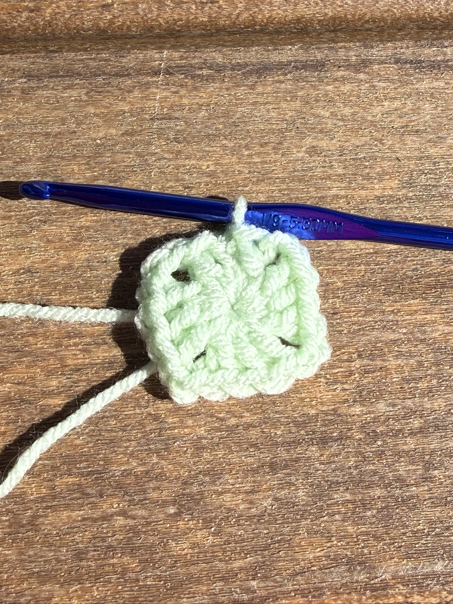
R1. make a mr, in the mr ch 3 sts (counts as the first dc st now and throughout), make 11 dc sts in the ring. Join with a sl st to the top of the first ch 3 sp.
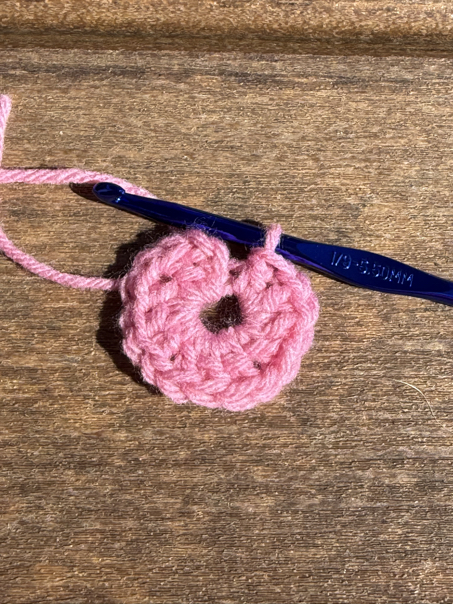
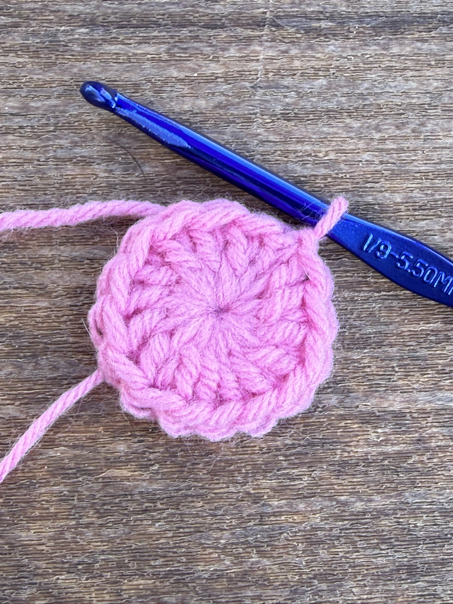
R2. ch 3 sts, dc in the next dc st, in the next st make 3 dc sts (first corner made), dc in each of the next 3 dc sts, in the next st make 3 dc sts (second corner made), dc in each of the next 3 dc sts, in the next st make 3 dc sts (third corner made), dc in each of the next 3 dc sts, in the next st make 3 dc sts (fourth corner made), dc in the last dc st. Join with a sl st to the top of the first ch 3 sp.
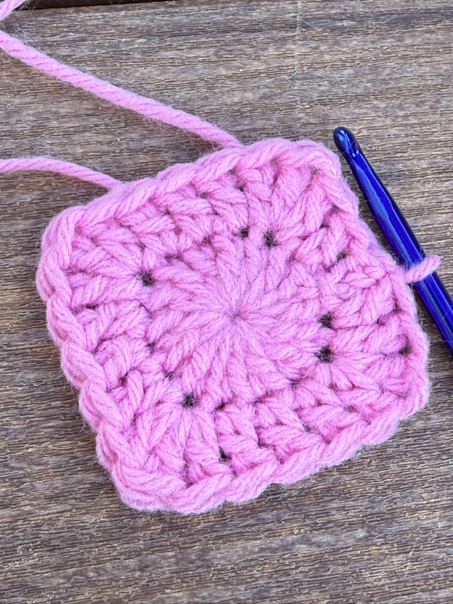
R3. ch 3, dc in the next 2 dc sts, in the next st make 3 dc sts (first corner made), dc in the next 5 dc sts, in the next st make 3 dc sts (second corner made), dc in the next 5 dc sts, in the next st make 3 dc sts (third corner made), dc in the next 5 dc sts, in the next st make 3 dc sts (fourth corner made), dc in the last 2 sts. Join with a sl st to the top of the first ch 3 st.
Repeat round 3 until your granny square reaches your desired size. Note, on the sides, your dc sts will increase by 2 sts each time around.

If you would like to use the same pattern, but want to use the tr st in each corner rather than the dc st, your instructions will look like this:
R1. make a mr, in the mr ch 3 sts (counts as the first dc st now and throughout), make dc, tr, 3 dc, tr, 3 dc, tr, 3 dc, tr, 2 dc in the ring. Join with a sl st to the top of the first ch 3 sp.
R2. ch 3 sts, dc in the next dc st, in the next st make dc, tr, dc sts (first corner made), dc in each of the next 3 dc sts, in the next st make dc, tr, dc sts (second corner made), dc in each of the next 3 dc sts, in the next st make dc, tr, dc sts (third corner made), dc in each of the next 3 dc sts, in the next st make dc, tr, dc sts (fourth corner made), dc in the last dc st. Join with a sl st to the top of the first ch 3 sp.
R3. ch 3, dc in the next 2 dc sts, in the next st make dc, tr, dc sts (first corner made), dc in the next 5 dc sts, in the next st make dc, tr, dc sts (second corner made), dc in the next 5 dc sts, in the next st make dc, tr, dc sts (third corner made), dc in the next 5 dc sts, in the next st make dc, tr, dc sts (fourth corner made), dc in the last 2 sts. Join with a sl st to the top of the first ch 3 st.
Solid Granny Square Pattern Copyright
Please note that this pattern is intended for personal use only, and is not for commercial distribution. By copyright, unless otherwise noted, you are not authorized to copy or claim my content as your own. You are, however, more than welcome to sell your finished products made with my patterns. I always appreciate it when you link to my patterns so that others can find them too!
Solid Granny Square Pattern Tips and Tricks
The Yarn You Use
The type of yarn you use to make your granny squares will determine how your granny squares turn out. For example if you use a lighter yarn weight, they will be smaller and more delicate. If you are just learning, I would highly recommend using a nice medium weight yarn. But keep in mind you may need to use a different type of yarn depending on what project you intend to make with your granny squares. Keep in mind, if you are just practicing or making a smaller project, these granny squares are a great project to use up some of your leftover yarn on.
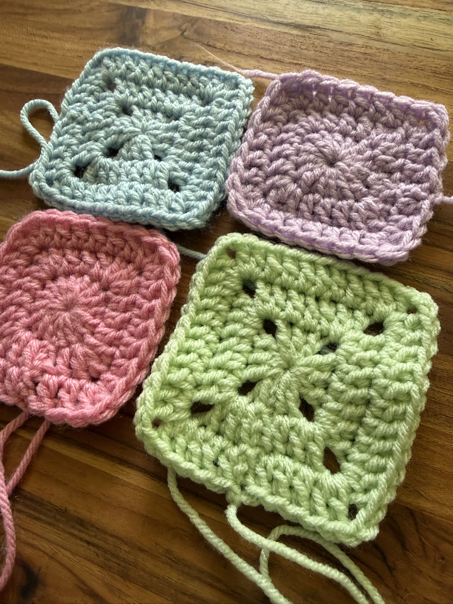
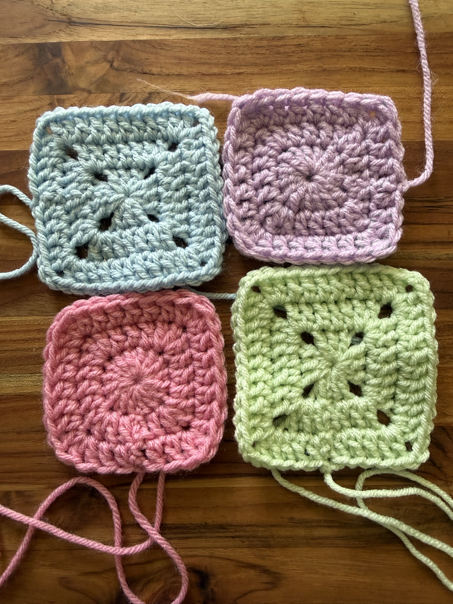
Using Different Colors
A fun way to mix things up is to use different colors to make a granny square design. You can do this by making each block in varying colors, and laying out a pattern with the colors. Or you can make different rounds using different colors. It is completely up to you how you utalize colors in the granny square pattern.
What About A Single Crochet
Yes, you can use a single crochet stitch instead of a double crochet stitch if you would like, for a tighter granny square. You would follow the pattern above, just substitute the single crochet stitch for the double crochet stitch.
Your Crochet Hook Size
The crochet hook size above is the recommended hook size, but keep in mind, you may need to adjust the hook size depending on what yarn you use, and your personal stitching tension. Please feel free to increase or decrease the crochet hook size as needed.
Crochet Pattern For Solid Granny Square
Making a solid granny square is an easy crochet project and so much fun because there are a lot of different ways you can use the granny squares. These are a great beginner project to practice on, or it can be a good project for crocheters of any skill level to make all kinds of projects. Get creative and see what your preference is for how to use these nice and easy solid granny squares.
Thank you so much for stopping by to check out this easy solid granny square crochet pattern. It is my hope that you will give this free crochet pattern a try, and that you will enjoy making these solid stitch granny squares.
Happy Crocheting!
Be sure to follow us online on your favorite social media platform!
More Crochet Patterns:


Solid Granny Square Crochet Pattern
Materials
- Medium weight yarn
- 5.5 mm hook
- Scissors
- Stitch marker (optional)
Instructions
- Method 1: The Traditional Granny Square
R1. make a mr, in the mr ch 3, dc, ch 2, 3 dc, ch 2, 3 dc, ch 2, 3 dc, ch 2, dc, join with a sl st. (2 ch 2 spaces) - R2. ch 2 (counts as the first dc), dc in the next st, in the first ch 2 sp, make (2 dc, ch 2, 2 dc), *dc in each of the next dc sts, in the next corner sp work (2 dc, ch 2, 2 dc)*. Repeat from * to * 2 more times. Dc in the last st, join with a sl st.
- R3. ch 2 (counts as the first dc), dc in the next st, in the first ch 2 sp, make (2 dc, ch 2, 2 dc), *dc in each of the next dc sts, in the next corner sp work (2 dc, ch 2, 2 dc)*. Repeat from * to * 2 more times. Dc in each of the last dc sts, join with a sl st.
Repeat round 3 until your granny square reaches your desired size. - R1. make a mr, in the mr ch 3 sts (counts as the first dc st now and throughout), make 11 dc sts in the ring. Join with a sl st to the top of the first ch 3 sp.
- R2. ch 3 sts, dc in the next dc st, in the next st make 3 dc sts (first corner made), dc in each of the next 3 dc sts, in the next st make 3 dc sts (second corner made), dc in each of the next 3 dc sts, in the next st make 3 dc sts (third corner made), dc in each of the next 3 dc sts, in the next st make 3 dc sts (fourth corner made), dc in the last dc st. Join with a sl st to the top of the first ch 3 sp.
- R3. ch 3, dc in the next 2 dc sts, in the next st make 3 dc sts (first corner made), dc in the next 5 dc sts, in the next st make 3 dc sts (second corner made), dc in the next 5 dc sts, in the next st make 3 dc sts (third corner made), dc in the next 5 dc sts, in the next st make 3 dc sts (fourth corner made), dc in the last 2 sts. Join with a sl st to the top of the first ch 3 st.
Repeat round 3 until your granny square reaches your desired size. Note, on the sides, your dc sts will increase by 2 sts each time around.
Method 2: No Spaces Granny Square
PIN for Later!