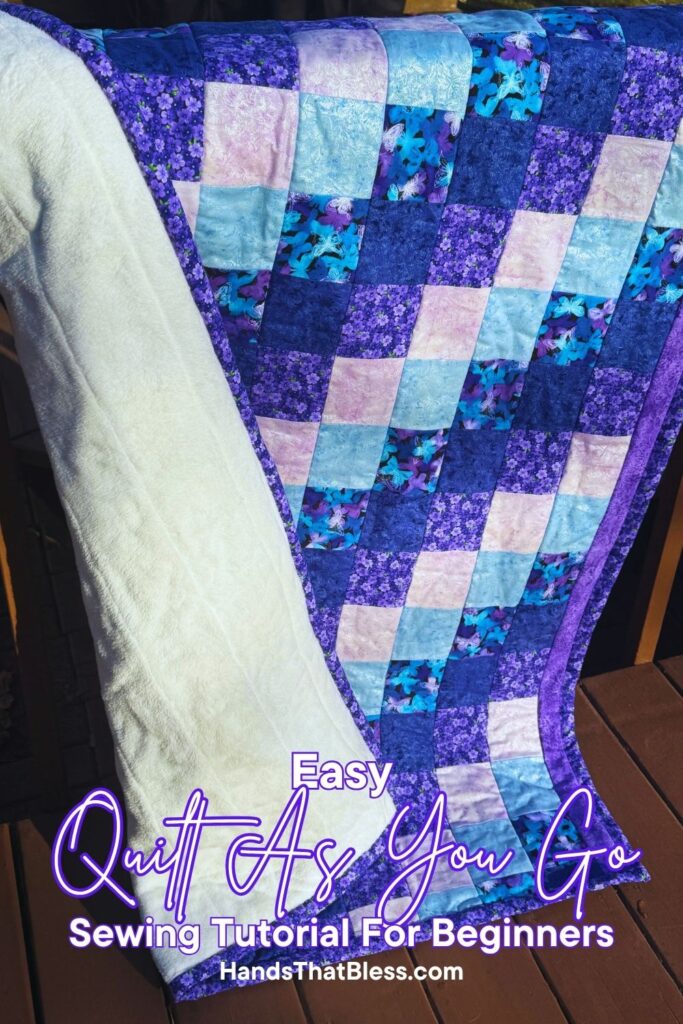
Quilt As You Go For Beginners
I am excited to share with you a very basic way that you can quilt as you go, which is perfect for beginners. This is a method that my mom actually came up with, after getting frustrated with traditional quilting methods, or even the technical way you are supposed to quilt as you go.
This is a quilting technique that works really well for an easy quilt pattern, and can allow you to have the entire quilt quilted as you work, so that it is nicely finished, without worrying about hand quilting, or finding someone who can do machine quilting for you. If this is your first time, and you want a nice simple quilt pattern that will allow you to quilt the blanket as you go, then this is the perfect tutorial for you!
Easy Quilt As You Go For Beginners
If you are new to the quilting process, and want to make your first quilt, this is a great place to start. This method that I am about to show you, for quilting as you go, is an easy way to make a simple quilt pattern, and have it quilted as you are working on the blanket. That way you don’t have to worry about going back to tie it or quilt it after the fact.
You can use this method to make a quilt in a variety of sizes. These include large quilts or small like a baby quilt. The only thing that changes is the amount of fabric you need, the blocks in each row and the time that it takes to make your finished quilt. Otherwise the process is the same easy process.
Let’s jump right into the quilt as you go sewing tutorial, by starting with the essential tools you will need to get started.
How To Sew A Quilt As You Go
Materials Needed
Your pieces of fabric for the quilt front and backing
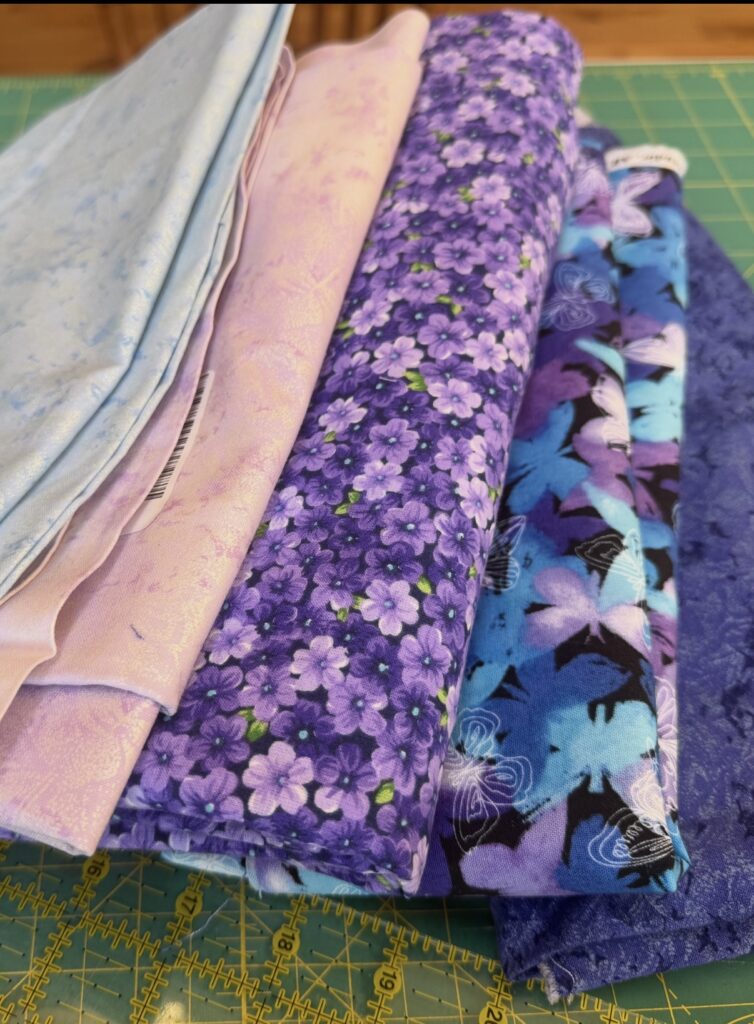
To make a crib size quilt, I used 5 colors of ½ yard each plus 2 additional colors of fabric each ½ yard for making the borders.
Cotton batting – A piece of batting the size of your finished quilt
Spray adheasive for quilting or basting spray
A standard sewing machine
A rotary cutter
Cutting Mat and Ruler
Ironing board and iron
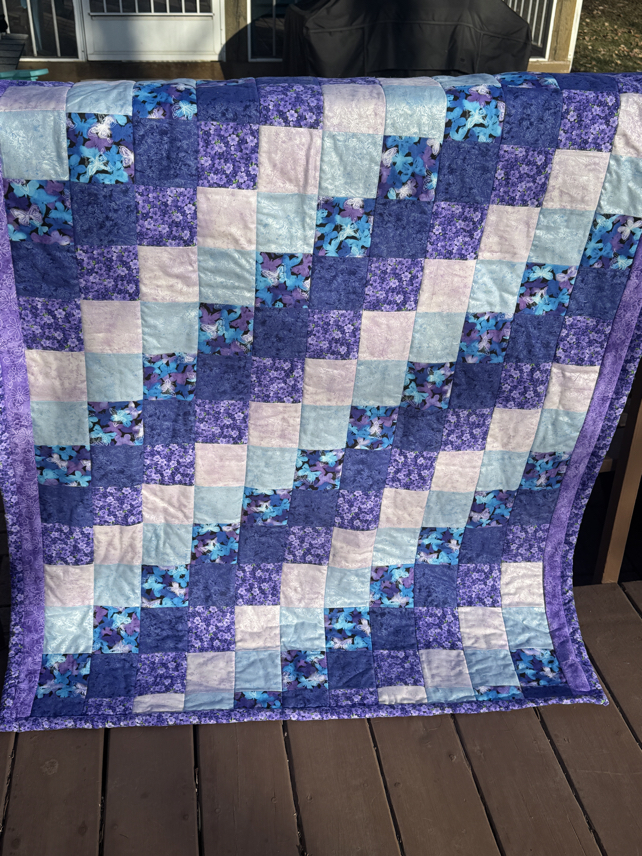
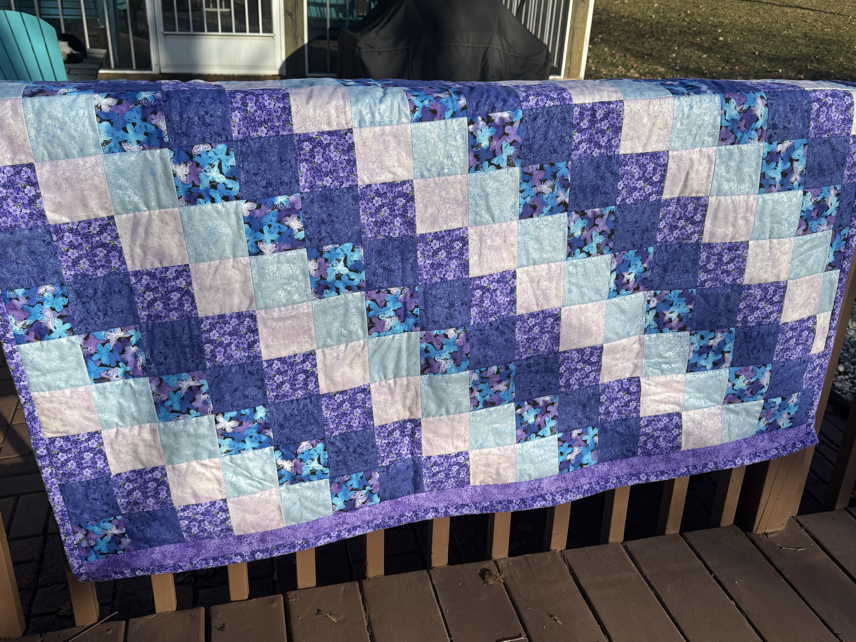
Finished Size: 45×60 in
I like to use this method to make a 45 x60 lap or crib quilt, but you can use this method to make any size you wish.
Reccomended Seam Allowances: 1/4 inch
Our Easy Quilt-As-You-Go Method
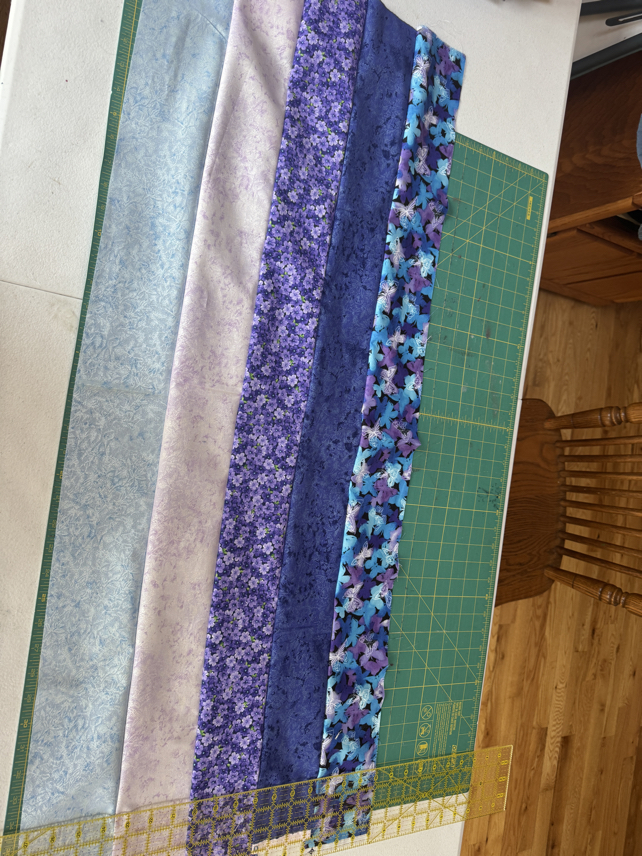
Step 1: Select the Fabric
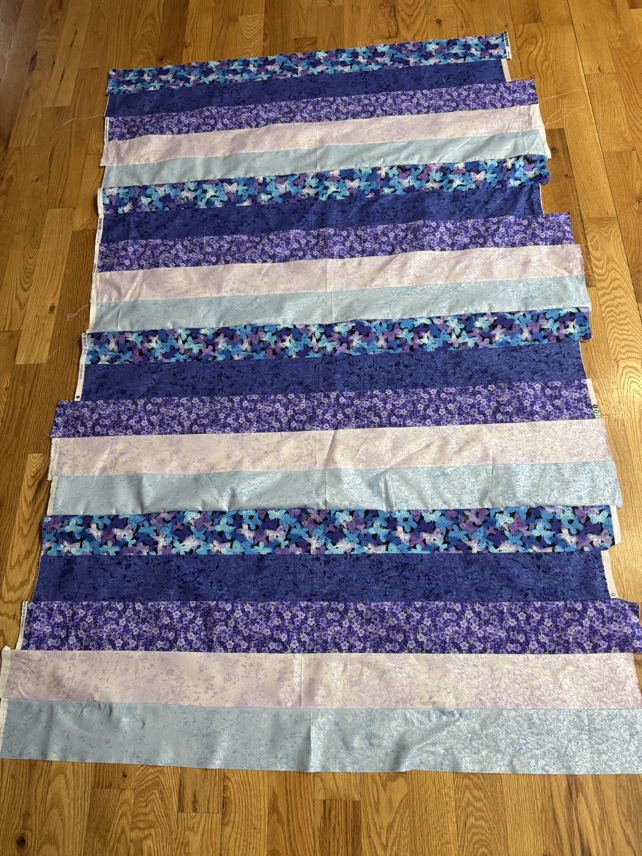
Choose your fabrics. It is best to choose a color scheme that goes well together for whatever purpose you are making the quilt. Keep in mind you will want a total of 5 ½ yards of fabric for the front for a crib size quilt, and an additional piece of fabric for the back, I divided it into 5 colors, each 1/2 yard for the front.
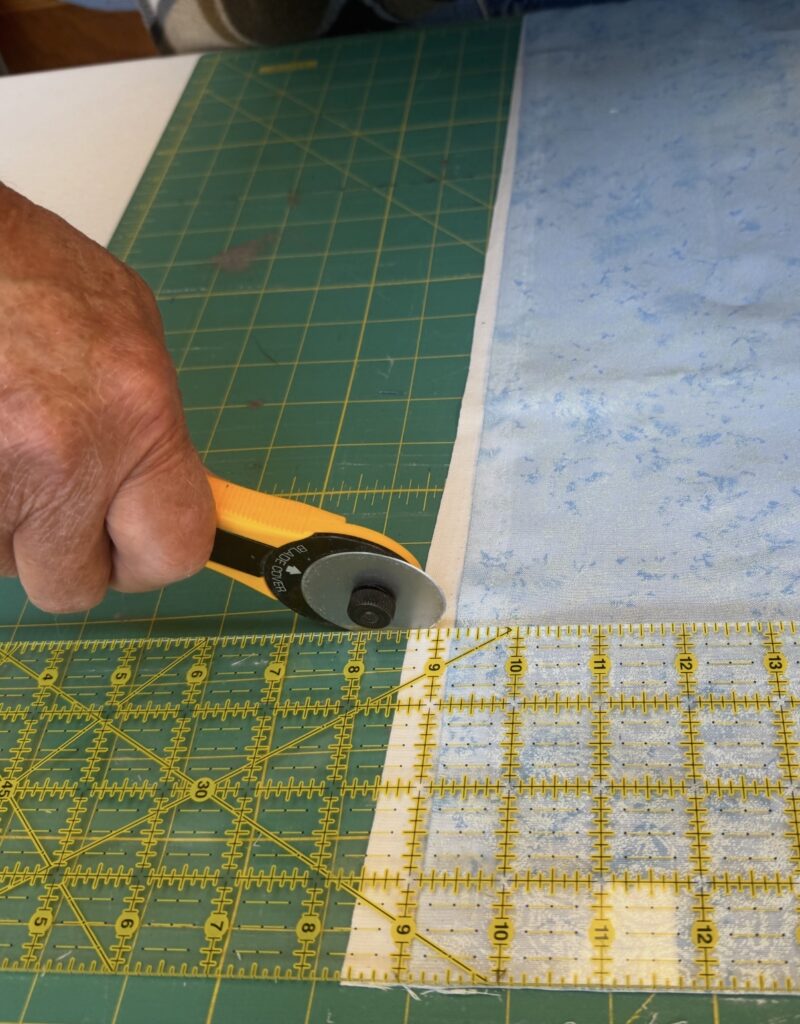
Step 2: Cut the Fabric
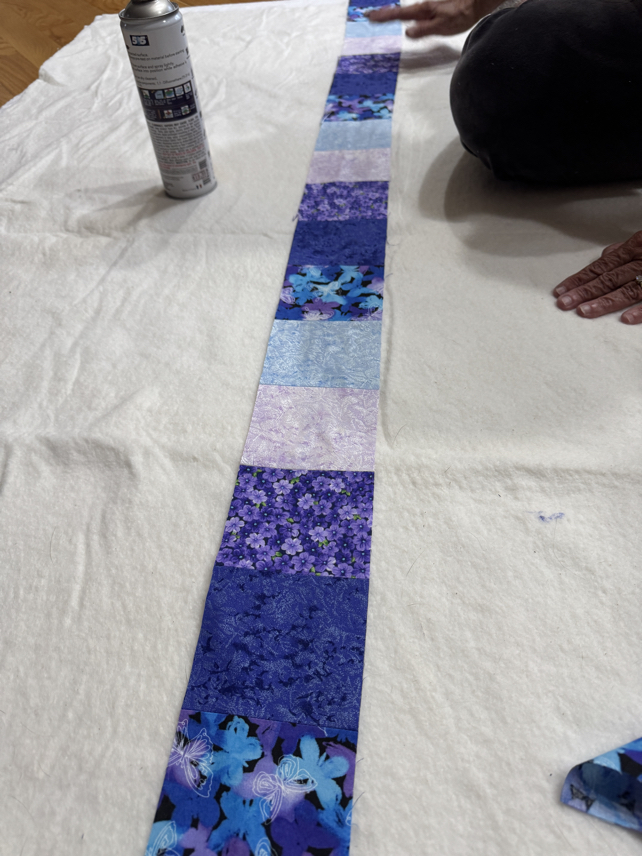
The next step is to cut the 5 colors of fabrics into 4” strips, you will have 4 strips of each color.
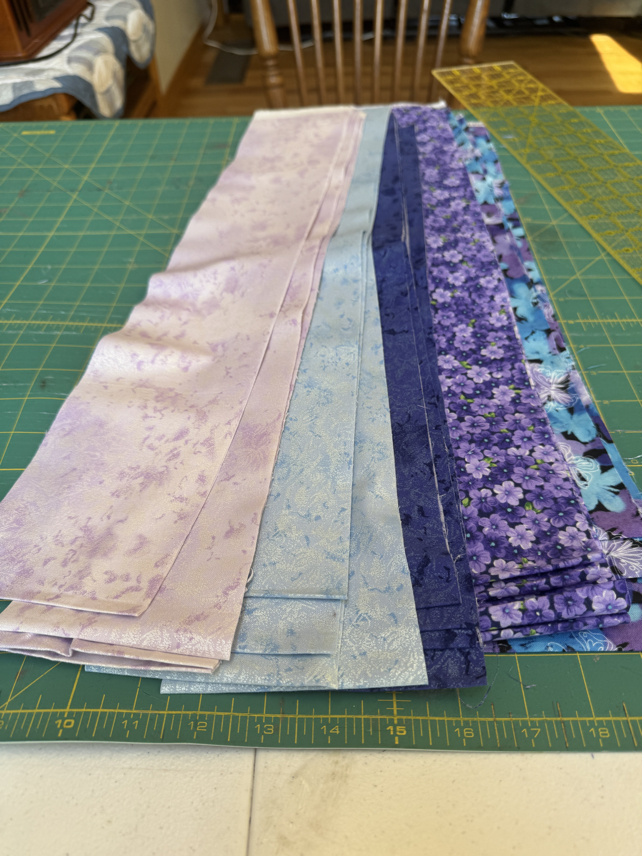
Step 3: Arrange the Front Pattern
Place the strips into your choice of color order.
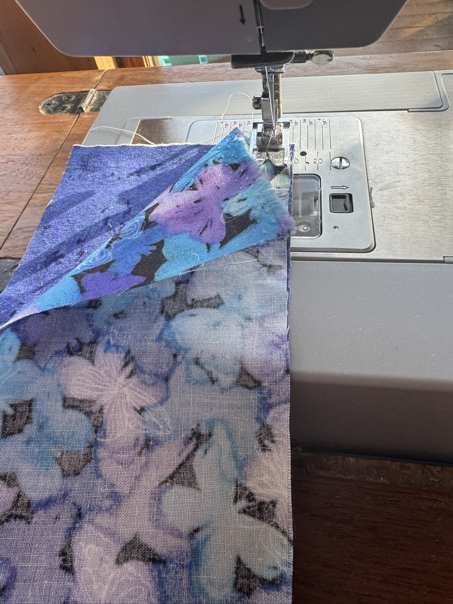
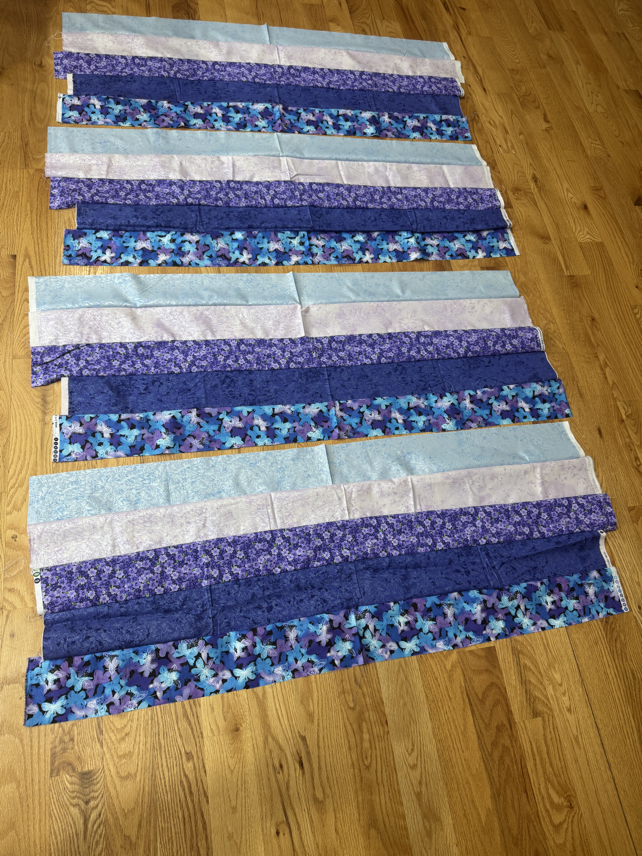
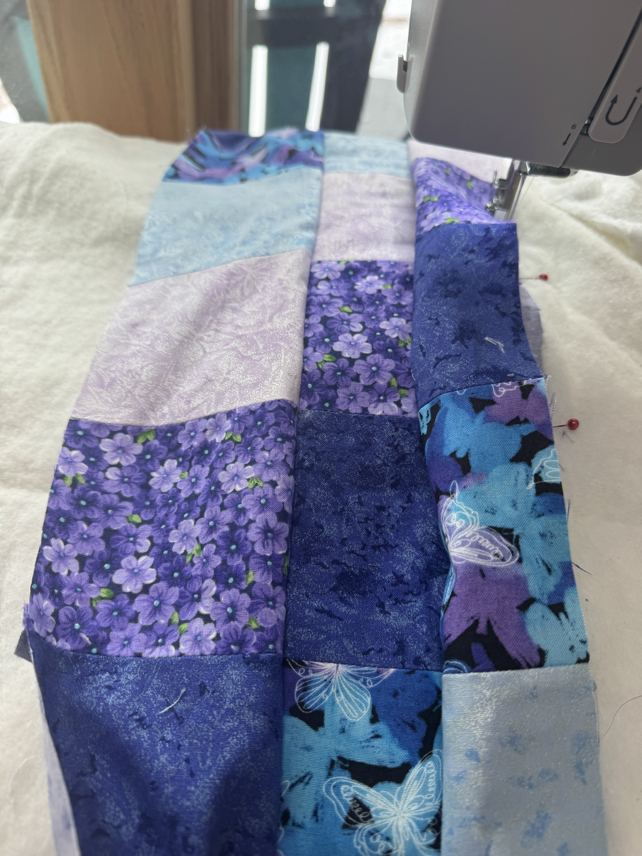
Step 4: Sew the Strips Together
Sew the strips together using a 1/4” seam. Be sure to sew all of the strips in color sequence, with one of each of the 5 different colors. In this step you will join 5 (one of each different fabric) strips together, completing 4 sets with 5 strips each.
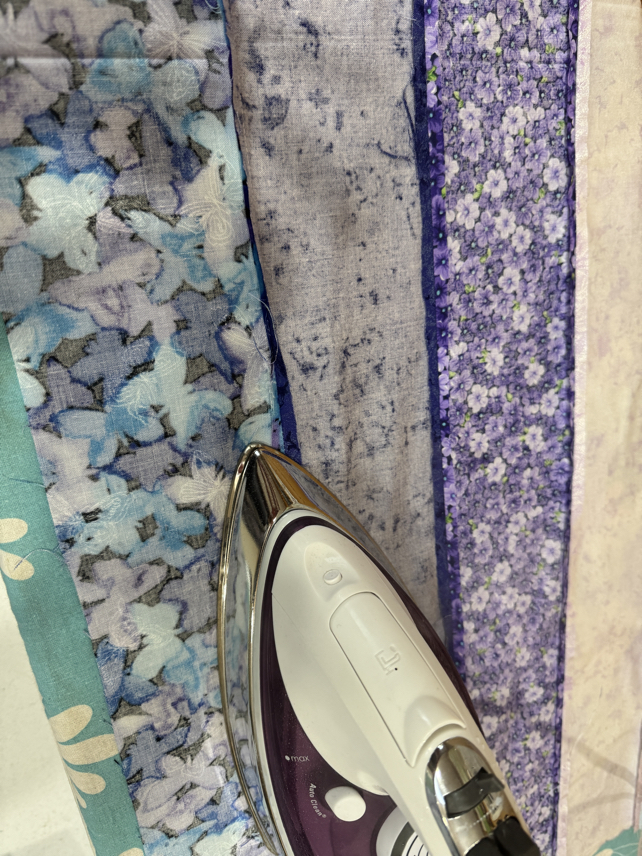
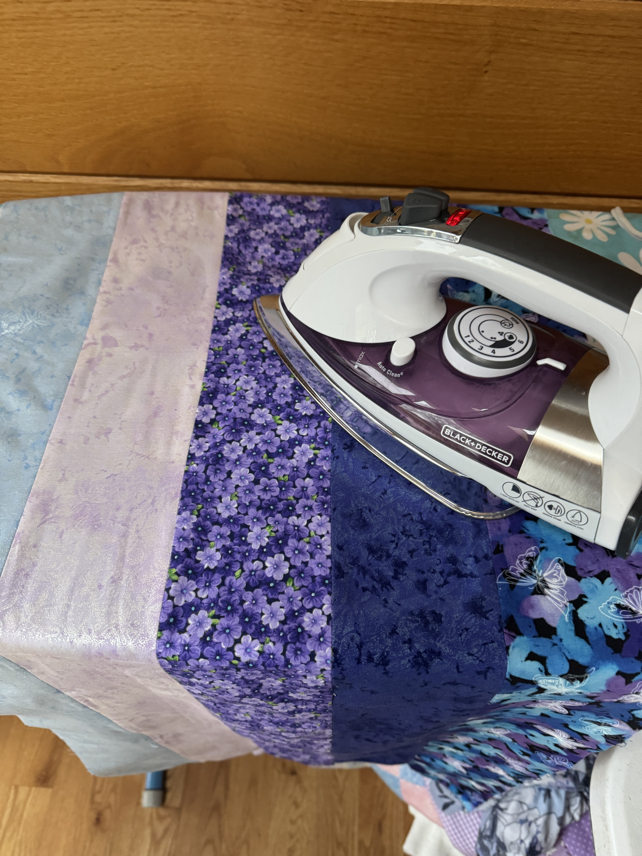
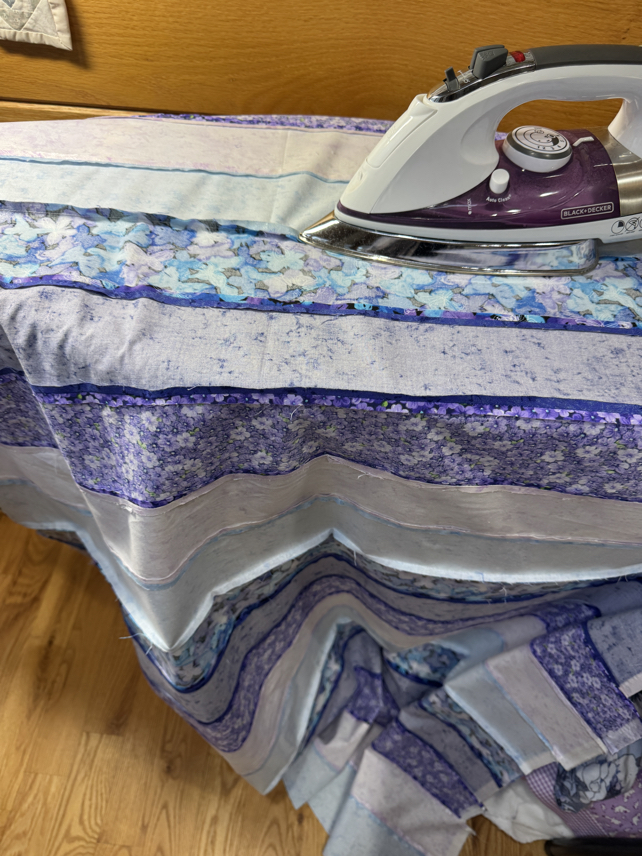
Step 5: Iron the Seams
Iron each 5 strip panel, so that you are pressing all of the seems open.

Step 6: Sew the Panels Together
Sew together the 4 panels of 5 strips, creating a large panel-20 strips long.
Step 7: Iron the Seams and Front
Press the last 3 seams open, but make sure that all of the seams are pressed open. Turn the entire 20 strip panel, and carefully use a hot iron to iron the whole front of this panel smooth.
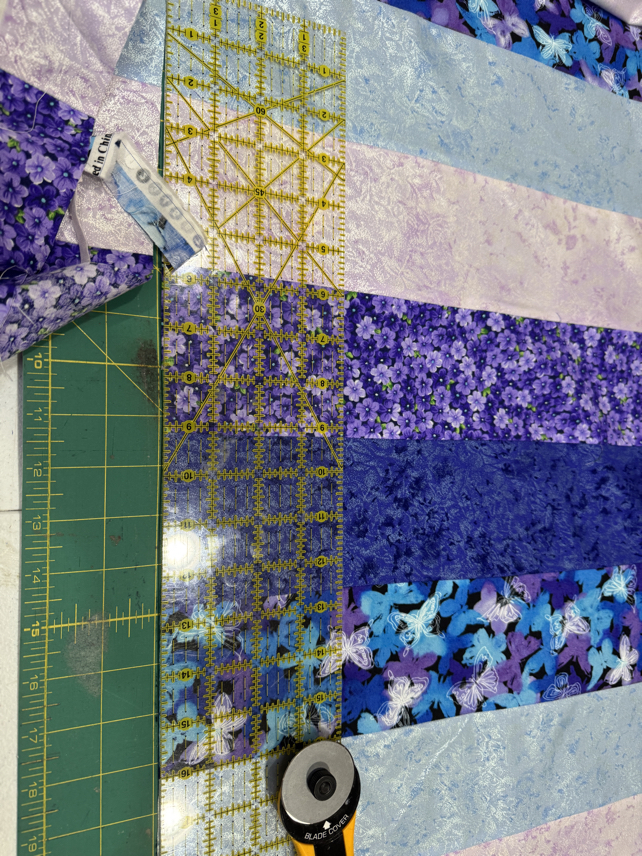
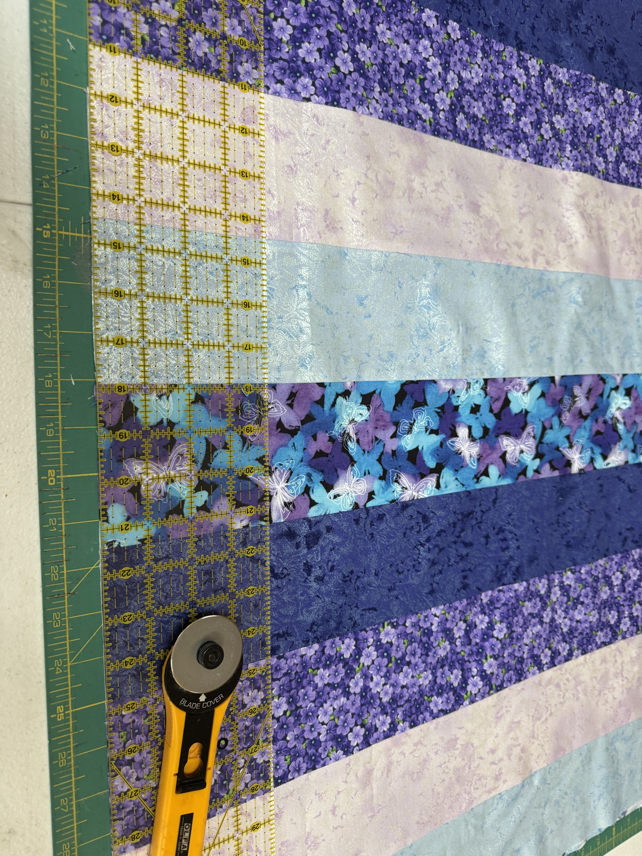
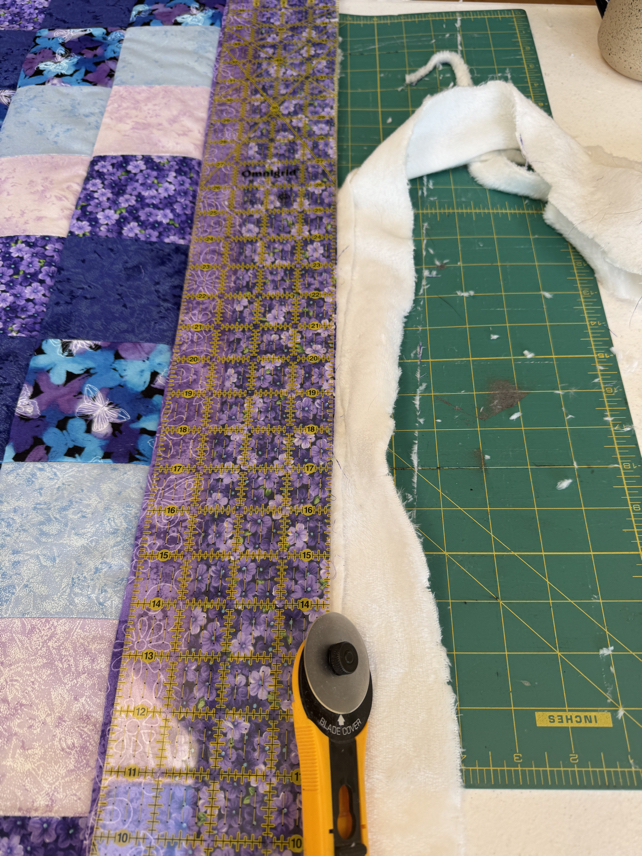
Step 8: Cut the Panel into Square Strips
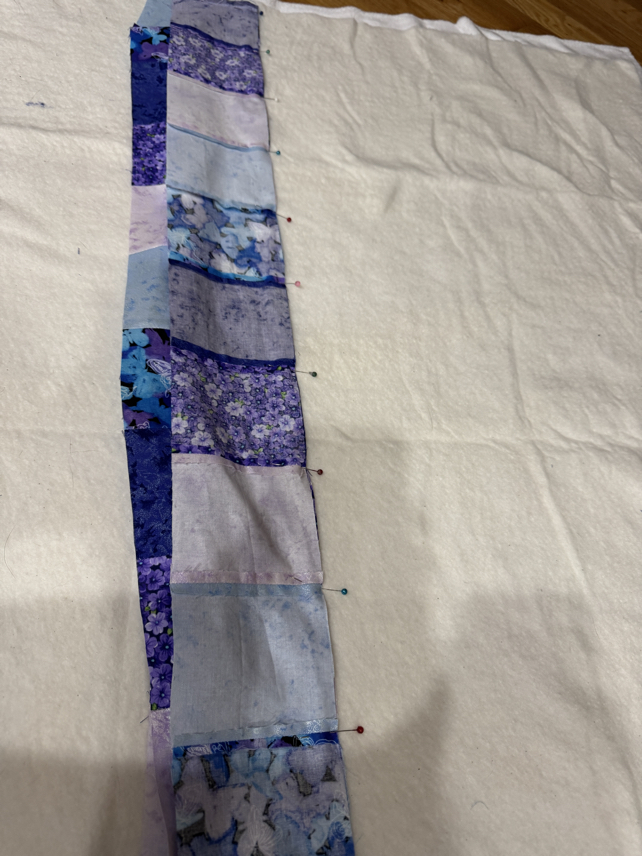
Place the large panel on cutting mat and using a long ruler and rotary cutter trim the uneven edges, forming a large rectangle. Then cut the panel into 4” wide long strips (of 4” connected squares). Set the strips of squares aside.
Step 9: Lay out the Quilt Front
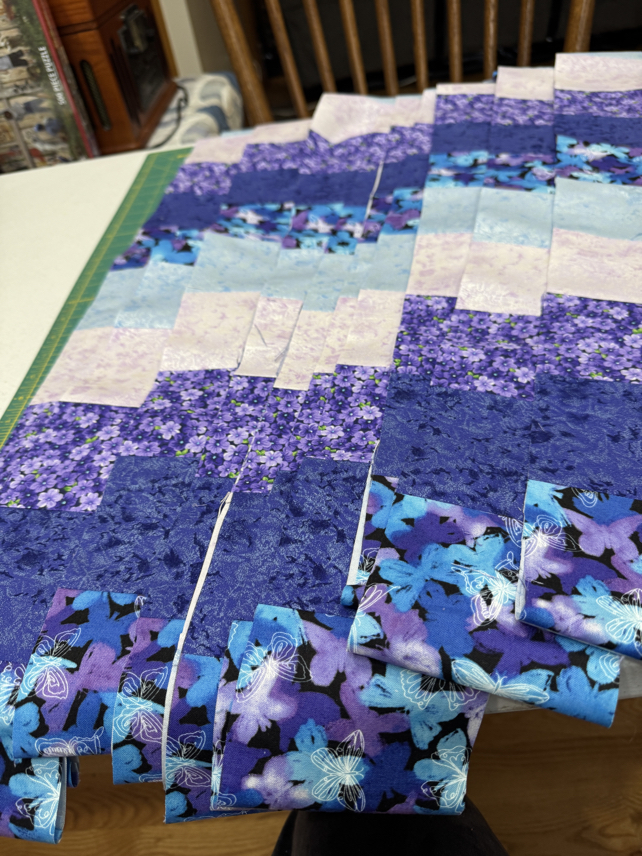
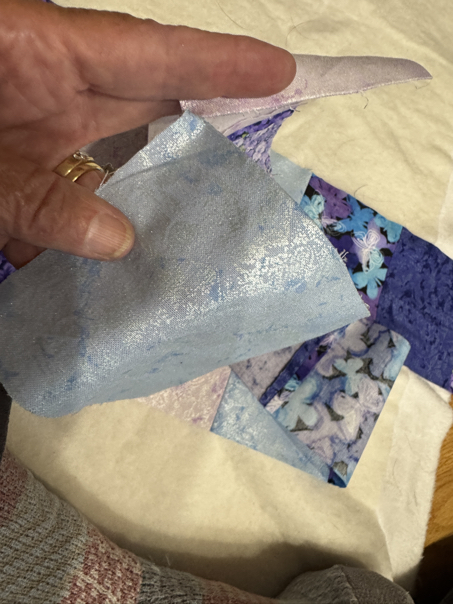
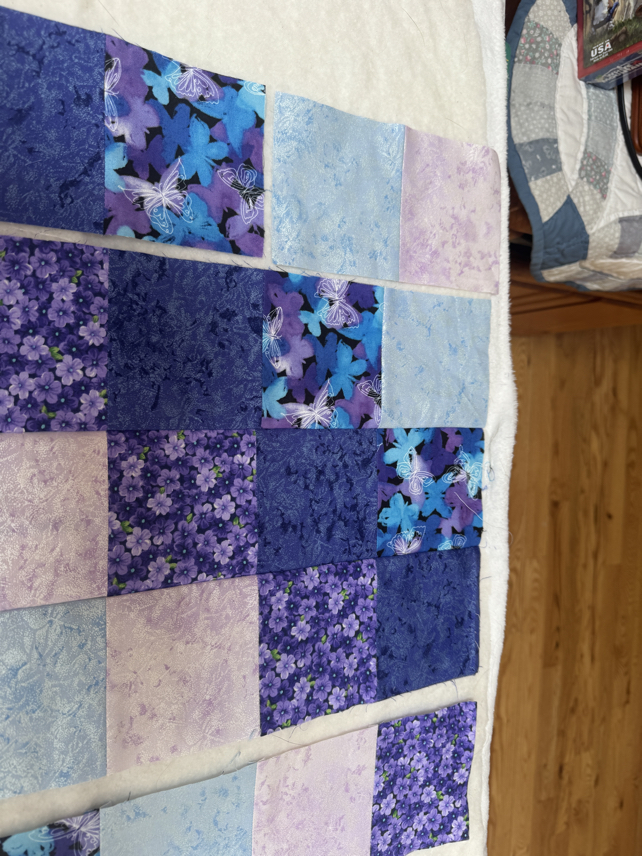
Now take the strips that you just cut out of the strips of squares, and lay them on a flat surface. Take the first strip and lay it out flat. Take the second piece and lay it out, staggering it one block over. Make sure that the color pattern lines up with the first strip, just each square should be indented by one block. Repeat this step with each of the cut quilt blocks.
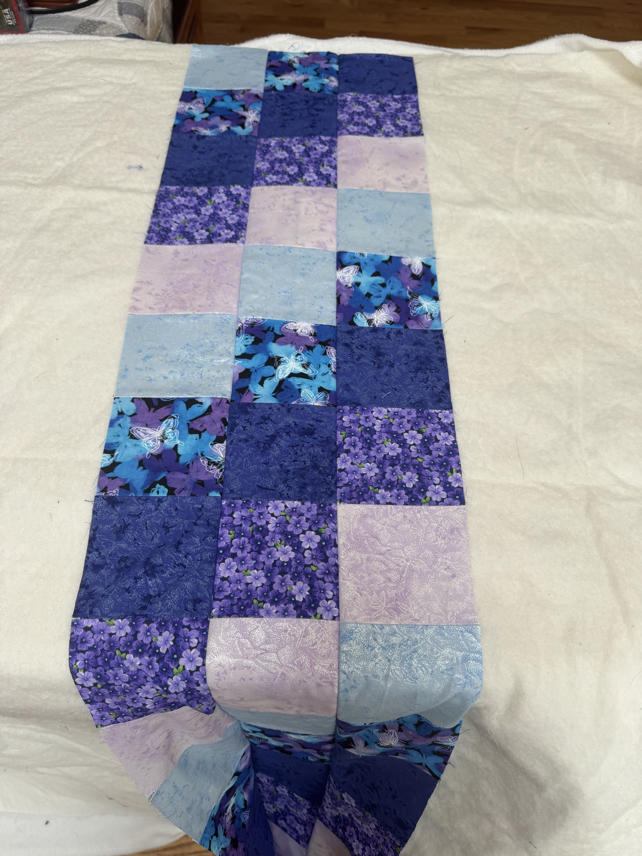
Step 10: Create the Diagonal Block Pattern
Next use a stitch ripper to remove the extra blocks. Your first strip will be left intact, the next strip you will remove one block from the end, the next block you will remove two blocks, and the next strip you will remove three blocks, etc. Move these removed blocks from one end of that strip where they were removed to the other end.
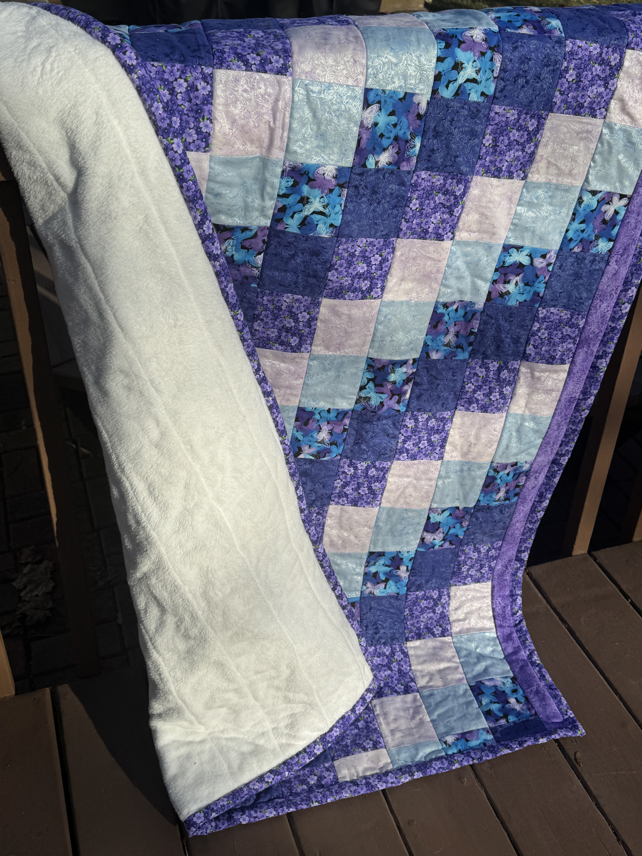
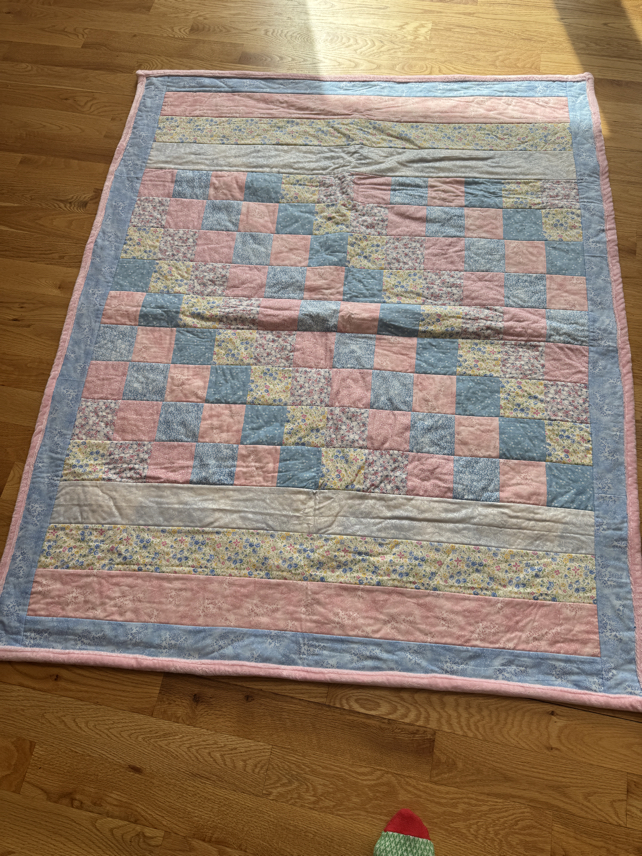
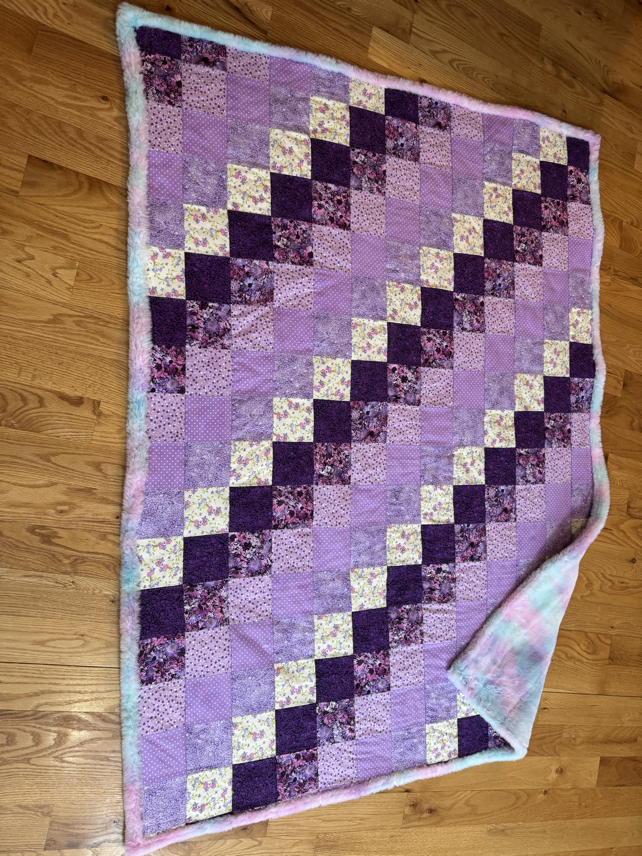
Make sure that the color pattern lines up, being indented by one block, then sew the blocks in place to complete each strip. These are your simple blocks that will make up the front of the quilt. When you have the entire front of the quilt laid out and each strip sewn to itself to create a diagonal block pattern, you are ready to start assembling the quilt.
Step 11: Starting the Quilt As You Go
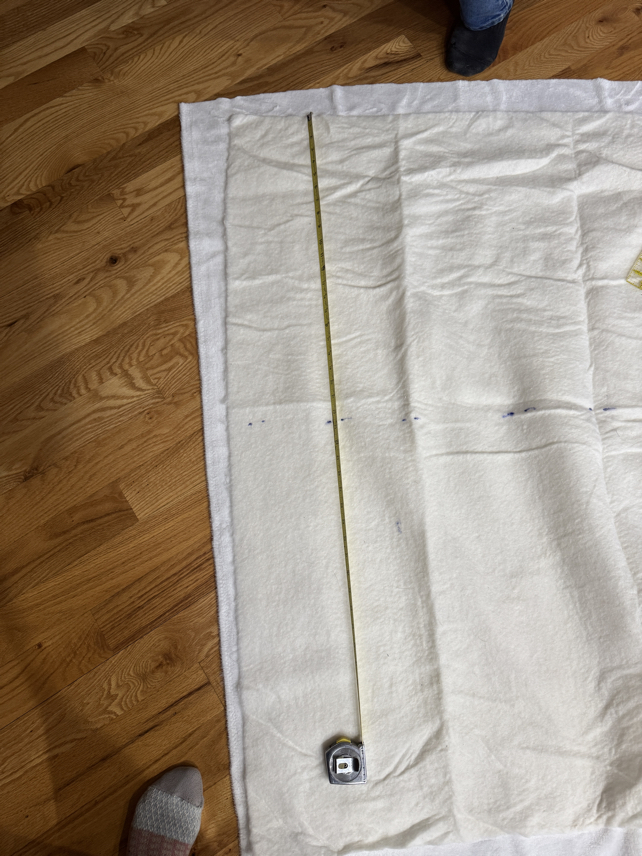
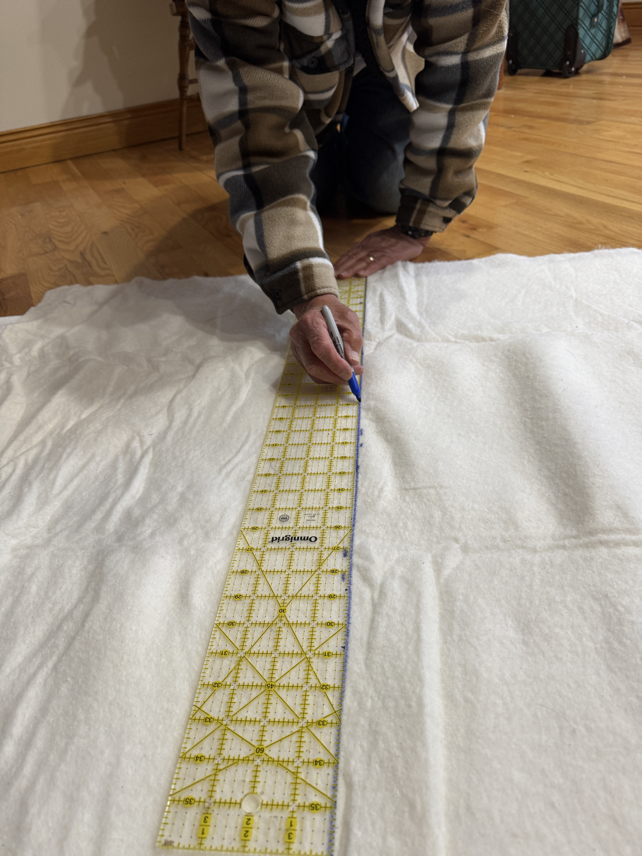
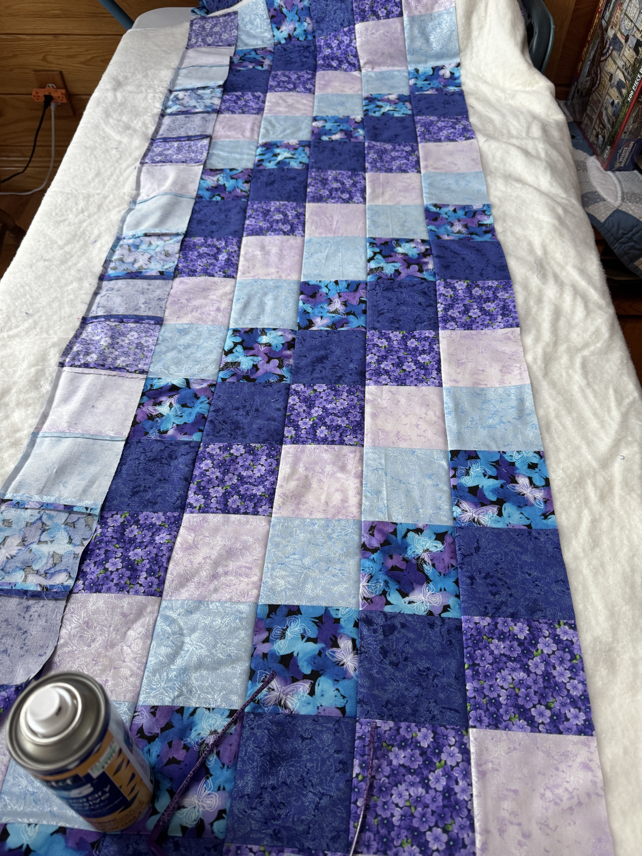
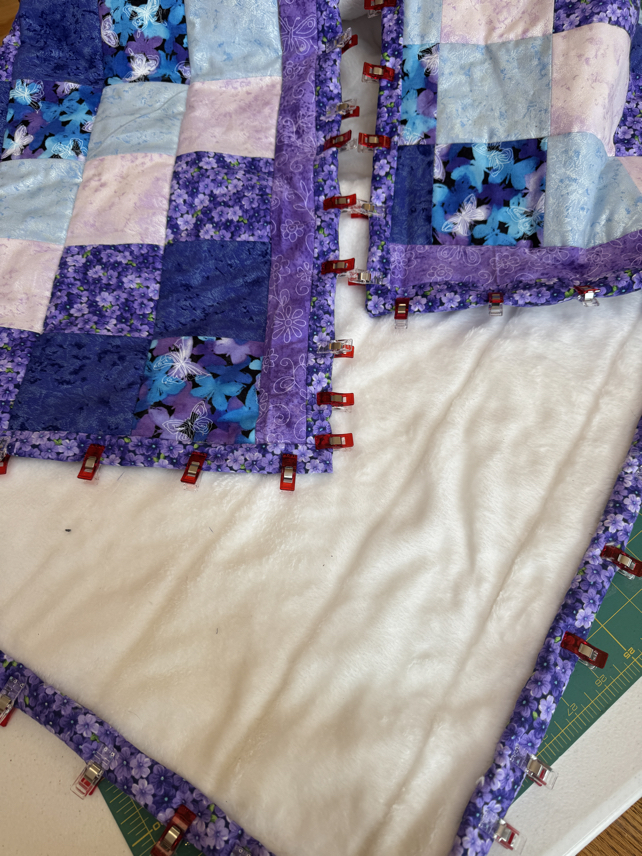
Lay the quilt backing (right side down) with the wrong side of the backing fabric facing up, making sure the fabric is on a smooth flat surface. Place the 45”x 60” batting squarely & smoothly on top of the backing. Measure the batting to determine where the center of the batting is located.
Draw the center line the full length of the batting. Fold the batting in half along the center line that you have marked. Spray the exposed half of the backing with fabric adhesive spray. Smooth the batting back in place over the half where adhesive was applied. Repeat these steps with the other half of the backing.
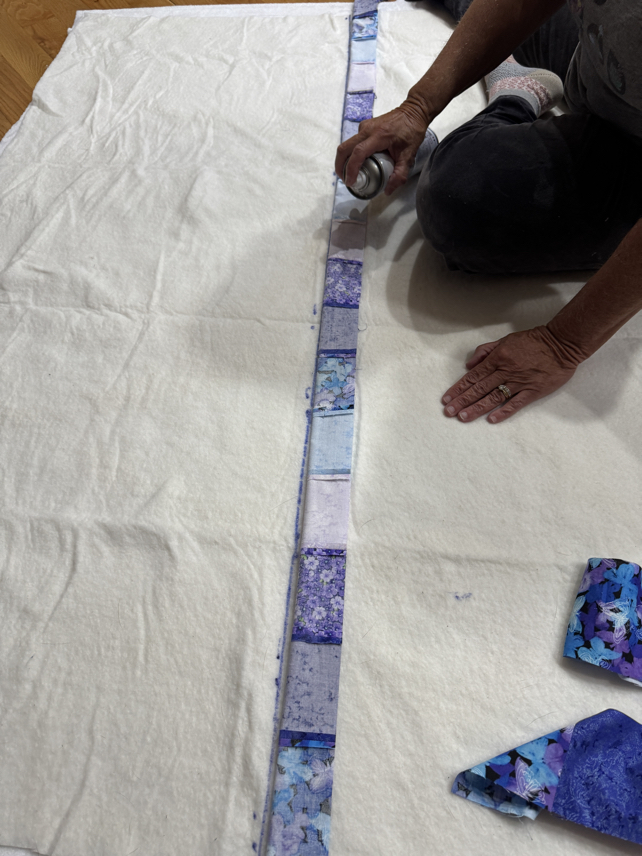
Step 12: Quilting the First Strip
Taking from your prepared strips, you will start from the center and work your way in both directions. Place the first prepared strip of squares on the center line. Carefully adhere this strip down to the center. Strips 2 & 3 are to be placed on either side of the center strip, face down. Adjust strips 2 & 3 one block down-left of center. One block up-right of the center strip. Pin them in place, face down onto the center strip.
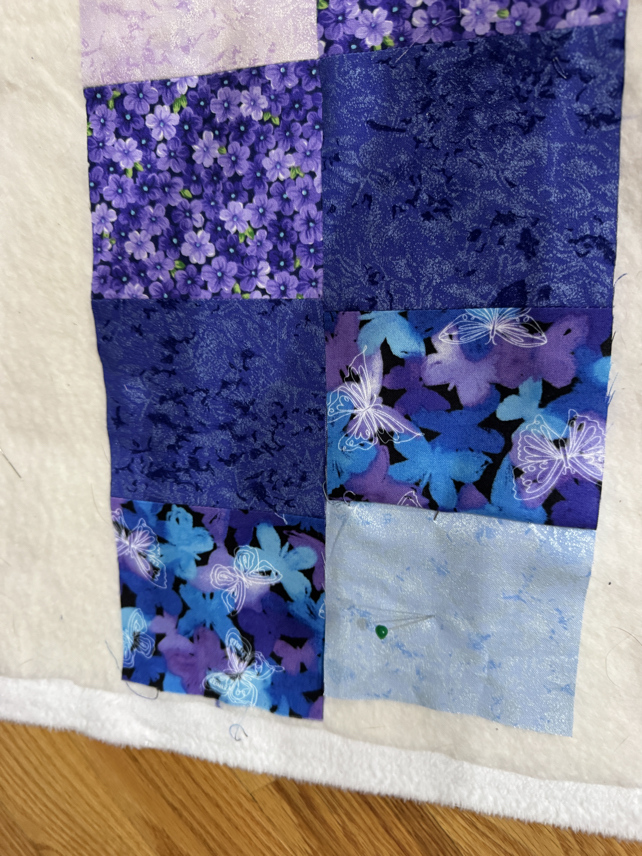
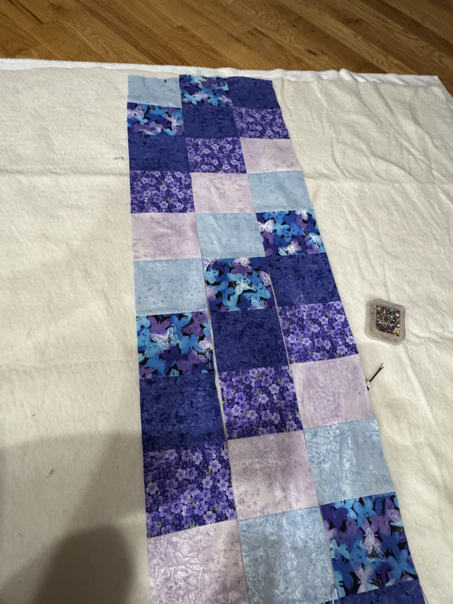
Sew Strips 2 & 3 in place, placing the walking foot at the edge of the center strip, attaching them to the center strip. Then spray these two strips in place & carefully smooth them down.
Continue this process of assembling the quilt top, working your way from the center, toward both sides. Be careful to keep the diagonal pattern going, by sliding new strips vertically up or down as needed.
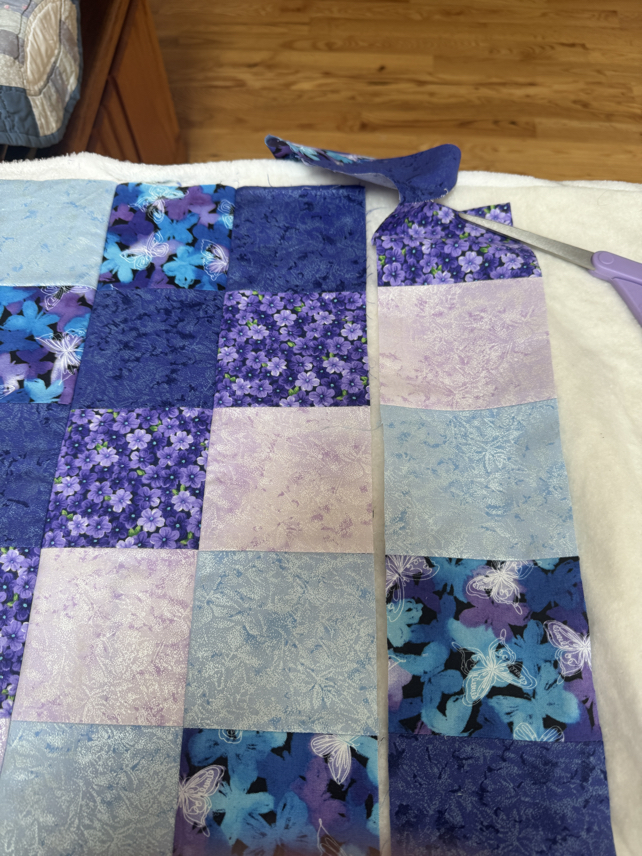
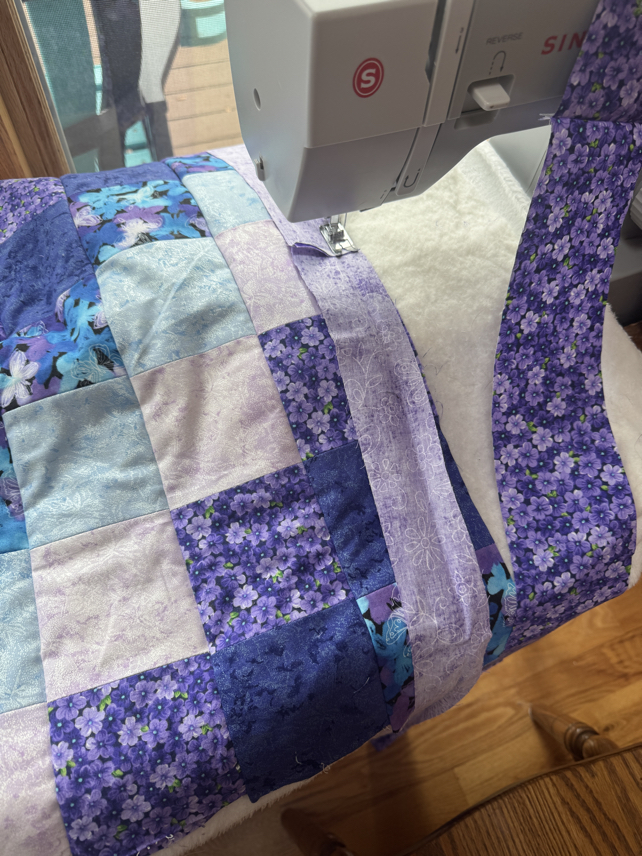
Step 13: Adding a Boarder
Once the quilt strips are all in place, you will want to add a border or two of your different coordinating fabrics. This gives a “finished look.
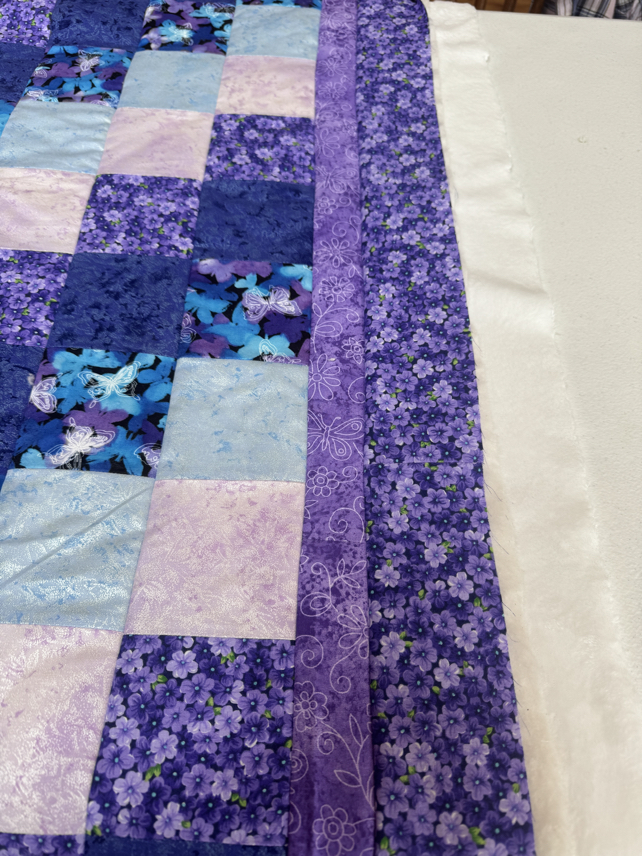
Step 14: Finishing the Edges
Prepare to hem the edges. Fold the edges twice so there are no raw edges. Keep the hem even. Pin or clip in place. Then hem all edges. I typically do this by hand, but you can do it with your machine if your quilt isn’t too thick and you work very carefully.
Enjoy your finished quilt!

Quilt as you go Pattern Copyright
Please note that this pattern is intended for personal use only, and is not for commercial distribution. By copyright, unless otherwise noted, you are not authorized to copy or claim my content as your own. You are, however, more than welcome to sell your finished products made with my patterns. I always appreciate it when you link to my patterns so that others can find them too!
Quilt As You Go For Beginners Tips and Tricks
Careful to Sew in Straight Lines
This easy quilting as you go is a great technique for beginners, but it is very important that you keep your stitching in very straight lines, no matter what. You may need to stitch very slowly when you begin, to make sure that everything stays nice and straight. If your lines get crooked, it is going to cause a lot of problems for you, so it is best to slow down and be very careful as you sew.
The Type of Fabric Is Best
There are a lot of different types of fabric to choose from, so knowing what works best to make a qult will help you in your fabric selection. The best type of fabric that you can use for this quilt are quilting weight cottons. You can use soft fleece if you want for the backing, but cotton is going to be the easiest to work with.
Some Practical Advice To Help You Out
Tip 1: I always recommend purchasing a bit more fabric than you think you will need. At least an extra quarter yard. That way you will have enough in case you mess something up, or even if you just miscalculated.
Tip 2: Once you’ve made a quilt this way, it makes the process much easier. You just might be hooked on this method of quilting as you go for beginners.
Tip 3: Make sure to always double check before stitching a row down, this way you can make sure that the squares are forming a diagonal pattern and nothing is out of place.
Beginners Tutorial for Quilt As You Go
This quilt as you go tutorial is a great way for beginners or quilters of any skill level to make a quilt that is nicely quilted when you finish. You can use this method even if you are an experienced quilter. This quilting method is a very easy way to have a nicely finished quilt that looks great but also doesn’t require extra work or a fancy machine to make it quilted.
Thank you so much for stopping by to check out our free tutorial for learning how to quilt as you go for a beginners tutorial. It is my hope that you will give this unique method a try, and that you will enjoy using this quilt as you go method.
Happy Quilting!
Be sure to follow us online on your favorite social media platform!
More Sewing Tutorials
PIN for Later!