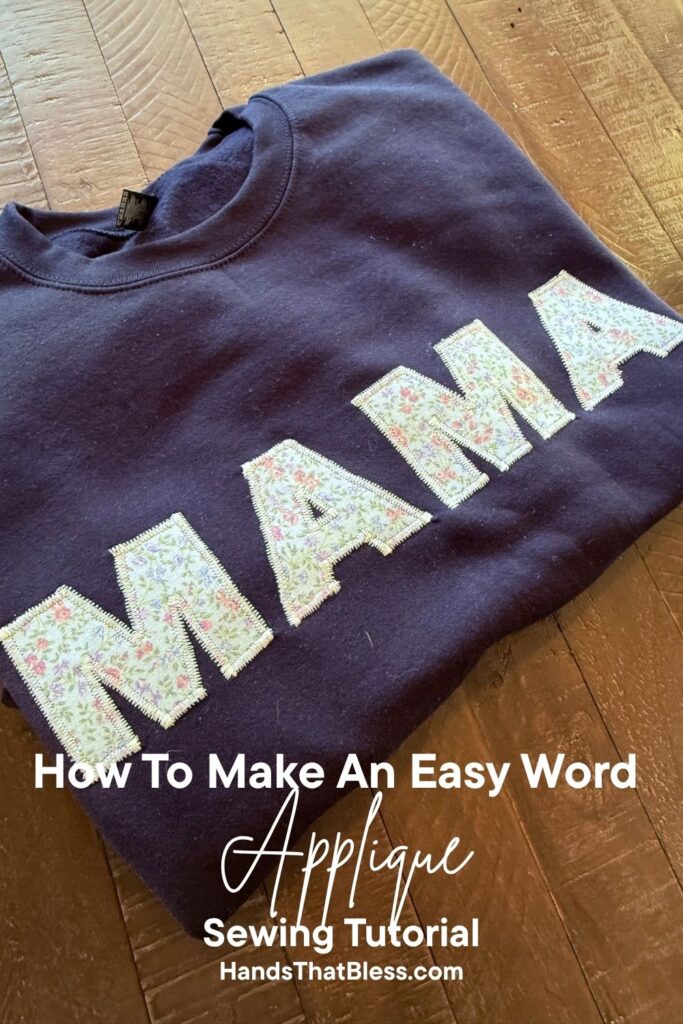
How To Make An Applique
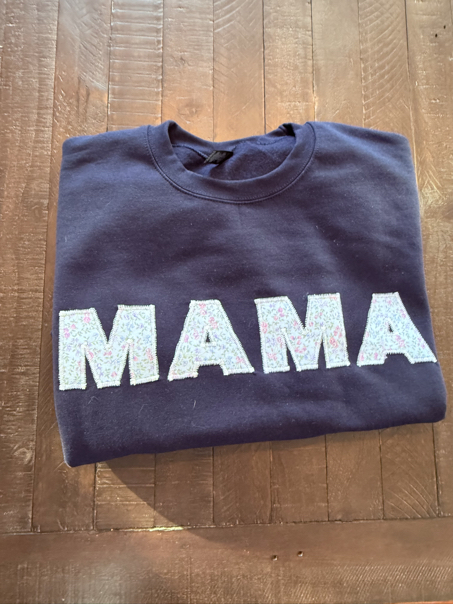
Making a word applique is a fun and easy way to add words to any sewing project, like a sweatshirt, pillow, t-shirt, or anything else you desire. You can of course use the same theory for appliqué shapes, but today I am going to focus on showing you how to easily add words to your sewing project.
There are many different ways that you could go about doing this, but I am excited to show you the perfect way to easily add any word you want to your sewing project, specifically a sweatshirt.
How to Make an Applique for Beginners
Making a simple word applique is surprisingly easy. You might think that you need special equipment or a fancy embroidery machine in order to do this, when the reality is that those things might be nice, but are not required.
A basic sewing machine that can do a tight zig-zag stitch can easily do the job just fine. You will also want some cotton fabric to use as your appliqué fabric, which matches nicely but stands out enough from your background fabric. Otherwise, there are only a few other things you really need in order to make word applique.
Let’s jump into the detailed instructions to get you started on this step-by-step guide to learn how to make your own word applique on any sewing project. In this example, I used a basic sewing machine, with a zig zag function, and placed the word applique onto a sweatshirt. Please feel free to mix things up as you wish.
Applique Sewing Tutorial
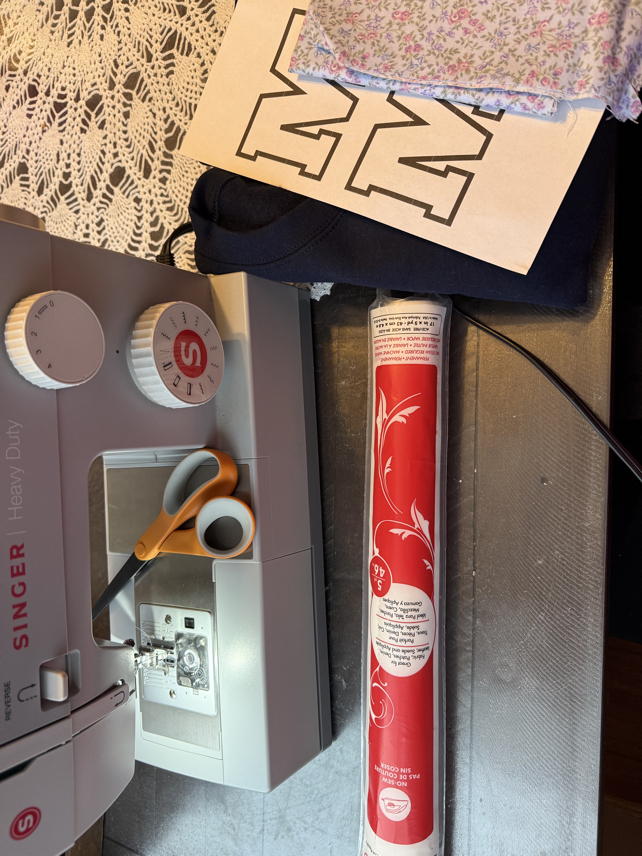
What You Will Need
Sweatshirt
Fabric to cut out appliqué pieces
Heat n bond lite iron on adhesive
Sewing Machine
Printer (reccomended)
Sharp scissors
X-Acto knife
Parchment paper
Colored thread (optional) but you will need thread of some kind
Ironing board and iron
How to Make an Applique Step by Step
Step 1: Create Your Pattern
First, you will want to create your applique pieces that will serve as your pattern template. There are a couple of ways you can do this. First of all, the most user friendly option is to open Canva, or another program you have access to with different fonts. Then type your word, nice and big, out of your desired font.
Or, if you have a silhouette or cricket cutting machine, you can use some versions of these to cut out your words. This is a nice and easy way to make sure your letters come out cut perfectly.
If you are looking for font ideas, Avenir Next Heavy is a nice option, or Alfa Slab One is another good option. Basically something nice and bold, but feel free to choose whichever font you like the best.
Type out your word, so that it is nice and large, then print out your pattern template, and cut out the letters.

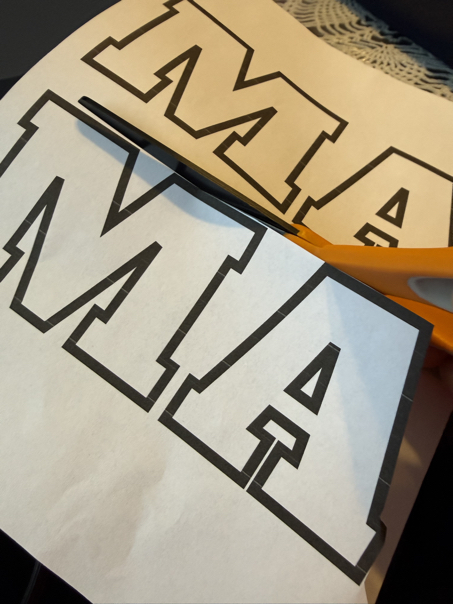
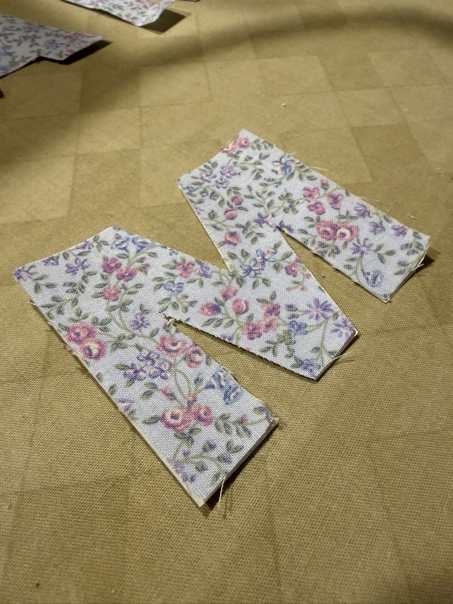
Step 2: Cut Out The Pieces
Place your cut out pattern pieces on top of your piece of fabric you want to use for the appliqué pieces. Pin them in place, and carefully cut out each of the letters.
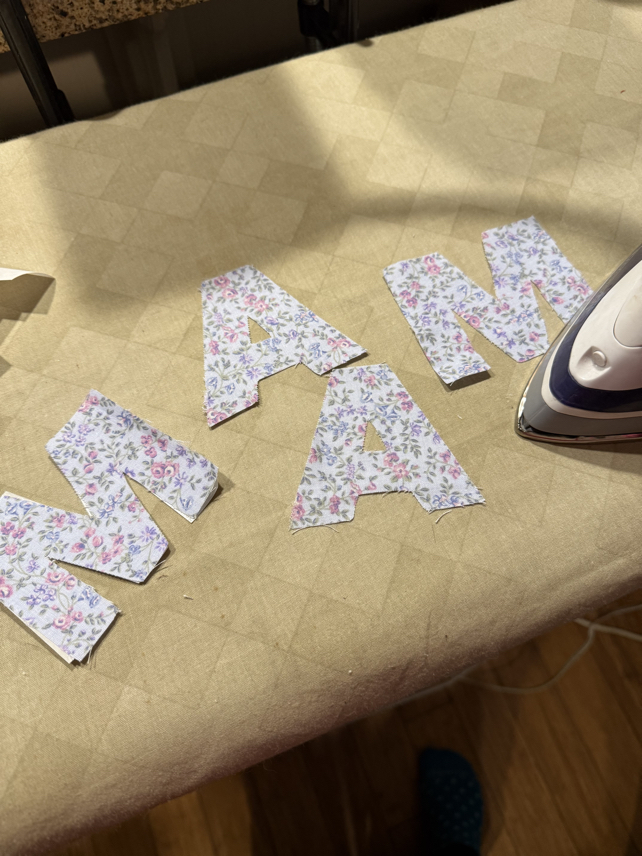
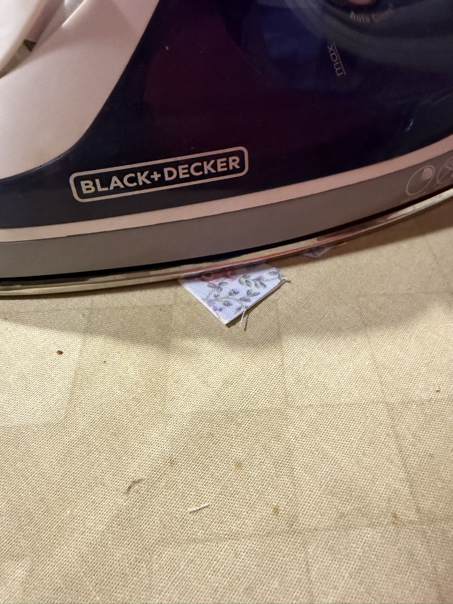
Step 3: Apply The Heat N Bond
Next, apply the heat n bond to the wrong wide of the fabric. Make sure that the write side stays clean and untouched by the adhesive.
With just one sticky side of the heat and bond fabric exposed, iron it to the back side of each of your cut out letters. Trim away any excess material and let them cool. Tip: I used parchment paper to help keep this process nice and clean.
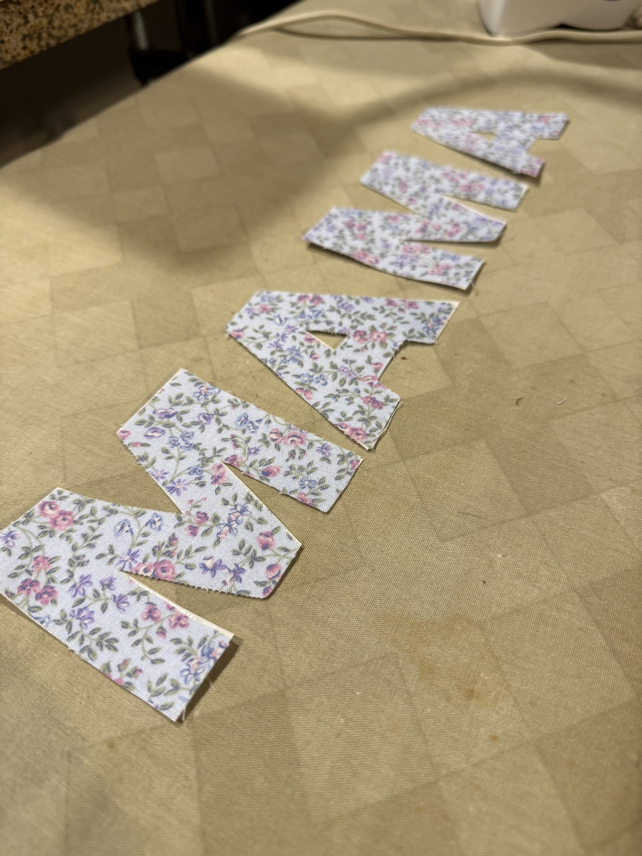
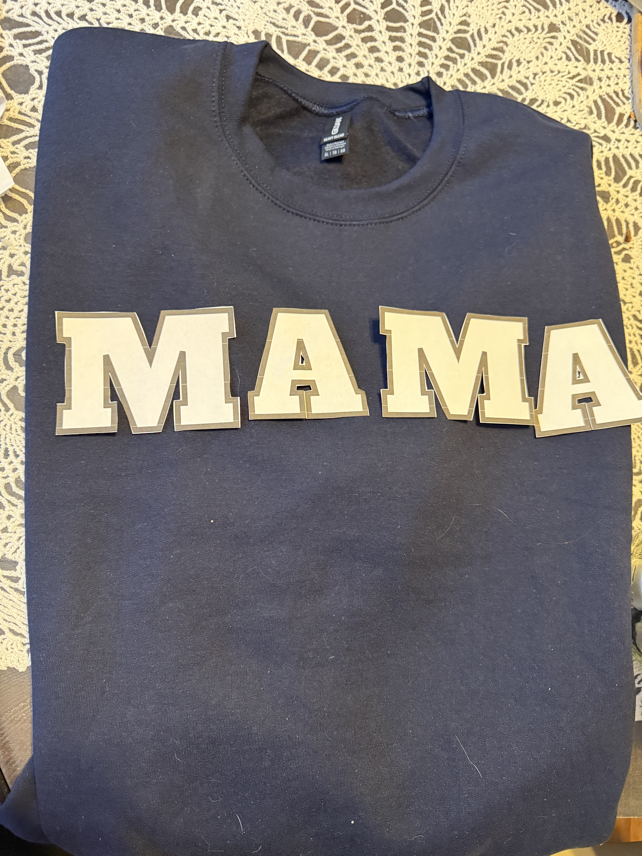
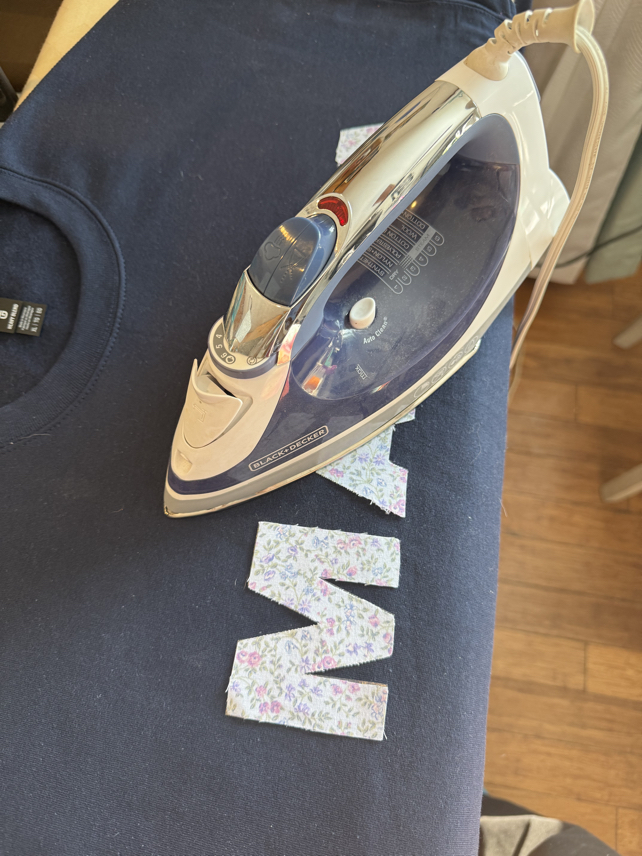
Step 4: Iron To The Sweatshirt
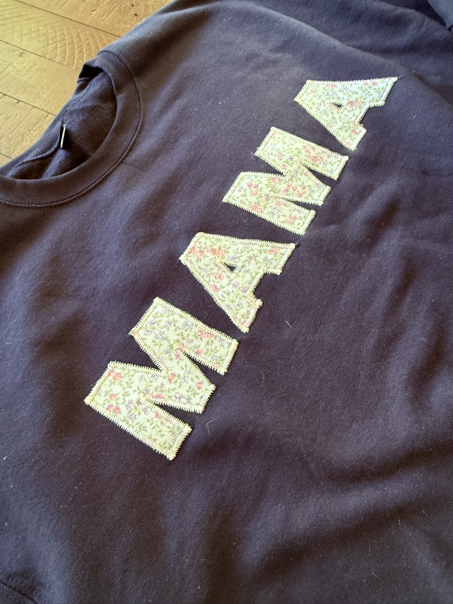
Now it’s time to determine your placing of the letters on your. Arrange each of the letters on the front of the shirt, remembering to leave a little space in between each letter for your stitching.
Once you are happy with how the letters appear, you can remove any remaining paper to cover the adhesive, and cover them with parchment paper before ironing them in place.
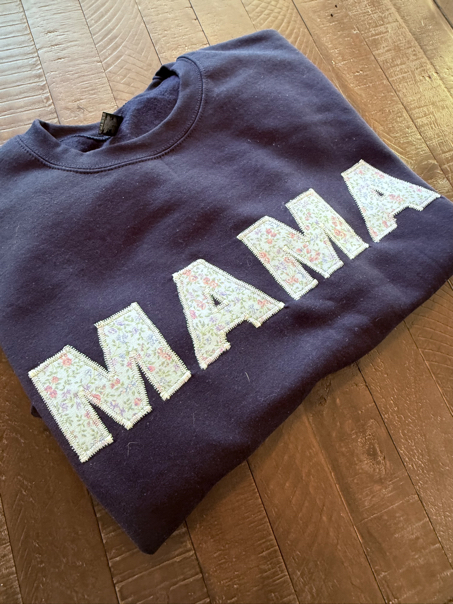
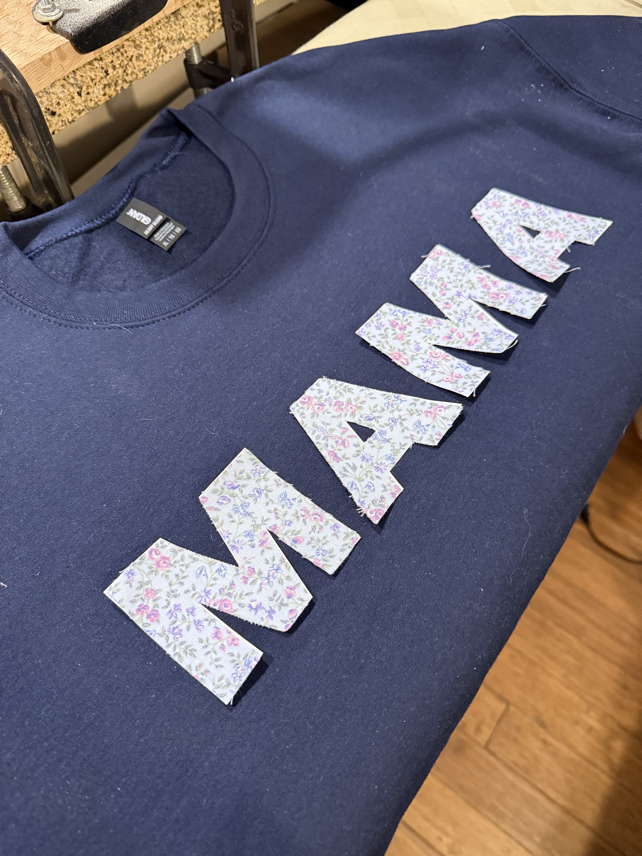
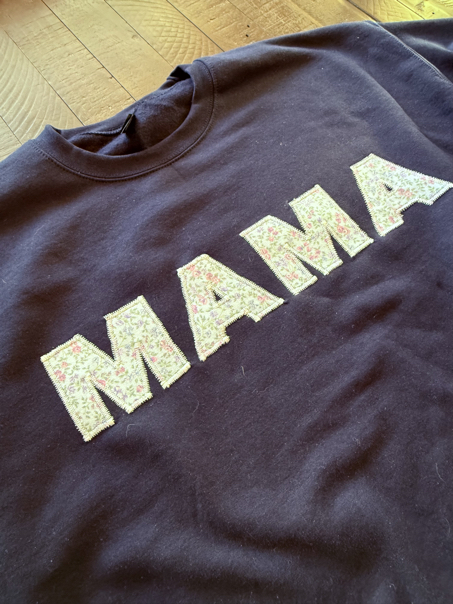
Step 5: Sew Around The Edge
Now it’s time to sew a tight zig zag stitch around the raw edge applique. To do this make sure your machine is turned to the zig zag function. Then change your settings so that the stitches are wide but close together.
Place the presser foot on the edge of your applique so that your stitches will sew one side into the applique fabric and the other side into just the shirt. Exactly where you place the presser foot may depend on your machine. Please do a test on some scrap fabric before working on your shirt.
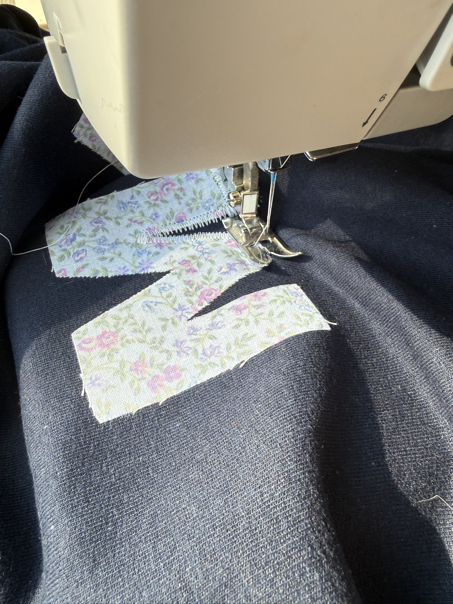
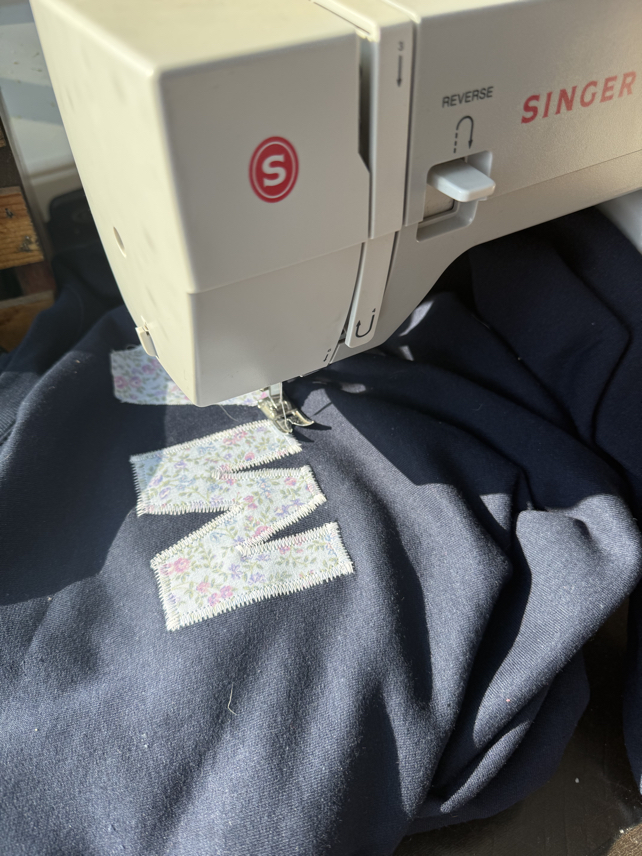
Sew a tight zig zag stitch around all of the edges of your applique letters. Making sure to keep your shirt completely flat and with just the single layer being sewn as you go.
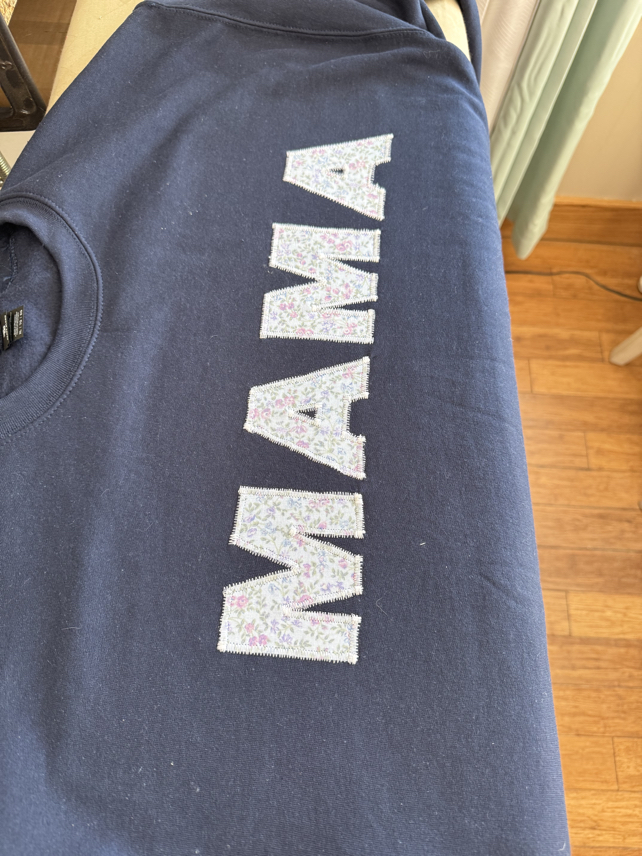
When you have sewn around all of the edges, your shirt is finished. Pull any loose threads to the inside and tie them off before finishing. Enjoy!
Word Applique Sewing Tutorial Copyright
Please note that this pattern is intended for personal use only, and is not for commercial distribution. By copyright, unless otherwise noted, you are not authorized to copy or claim my content as your own. You are, however, more than welcome to sell your finished products made with my patterns. I always appreciate it when you link to my patterns so that others can find them too!
Appliqué Projects to Make
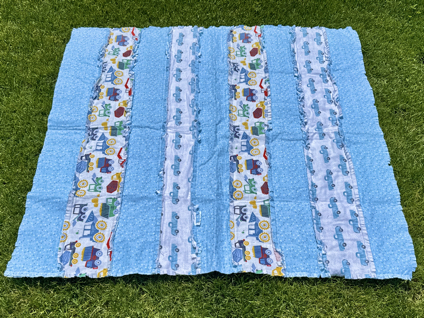
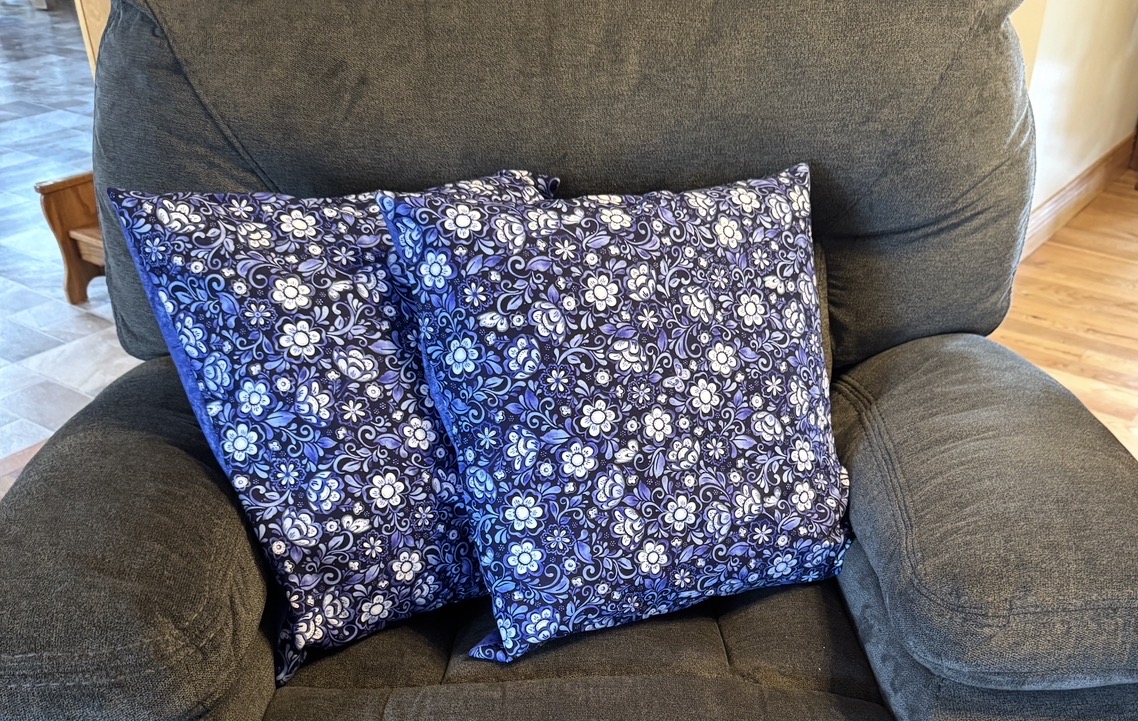
There are many things that you can make by following these steps for sewing applique to your project. In addition to letters, other ideas include simple shapes, or wven some fun characters on baby quilts. No matter what you make with your appliqué design, make sure to take your time and work carefully and neatly.
Tips and Tricks
Test on a piece of scrap fabric
The best advice I can give is to test it first on scrap fabric. This applies to ironing your adhesive fabric, to getting your zig zag stitch nice and tight but with the right tension, and also knowing where to place your presser foot. All of this works so much better if you first test it out on scrap fabric.
Finishing the top thread
When you are done sewing around the edges of your applique, make sure to tuck any loose threads you have through to the back of your project, then tie it off. This way you get a nice finished look.
Getting the perfect shape
Achieving the perfect shape with you applique letters can be difficult. Make sure that you choose a nice, clean, and bold font. This will help. Then if you have access to a cutting machine, I’d highly recommend using it. Otherwise take your time, and do your best.
Can you use embroidery thread?
I would not recommend using embroidery thread for this project, unless you plan to do all of the sewing by hand.
How to Make an Applique Easy
Applique sewing doesn’t have to be complicated. In this easy tutorial, we learned how to sew applique letters to a sweatshirt, or any project. This is a fun and easy way to add words to anything.
Thank you so much for stopping by to learn how to make an applique. I hope you’ll give it a try, and I hope you will enjoy this project!
Happy stitching!
Be sure to follow us online on your favorite social media platform!
More Sewing Ideas
PIN for Later!