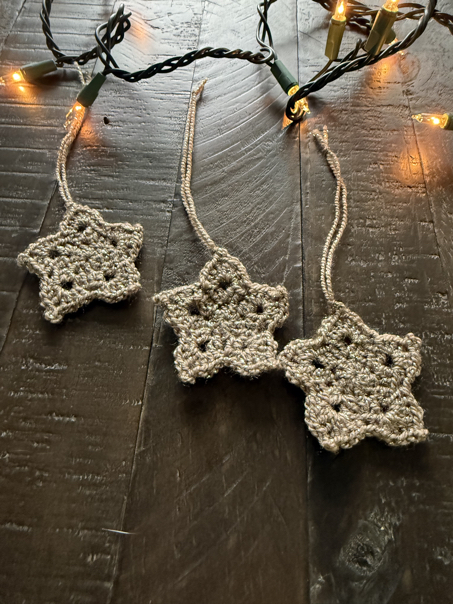
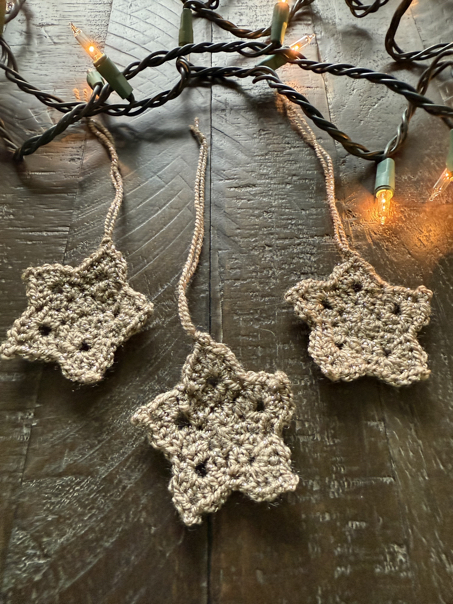
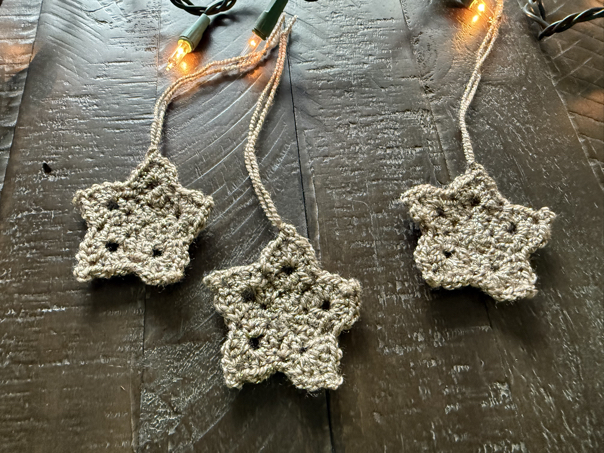
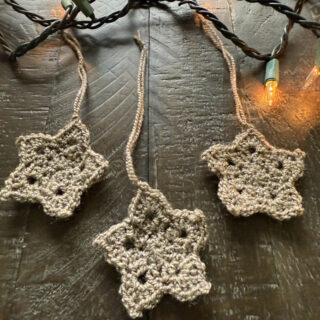
How To Crochet A Star
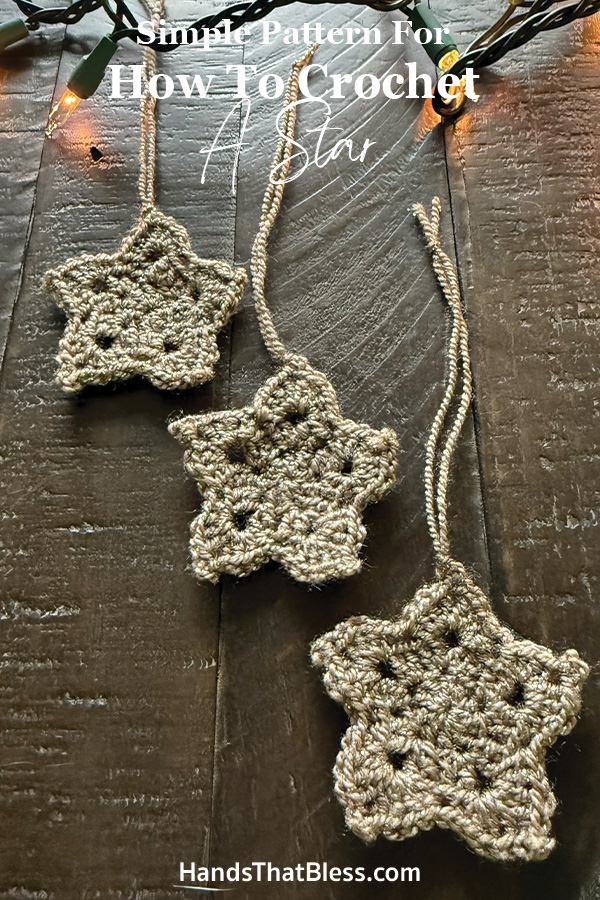
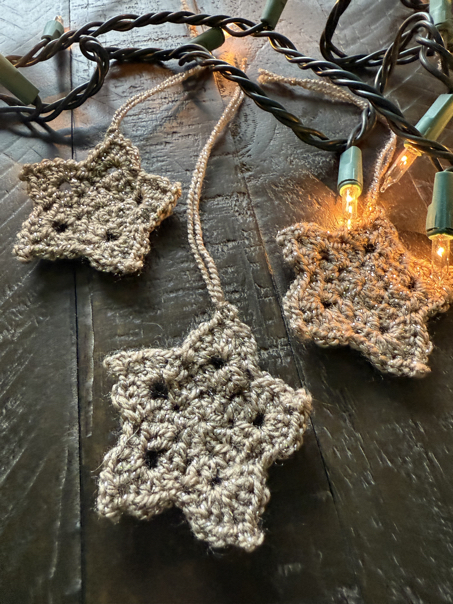
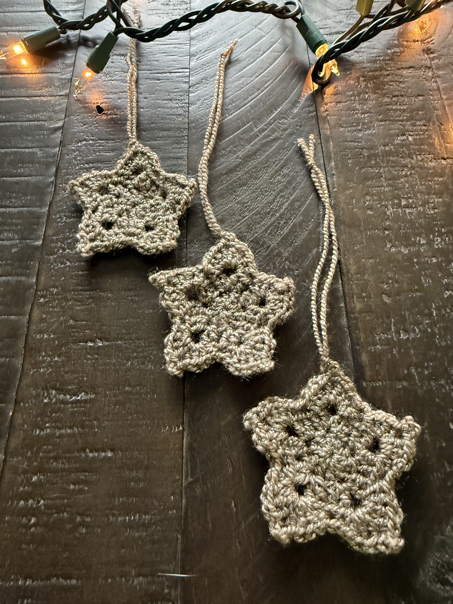
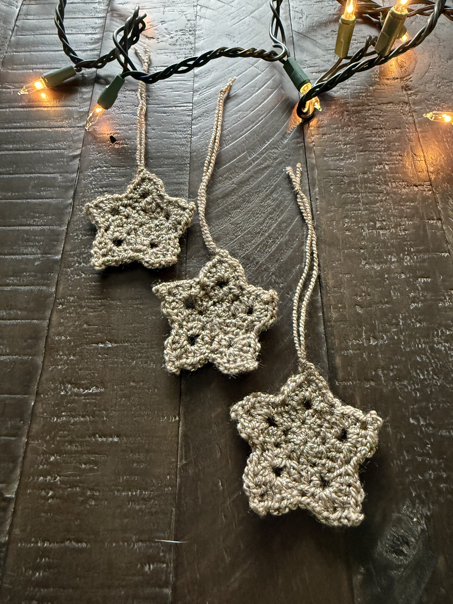
I am so excited to share with you how to crochet a star. These cute little crochet stars are the perfect addition to your Christmas decorations this holiday season. In this free pattern I will show you how you can easily make these crochet stars.
Free Crochet Star Pattern
There are many different ways you can make crochet stars as well as many different ways that crochet stars can be used. I am biased to making crochet stars using this pattern, because they are not only easy to make, but also really cute.
There are also several ways you can use crochet stars. You can hang them up from one of the star points to be used as a crochet star Christmas tree ornament, use them as star appliqués to attach to another item, as a Christmas gift decoration, or to make another item out to the stars by attaching several stars together by the points of the star.
Join our Mailing List and Receive a…
No matter how you decide to use the crochet star pattern, there are many great purposes for these sweet little Christmas stars. Let’s get started by jumping into the step by step instructions to making the easy crochet star pattern.
Easy Crochet Star Pattern
Materials
#4 medium-weight yarn
4.5 mm crochet hook
Scissors
Please note that this pattern is written in US terms
Abbreviations
sc – single crochet
mr – magic ring
sl st – slip stitch
tr – treble crochet
hdc – half double crochet
dc – double crochet
ch – chain
st/sts – stitch / stitches
How To Crochet A Star Pattern

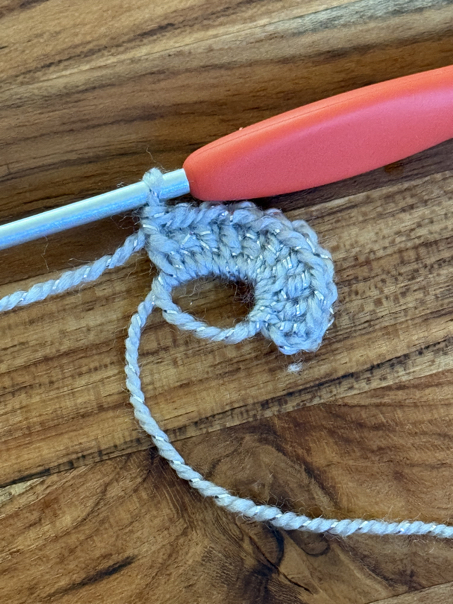
Round 1: make a mr
Round 2: ch 2 sts (counts as the first dc st), in the mr make 9 more dc sts. Join with a sl st to the top of the ch sts. (10 dc sts)
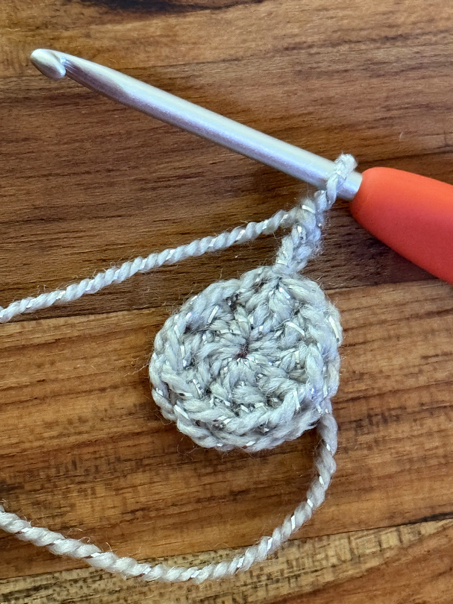
Round 3: ch 3 (counts as the first dc st), dc in the same st, ch 2, in the same st as previous, make 2 more dc sts, skip the next dc space. In the next st, make (2 dc, ch 2, 2 dc, skip the next st) Repeat 3 times more. Join with a sl st.

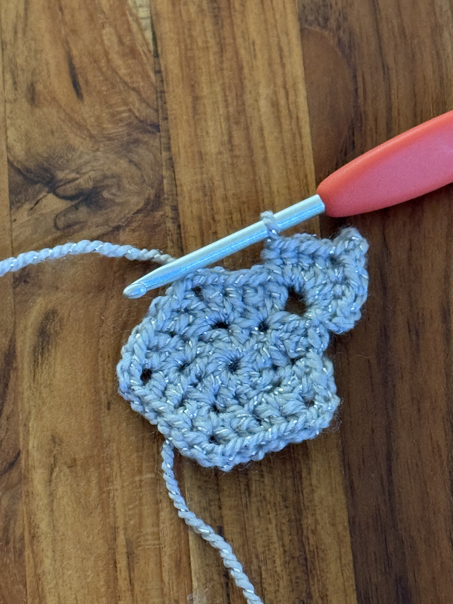
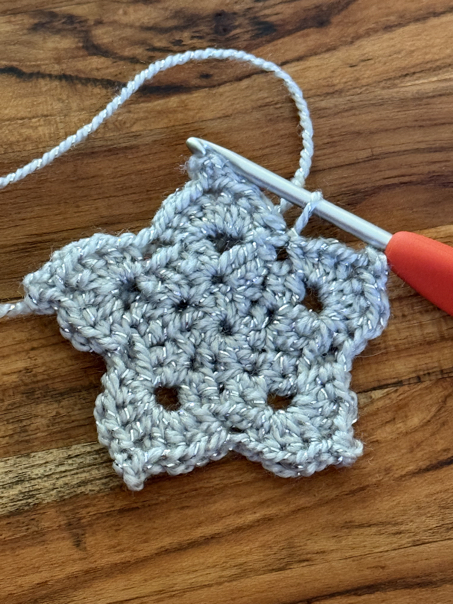
Round 4: ch 1, sl st in the first ch 2 space. Ch 2 (counts as the first hdc st). In the same ch 2 space make, hdc, 2 dc, ch 3, in the 3rd ch from the hook make a sl st, then make 2 dc and 2 hdc sts in the same ch 2 space. Skip to the next ch 2 space. Work (2 hdc, 2 dc, ch 3, sl st in the 3rd ch from the hook, 2 dc, 2 hdc) Repeat 3 times more. Join with a sl st. Finish off and weave in the end.
After the last slip stitch, make sure to leave a long tail of yarn, then weave it into the project so that it is hidden.
Making a Hanging Loop
If desired, cut a piece of yarn that is approximately 6 inches long. Pull one end of the yarn through one of the points. Use your crochet hook to loop it around. Tie the loose ends together to make the hanging loop. Trim the ends of the yarn as needed.
Crochet Star Pattern Copyright
Please note that this pattern is intended for personal use only, and is not for commercial distribution. By copyright, unless otherwise noted, you are not authorized to copy or claim my content as your own. You are, however, more than welcome to sell your finished products made with my patterns. I always appreciate it when you link to my patterns so that others can find them too!
You Might Also Like:

Cute Crochet Stars Tips and Tricks
Selecting your crochet hook size
The crochet hook size that you use will largely depend on your stitching tension, and the yarn that you use. Larger hooks will make bigger stars and looser stitches. Feel free to adjust the crochet hook size that you use for these crochet stars until you are happy with the outcome.
Making different sizes
You can make different sized stars by using smaller or larger crochet hook sizes, as well as by using smaller or larger yarn sizes. If you would like small stars, you can use a light weight yarn, or for little stars, even crochet thread. Make sure to adjust the crochet hook size accordingly if you change the yarn weight used for this crochet star pattern.
Choosing your yarn
I highly recommend using a number four medium weight yarn for these little crochet stars. However, you can adjust the yarn weight to your liking. Just make sure that you use a smaller or larger crochet hook depending on what yarn size you use, so that your hook is the right size for your yarn.
Crochet Star Pattern
These cute crochet stars are a quick and fun project to make this Christmas season. They are a great way to add a little extra holiday decoration to your home without spending a ton of time on your crochet project. Plus, you get to enjoy the cute stars when you are finished.
Thank you so much for stopping by to learn how to crochet a star! It is my hope that you will give this free crochet star pattern a try, and I hope you enjoy making this quick and fun project this Christmas season. Now it’s time for you to get started by giving this free crochet star pattern a try!
Happy crocheting!
Be sure to follow us online on your favorite social media platform!
More Free Crochet Patterns
How To Crochet A Star
Materials
- #4 medium-weight yarn
- 4.5 mm crochet hook
- Scissors
Instructions
- Round 1: make a mr
- Round 2: ch 2 sts (counts as the first dc st), in the mr make 9 more dc sts. Join with a sl st to the top of the ch sts. (10 dc sts)
- Round 3: ch 3 (counts as the first dc st), dc in the same st, ch 2, in the same st as previous, make 2 more dc sts, skip the next dc space. In the next st, make (2 dc, ch 2, 2 dc, skip the next st) Repeat 3 times more. Join with a sl st.
- Round 4: ch 1, sl st in the first ch 2 space. Ch 2 (counts as the first hdc st). In the same ch 2 space make, hdc, 2 dc, ch 3, in the 3rd ch from the hook make a sl st, then make 2 dc and 2 hdc sts in the same ch 2 space. Skip to the next ch 2 space. Work (2 hdc, 2 dc, ch 3, sl st in the 3rd ch from the hook, 2 dc, 2 hdc) Repeat 3 times more. Join with a sl st. Finish off and weave in the end.
After the last slip stitch, make sure to leave a long tail of yarn, then weave it into the project so that it is hidden. - Making a Hanging Loop
If desired, cut a piece of yarn that is approximately 6 inches long. Pull one end of the yarn through one of the points. Use your crochet hook to loop it around. Tie the loose ends together to make the hanging loop. Trim the ends of the yarn as needed.
PIN for Later