Teddy Bear Crochet Pattern
I am so excited to share this cute teddy bear crochet pattern with you, and the best part is that it is an entirely free amigurumi pattern for you to enjoy making. You don’t have to be an expert at your crochet skills in order to make this cute little bear.

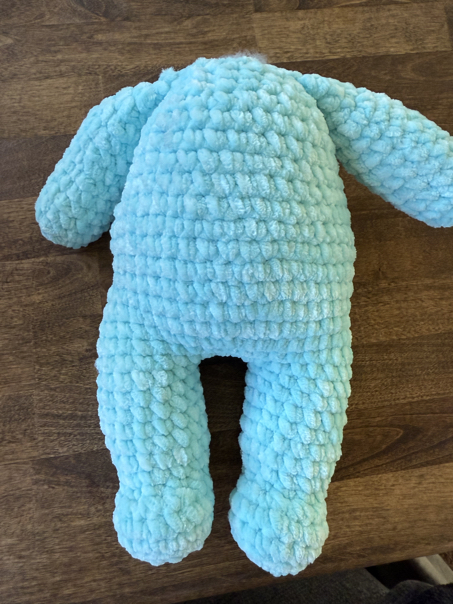
In the details below I have outlined each step you will want to take to make this adorable crochet bear pattern. Unlike some other crochet teddy bear patterns, this little guy is made with a chubby belly, and can even be stuffed enough so that his butt is noticeable.
I recommend finishing this little amigurumi teddy bear out with some safety eyes, and then using colored floss to stitch on its nose, mouth, eyebrows, and even eyelashes if you want. The finishing details make all the difference to make your adorable teddy bear absolutely irresistible.
Classic Crochet Teddy Bear Pattern
This easy crochet teddy bear pattern walks you through each step with detailed instructions needed to make this cute little teddy bear. If you like to make crochet amigurumi, or crochet stuffed animals, this is a great pattern to try.
I tried to write it so that it would be an easy pattern for crocheters of all skill levels to follow. Plus, if you have any questions, feel free to drop a comment or send me an email.
These adorable teddy bears make the perfect gift for any young ones in your life, or even for a baby shower gift. Some older kids have also been known to enjoy these stuffies that are made with so much love.

Tips and Tricks
Now, before we jump into the detailed pattern, let’s first cover some great tips that you will want to keep in mind when selecting the yarn you want to use to make this crochet teddy bear pattern, as well as the size of the crochet hook.
Yarn Selection
When selecting the yarn for your crochet teddy bear, there are a lot of different options to choose from. There are so many different styles and sizes to choose from when you take a walk down the yarn aisle of your local craft store.
I like to use one main color to create this teddy bear, but you may also want to have an accent color, for its nose, or even on its paws. I also prefer to use soft, plush yarn, or fluffy yarn, so that my final product is soft and snuggly.
The most common type of yarn to use is worsted weight yarn. You can find the yarn weight listed on the label of each skein of yarn.
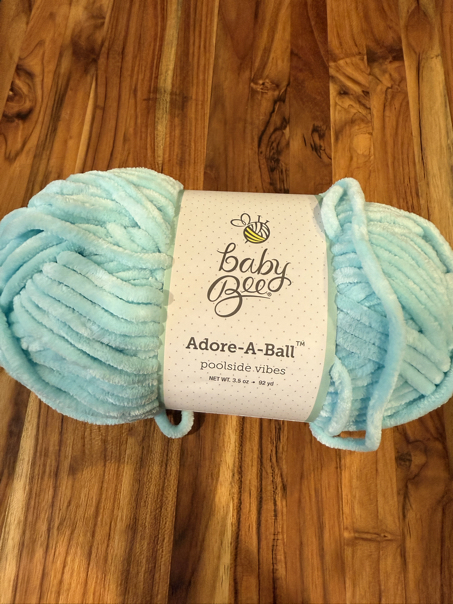
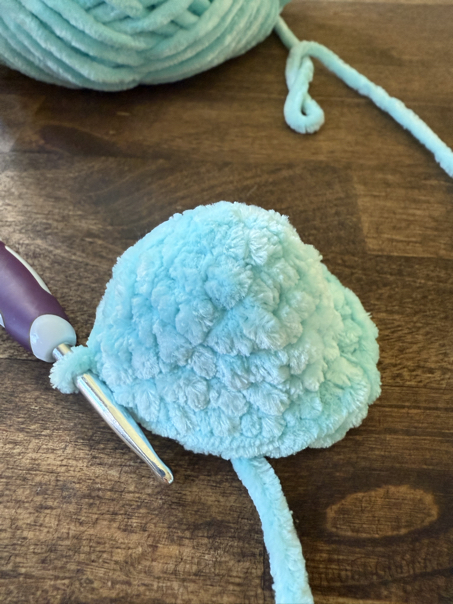
My personal favorite type of yarn to use when making this teddy bear pattern is velvet yarn. In the pictures of this pattern, I used two skeins of 3.5 oz yarn that were 92 yards long for each skein. The yarn was a 5 bulky weight yarn.
The best thing to remember when making any crochet pattern is that you can use the written pattern as your guide, however, when it comes down to it, you are the one making it. You are free to use whatever type of yarn you prefer, or what you like best.
You can even enjoy choosing your own color of yarn to create this cute little bear. While a brown color or black yarn is the most common, feel free to use whatever colors you like the best!

Hook Size
The size of the crochet hook that you choose to use will depend on what type of yarn you’re using, and how loose or tight your stitches are naturally. If you are using worsted-weight yarn, your best bet is probably going to be to use a size G crochet hook.
For making this crochet teddy bear using velvet yarn, I use a size H crochet hook. However, you may need to increase or decrease the size depending on your stitches, and what yarn you have selected.
You can always double-check the wrapping on the skin of the yarn, for size suggestions on your crochet hook, based on the specific type of yarn you are using.

Cute Crochet Teddy Bear Pattern
Materials
- 2 skeins of velvet yarn (3.5 oz and 92 yards long for each skein)
- 5.0 mm crochet hook
- stitch marker
- yarn needle
- colored floss
- 2 mm safety eyes (or as big as desired)
- fiberfill stuffing or poly-fil stuffing
Skill Level: Beginner/Intermediate
Abbreviations
ch – chain
sc – single crochet
sl st – slip stitch
mr – magic ring (magic circle)
inc (sc inc) – increase (single crochet increase)
BLO – back loop only
dec – decrease
st/sts – stitch/stitches
Basic Crochet Stitches

The basic crochet stitches that are used in this pattern include a chain, single crochet, increase, decrease, and slip stitch.
Chain. To make a change and you start off by making a slip knot and leaving a loop to insert the hook. Then yarn over and pull a loop through. Continue this process as directed to make chains. Each loop counts as one chain stitch.
Single Crochet. To make a single crochet, you insert the hook into the stitch indicated. Then yarn over and pull that loop up through the stitch that your hook has been entered in. There are now two loops on the hook. Yarn over once more info through the two loops. This makes a single crochet stitch.
Increase. In this pattern, we used a single crochet increase. To make this stitch, you will simply create two single crochet stitches in the same stitch to form an increase.
Decrease. This pattern also incorporates a decrease stitch, which is done using a single crochet stitch. To make a decrease, insert the hook into the stitch indicated, yarn over, and pull up a loop. Insert the hook into the next stitch indicated turnover and pull up a loop. There are now three loops on the crochet hook. Yarn over once more and pull through all three loops on the hook. This makes a decrease stitch.
Slip Stitch. In this pattern, a slip stitch is used to join the beginning and end of a round together. To make a slip stitch, insert the hook into the stitch indicated, yarn over, and pull this loop all the way through each stitch on the hook.

How To Crochet A Teddy Bear
Step-by-Step Instructions for the Cute Crochet Teddy Bear Pattern
To make the crocheted teddy bear, follow instructions below. Below are the step-by-step instructions on how to make each of the bear parts, and assembly instructions. Let’s begin by starting with the teddy bear’s arms.
Crochet The Parts
Start with the Torso and Extremities
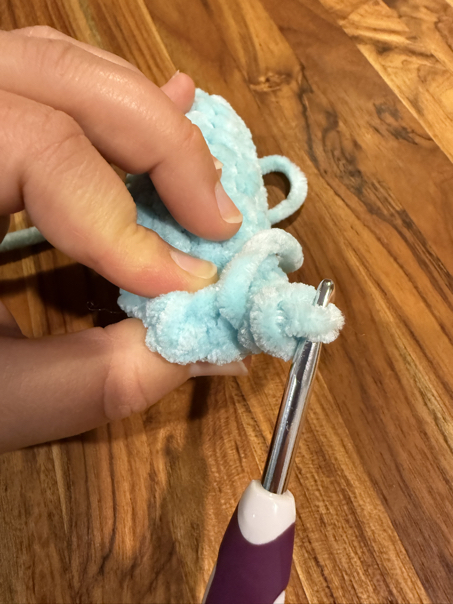
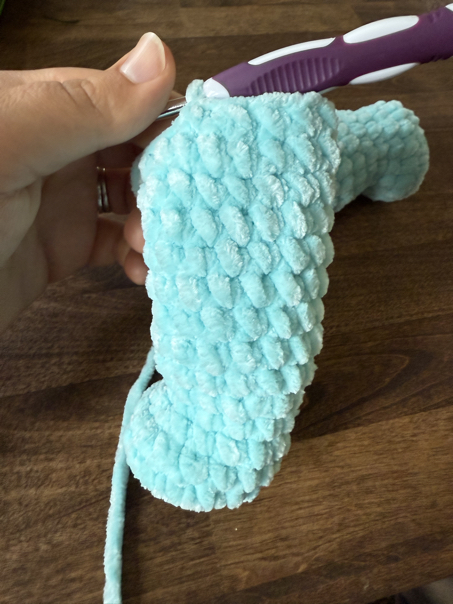
Arms (make 2)
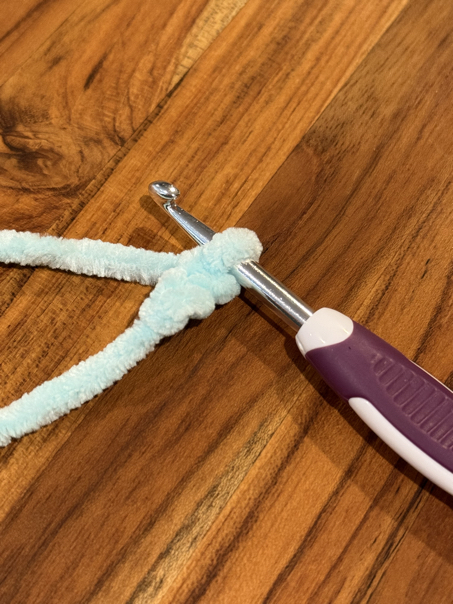
Round 1: ch 2, 6 sc in the 2nd ch from the hook. Join with sl st. (6)
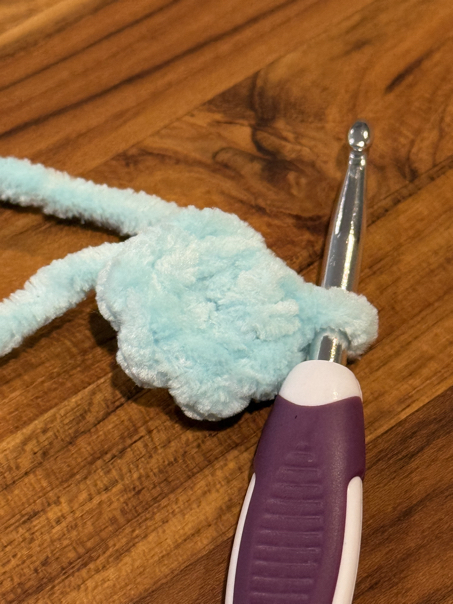
Round 2: ch 1, inc x 6. Join with sl st. (12)
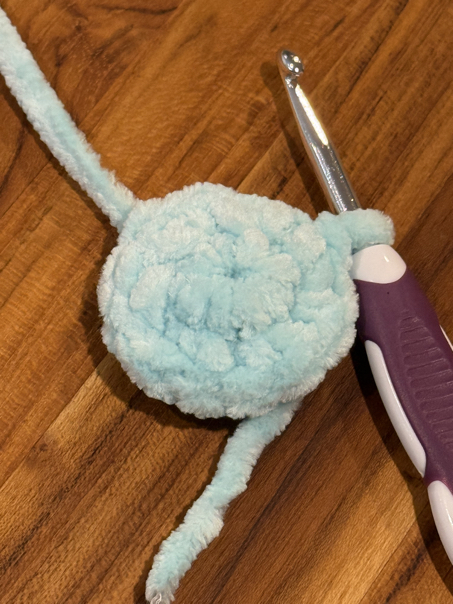
Round 3 – 10: ch 1, sc in each space around. Join with sl st. (12)
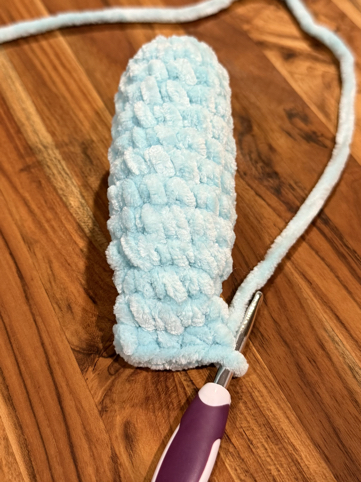
*stuff arm
Round 11: ch 1, (dec, sc) x4, join with sl st. (8)
Round 12 – 14: ch 1 sc in each st around (8)
Fold the top of arm together and make 4 sc st to hold them together. Finish off and leave a long tail for sewing.

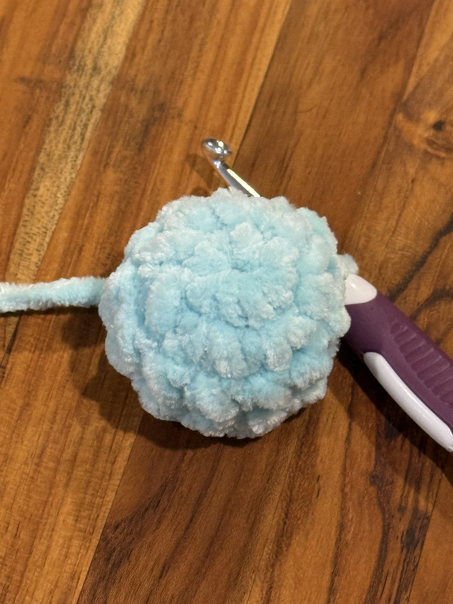
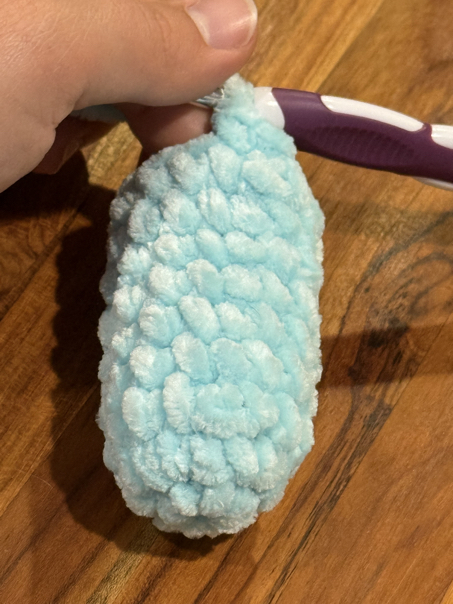
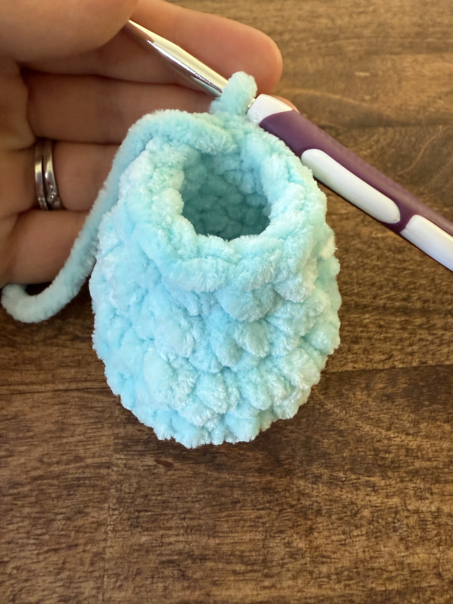
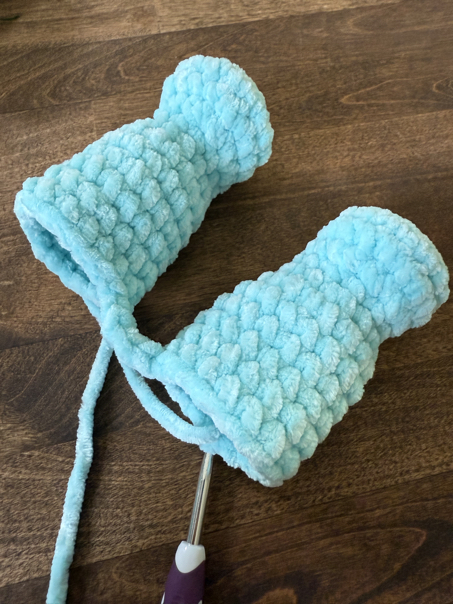
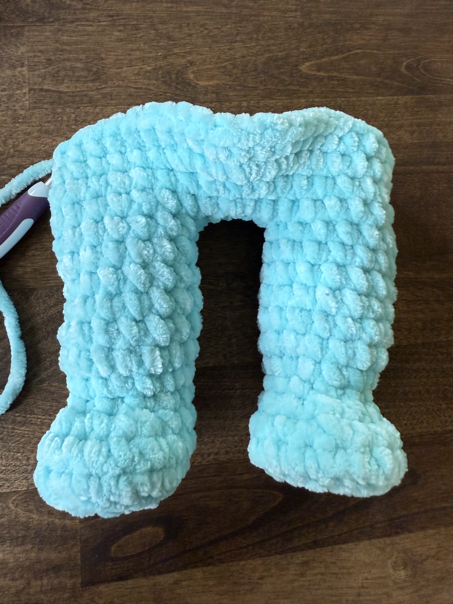
First Leg
Round 1: ch 2, 8 sc in the 2nd ch from hook. Join with sl st. (8)
Round 2: ch 1, inc x 8, join with sl st. (16)
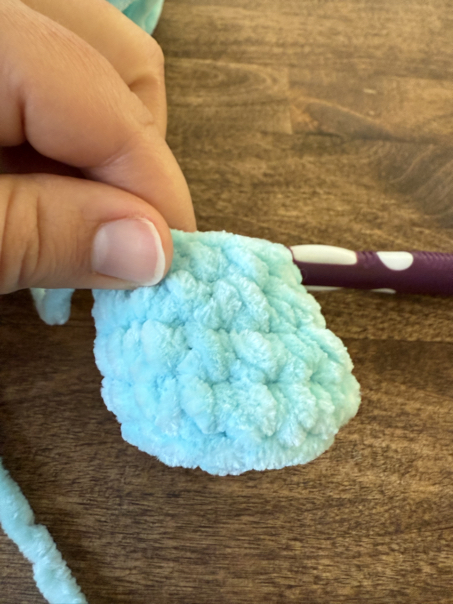
Round 3: ch 1, sc in BLO around. Join with sl st. (16)
Round 4: ch 1, sc in each st around. Join with sl st to the first stitch. (16)
Round 5: ch 1, sc in next 4 sts, dec x 4, sc in next 4. Join with sl st (12)
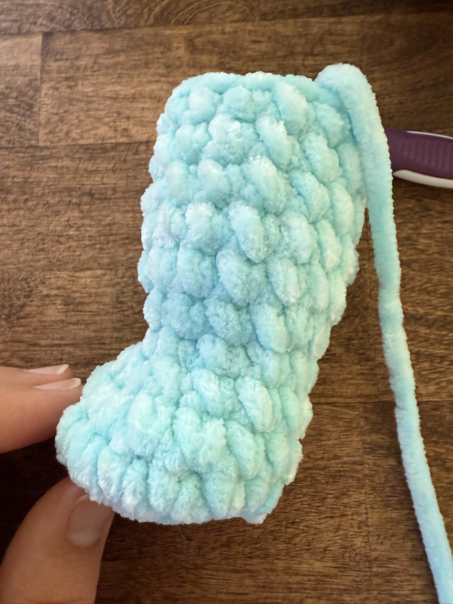
Round 6: ch 1, sc in each st around (12)

Round 7: ch 1, (2 sc, inc) x 4, join with sl st. (16)
Round 8-12: Ch 1, sc in each st around.
Finish off.
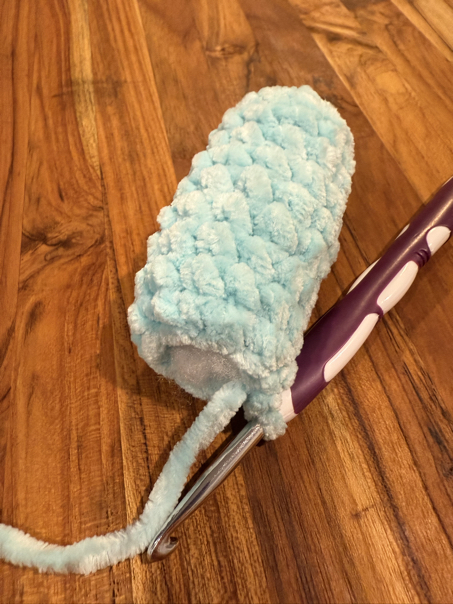
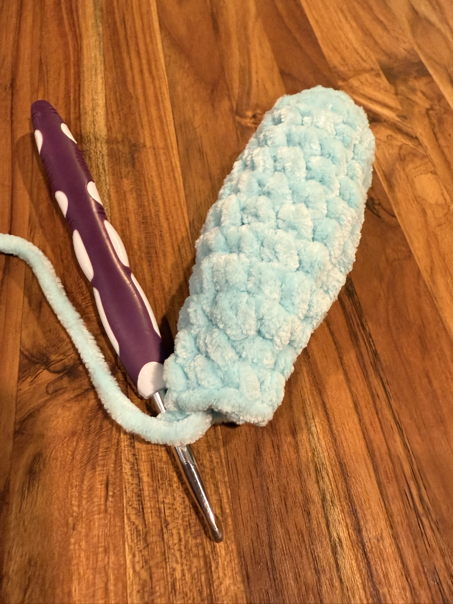
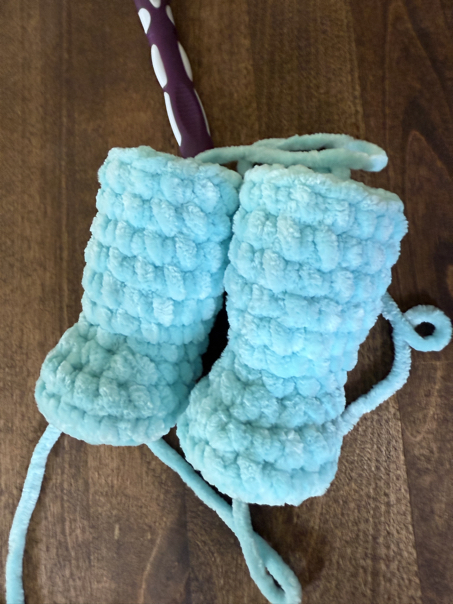
Second Leg
Round 1: ch 2, 8 sc in the 2nd ch from hook. Join with sl st. (8)
Round 2: ch 1, inc x 8, join with sl st. (16)
Round 3: ch 1, sc in BLO around. Join with sl st. (16)
Round 4: ch 1, sc in each st around. Join with sl st to the first stitch. (16)
Round 5: ch 1, sc in next 4 sts, dec x 4, sc in next 4. Join with sl st (12)
Round 6: ch 1, sc in each st around (12)
Round 7: ch 1, (2 sc, inc) x 4, join with sl st. (16)
Round 8-12: Ch 1, sc in each st around.
Do not finish off.
Join our Mailing List and Receive a…
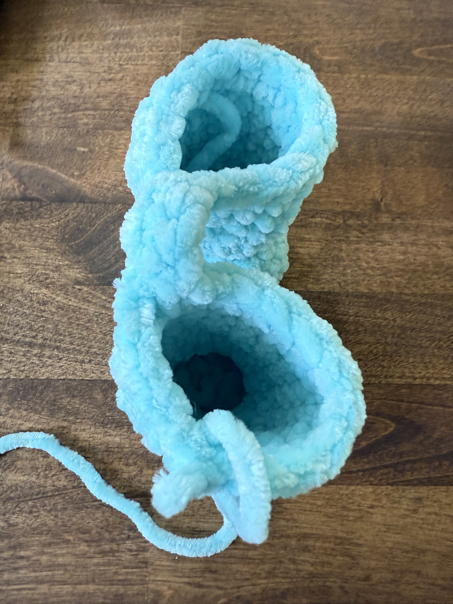
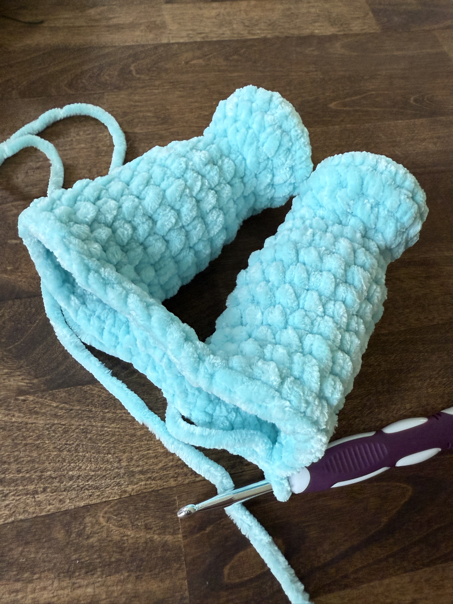
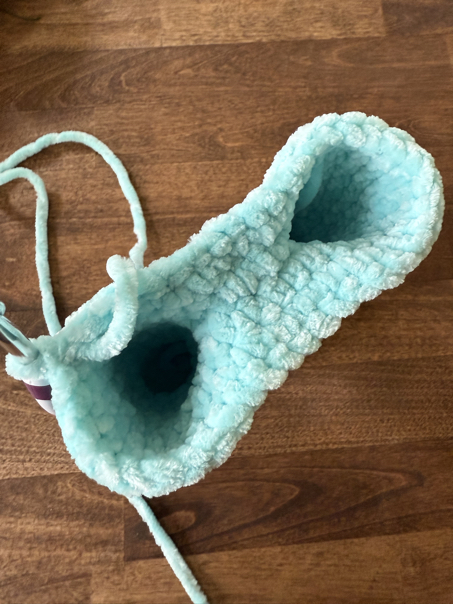
Body
Round 13: ch 1, 5sc, ch 4, now take the other foot and sc in each st around the second leg, 4 sc in ch 4 sp back across to the first foot, sc in remaining stitches. Join with sl st to the first st. (36)
Round 14: ch 1, 5 sc, sc in each back loop of ch 4, sc in each stitch around. Join with sl st. (40)
Round 15: ch 1, sc in each st around
Round 16: ch 1, sc in next 16 sts, dec x 2, 5 sc, inc x 5, sc in next 5 sts, dec x 2, sc, join with sl st.(41)
Round 17: ch 1, sc in each st around (41)
Round 18: ch 1, 6 sc, inc, sc, inc, 6 sc, dec, 10 sc, inc, 10 sc, dec, sc 1. Join with sl st. (42)
Round 19 – 22: ch 1, sc in each st around. Join with sl st. (42)
Round 23: ch 1, dec, 16 sc, dec x 2, 18 sc, dec. Join with sl st. (38)
Round 24: ch 1, sc in each st around. Join with sl st. (38)
Round 25: ch 1, dec, 14 sc, dec x 2, 16 sc, dec. Join with sl st. (34)
Round 26 – 27: ch 1, sc in each st around. Join with sl st. (34)
Round 28: ch 1, (dec, 5 sc) x 4, dec, 4 sc. Join with sl st. (29)


Round 29: ch 1, (dec, 4 sc) x 4, dec, 3 sc. Join with sl st. (24)
Round 30: ch 1, (dec, 3 sc) x 4, dec, 2 sc. Join with sl st. (19)
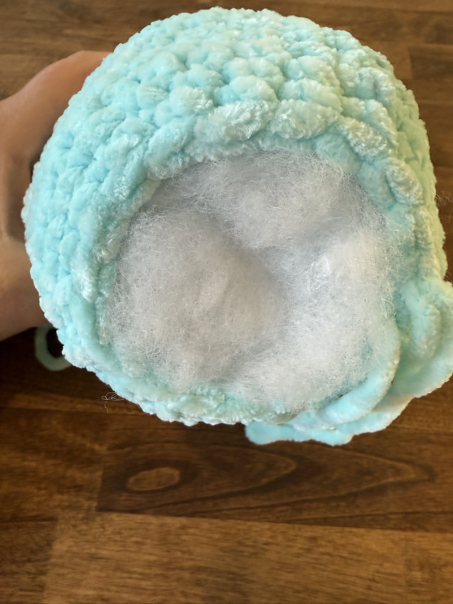
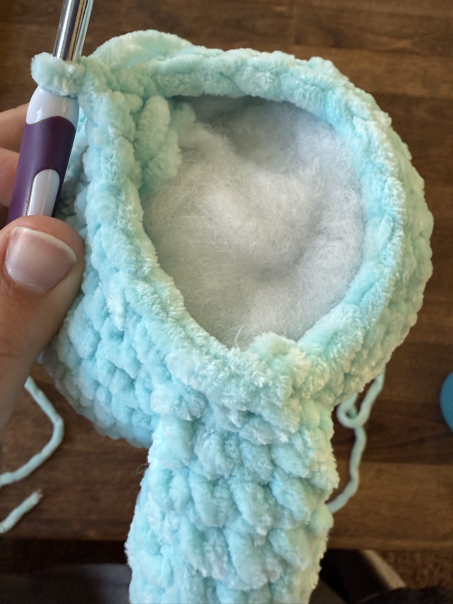
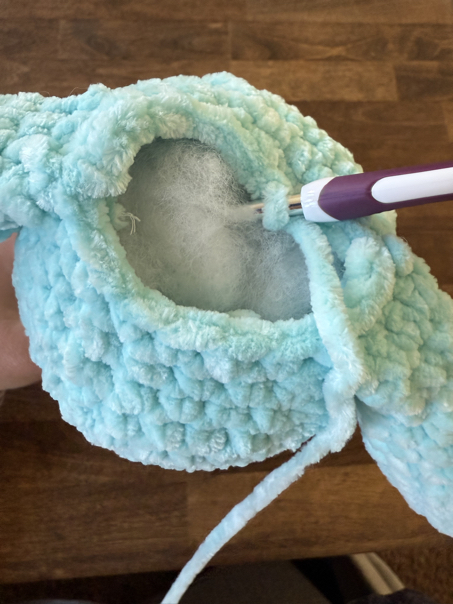
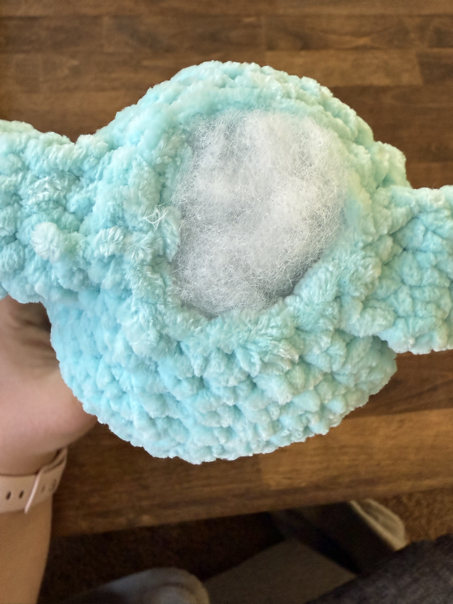
*Stuff the body with fiberfill or polyfil
Round 31: ch 1, 3sc in the top of the arm, 7sc, 4sc, in the top of the and arm, 6 sc, sc in the top of the 1st arm. Join with sl st.
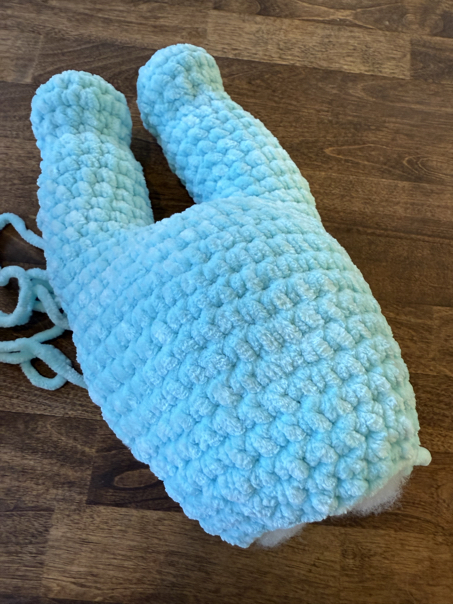
Round 32: ch 1, (dec, sc) around.
Finish off. Leave a long tail for sewing.
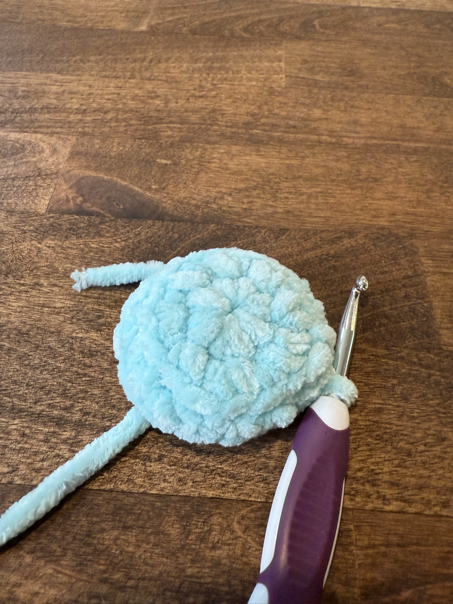
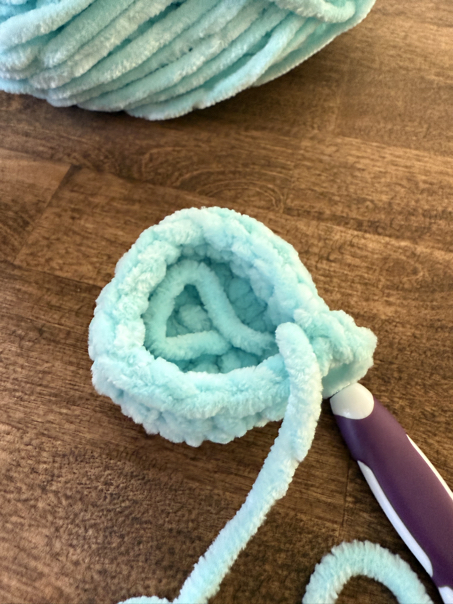
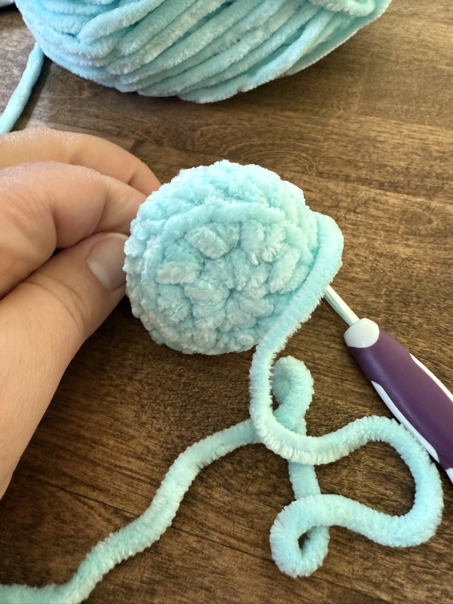
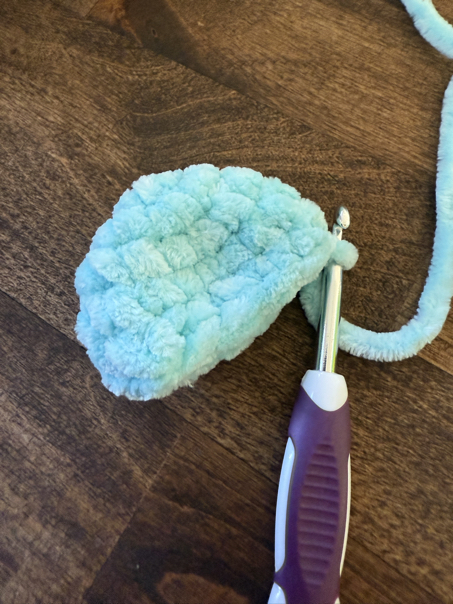
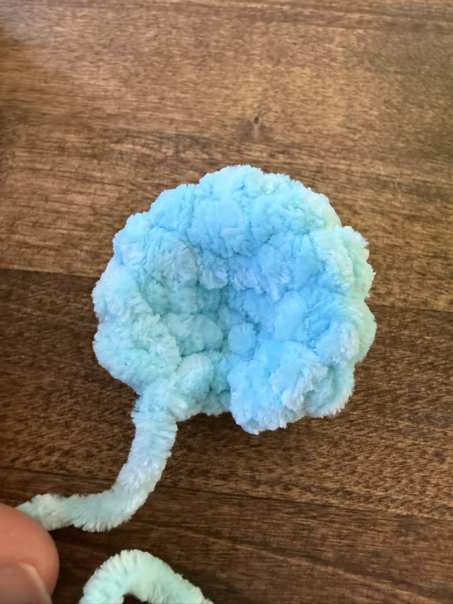
Tail
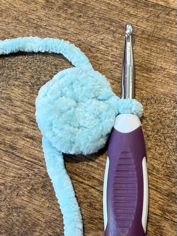
Round 1: ch 2, in the 2nd ch from hook, make 8 sc. Join with sl st.
Round 2: ch 1, inc around. Join with sl st (16)
Round 3: ch 1, sc in each st around. Join with sl st (16)
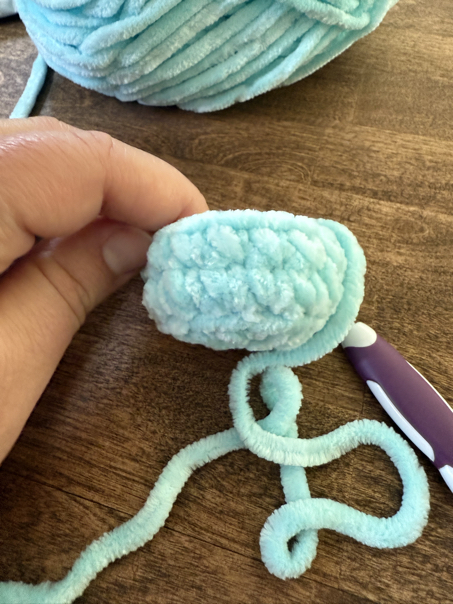
Round 4: ch 1, dec around. Join with sl st. (8)
Finish off by leaving a long tail for sewing. Now it’s time to move onto the bear’s head starting with it’s muzzle or nose and working your way out.

Head
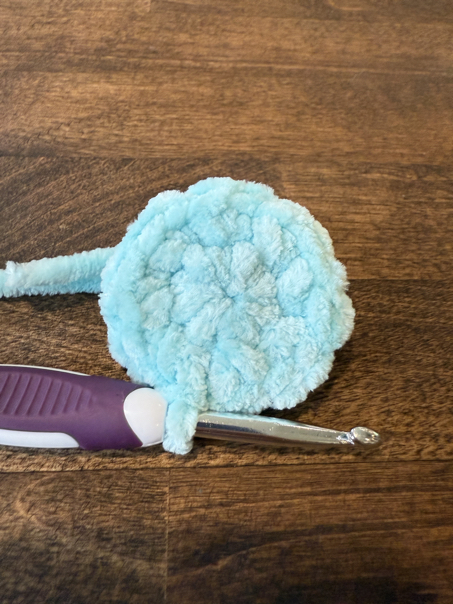
Round 1: ch 2, make 6 sc in the first ch sp (6)
Round 2: ch 1, (inc, sc) x 3, join with sl st. (9)
Round 3: ch 1, (3sc in same sp, 2 sc) x 3 (15)
Round 4: ch 1, sc in each st around. Join with sl st (15)
Round 5: ch 1, (inc, 4 sc) x 3. Join with sl st (18)
Round 6: ch 1, inc, 4 sc, inc 3 times, 4 sc, inc, 5 sc. Join with sl st. (23)
Round 7: ch 1, inc, 4 sc, (inc, sc) x 4, 3 sc, inc, 7 sc. Join with sl st. (29)
Round 8: ch 1, 2 sc, (inc, 3 sc) x 6, sc in remaining 4 sts around. Join with sl st. (35)
Round 9: ch 1, sc in each st around. Join with sl st. (35)
Round 10: ch 1, 3 sc, (inc, 4sc) x 5, 3 sc, dec x 2. Join with sl st. (38)
Round 11: ch 1, sc in each st around. Join with sl st. (38)
Round 12 – 15: ch 1, sc in each st around. Join with sl st.
Round 16: ch 1, (dec, 5 sc) around. Join with sl st.
Round 17: ch 1, (dec, 4 sc) around. Join with sl st.
Round 18: ch 1, (dec, 3 sc) around. Join with sl st.
*Insert safety eyes and fill with stuffing.
Round 19: ch 1, (dec, 2 sc) around. Join with sl st.
Round 20: ch 1, (dec, sc) around. Join with sl st.
Round 21: ch 1, dec around. Join with sl st.
Finish off. Leave a long yarn tail for sewing.

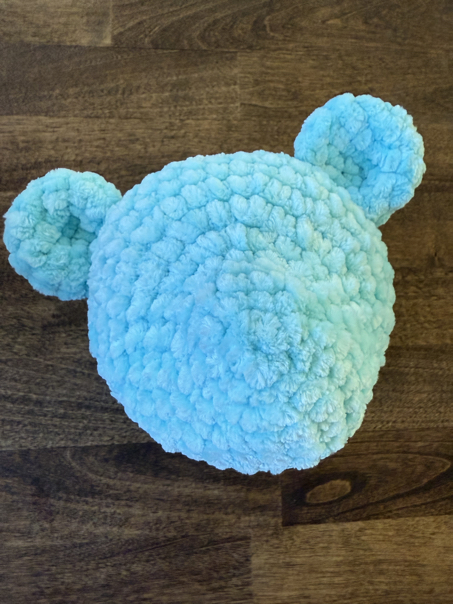
Ears (make 2)
Round 1: ch 2, make 6 sc in the 2nd ch from the hook. Join with sl st (6)
Round 2: ch 1, inc in each st around. Join with sl st. (12)
Round 3: ch 1, (inc, 2 sc) around. Join with sl st. (16)
Round 4: ch 1, sc in each st around. Join with sl st. (16)
Round 5: ch 1, (dec, sc) around. Join with sl st.
Finish off. Leaving a long tail to sew the ears together.
Pinch the ears together at the bottom, and use a yarn needle in the long tail to secure the bottom of the ears so that they curl around.
Assemble The Bear
The body is already completely assembled. You will still want to sew the ears on top of the bear head. Once they are sewn in place, you will also want to use a yarn needle with yarn, to attach the head to the body. Also, remember to sew the tail to the butt of the teddy bear.
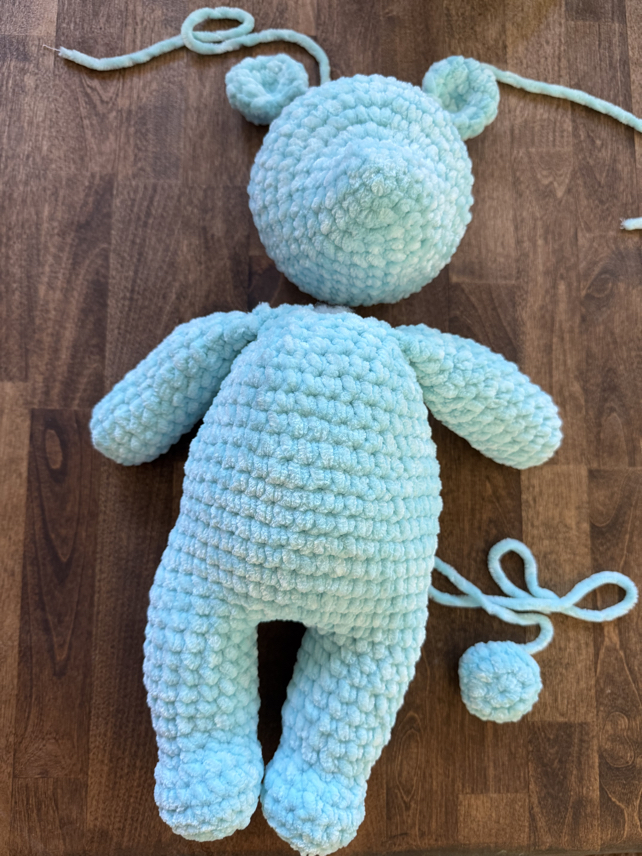
Note: this teddy bear doesn’t show safety eyes because it is for a baby and will only have an embroydered face.
Finishing
After the teddy bear is completely assembled, you can sew a face onto the teddy bear using colored floss, or colored yarn if desired. I recommend using colored floss to sew a nose, mouth, eyebrows, and even eyelashes onto the bear’s face if desired.
Feel free to get creative and add any details you want to include on your adorable, crocheted teddy bear.

Free Crochet Teddy Bear Pattern
This crochet teddy bear pattern is also available as a free download so that you can enjoy the pattern anytime. This free pattern is available for your personal use only and should not be used for commercial distribution under any circumstances. To get your copy of this free crochet pattern, simply enter your email address into the box below.
Crochet Teddy Bear Pattern Copyright
Please note that this pattern is intended for personal use only, and is not for commercial distribution. By copyright, unless otherwise noted, you are not authorized to copy or claim my content as your own. You are, however, more than welcome to sell your finished products made with my patterns. I always appreciate it when you link to my patterns so that others can find them too!
Perfect Teddy Bear Crochet Pattern

I hope that you have enjoyed this free Teddy bear crochet pattern! This teddy bear is the perfect size for children of all ages to enjoy, no matter if it’s made for young kids or kids at heart. I hope you enjoy your newest addition and have fun making this adorable, crocheted teddy bear.
Happy Crocheting!
Find Us Online!
Be sure to follow us online on your favorite social media platform!

Teddy Bear Crochet Pattern
Materials
- 2 skeins of velvet yarn 3.5 oz and 92 yards long for each skein
- 5.0 mm crochet hook
- stitch marker
- yarn needle
- colored floss
- 2 mm safety eyes or as big as desired
- fiberfill stuffing
Instructions
- To make the crocheted teddy bear, follow the instructions below. Below are the step-by-step instructions on how to make each of the bear parts, and assembly instructions. Let’s begin by starting with the teddy bear’s arms.
Arms (make 2)
- Round 1: ch 2, 6 sc in the 2nd ch from the hook. Join with sl st. (6)
- Round 2: ch 1, inc x 6. Join with sl st. (12)
- Round 3 – 10: ch 1, sc in each space around. Join with sl st. (12)
- *stuff arm
- Round 11: ch 1, (dec, sc) x4, join with sl st. (8)
- Round 12 – 14: ch 1 sc in each st around (8)
- Fold the top of arm together and make 4 sc st to hold them together. Finish off and leave a long tail for sewing.
First Leg
- Round 1: ch 2, 8 sc in the 2nd ch from hook. Join with sl st. (8)
- Round 2: ch 1, inc x 8, join with sl st. (16)
- Round 3: ch 1, sc in BLO around. Join with sl st. (16)
- Round 4: ch 1, sc in each st around. Join with sl st to the first stitch. (16)
- Round 5: ch 1, sc in next 4 sts, dec x 4, sc in next 4. Join with sl st (12)
- Round 6: ch 1, sc in each st around (12)
- Round 7: ch 1, (2 sc, inc) x 4, join with sl st.
- Round 8-12: Ch 1, sc in each st around.
- Finish off.
Second Leg
- Round 1: ch 2, 8 sc in the 2nd ch from hook. Join with sl st. (8)
- Round 2: ch 1, inc x 8, join with sl st. (16)
- Round 3: ch 1, sc in BLO around. Join with sl st. (16)
- Round 4: ch 1, sc in each st around. Join with sl st to the first stitch. (16)
- Round 5: ch 1, sc in next 4 sts, dec x 4, sc in next 4. Join with sl st (12)
- Round 6: ch 1, sc in each st around (12)
- Round 7: ch 1, (2 sc, inc) x 4, join with sl st.
- Round 8-12: Ch 1, sc in each st around.
- Do not finish off.
Body
- Round 13: ch 1, 5sc, ch 4, sc in each st around the second leg, 4 sc in ch 4, sc in remaining stitches. Join with sl st to the first st.
- Round 14: ch 1, 5 sc, sc in each back loop of ch 4, sc in each stitch around. Join with sl st.
- Round 15: ch 1, sc in each st around
- Round 16: ch 1, sc in next 16 sts, dec x 2, 5 sc, inc x 5, sc in next 5 sts, dec x 2, sc, join with sl st. (41)
- Round 17: ch 1, sc in each st around (41)
- Round 18: ch 1, 6 sc, inc, sc, inc, 6 sc, dec, 10 sc, inc, 10 sc, dec, sc. Join with sl st. (42)
- Round 19 – 22: ch 1, sc in each st around. Join with sl st. (42)
- Round 23: ch 1, dec, 16 sc, dec x 2, 18 sc, dec. Join with sl st. (38)
- Round 24: ch 1, sc in each st around. Join with sl st. (38)
- Round 25: ch 1, dec, 14 sc, dec x 2, 16 sc, dec. Join with sl st. (34)
- Round 26 – 27: ch 1, sc in each st around. Join with sl st. (34)
- Round 28: ch 1, (dec, 5 sc) x 4, dec, 4 sc. Join with sl st. (29)
- Round 29: ch 1, (dec, 4 sc) x 4, dec, 3 sc. Join with sl st. (24)
- Round 30: ch 1, (dec, 3 sc) x 4, dec, 2 sc. Join with sl st. (19)
- *Stuff the body with fiberfill
- Round 31: ch 1, 3sc in the top of the arm, 7sc, 4sc, in the top of the and arm, 6 sc, sc in the top of the 1st arm. Join with sl st.
- Round 32: ch 1, (dec, sc) around.
- Finish off. Leave a long tail for sewing.
Tail
- Round 1: ch 2, in the 2nd ch from hook, make 8 sc. Join with sl st.
- Round 2: ch 1, inc around. Join with sl st (16)
- Round 3: ch 1, sc in each st around. Join with sl st (16)
- Round 4: ch 1, dec around. Join with sl st. (8)
- Finish off by leaving a long tail for sewing.
Head
- Round 1: ch 2, make 6 sc in the first ch sp (6)
- Round 2: ch 1, (inc, sc) x 3, join with sl st. (9)
- Round 3: ch 1, (3sc in same sp, 2 sc) x 3 (17)
- Round 4: ch 1, sc in each st around. Join with sl st (17)
- Round 5: ch 1, (inc, 4 sc) x 3. Join with sl st (20)
- Round 6: ch 1, inc, 4 sc, inc 3 times, 4 sc, inc, 5 sc. Join with sl st. (24)
- Round 7: ch 1, inc, 4 sc, (inc, sc) x 4, 3 sc, inc, 7 sc. Join with sl st. (30)
- Round 8: ch 1, 2 sc, (inc, 3 sc) x 6, sc in remaining 4 sts around. Join with sl st. (36)
- Round 9: ch 1, sc in each st around. Join with sl st. (36)
- Round 10: ch 1, 3 sc, (inc, 4sc) x 5, 3 sc, dec x 2. Join with sl st. (40)
- Round 11: ch 1, sc in each st around. Join with sl st. (40)
- Round 12 – 15: ch 1, sc in each st around. Join with sl st.
- Round 16: ch 1, (dec, 5 sc) around. Join with sl st.
- Round 17: ch 1, (dec, 4 sc) around. Join with sl st.
- Round 18: ch 1, (dec, 3 sc) around. Join with sl st.
- *Insert safety eyes and fill with stuffing.
- Round 19: ch 1, (dec, 2 sc) around. Join with sl st.
- Round 20: ch 1, (dec, sc) around. Join with sl st.
- Round 21: ch 1, dec around. Join with sl st.
- Finish off. Leave a long yarn tail for sewing.
Ears (make 2)
- Round 1: ch 2, make 6 sc in the 2nd ch from the hook. Join with sl st (6)
- Round 2: ch 1, inc in each st around. Join with sl st. (12)
- Round 3: ch 1, (inc, 2 sc) around. Join with sl st. (16)
- Round 4: ch 1, sc in each st around. Join with sl st. (16)
- Round 5: ch 1, (dec, sc) around. Join with sl st.
- Finish off. Leaving a long tail to sew the ears together.
- Pinch the ears together at the bottom, and use a yarn needle in the long tail to secure the bottom of the ears so that they curl around.
Assemble The Bear
- The body is already completely assembled. You will still want to sew the ears on top of the bear head. Once they are sewn in place, you will also want to use a yarn needle with yarn, to attach the head to the body. Also, remember to sew the tail to the butt of the teddy bear.
Finishing
- After the teddy bear is completely assembled, you can sew a face onto the teddy bear using colored floss, or colored yarn if desired. I recommend using colored floss to sew a nose, mouth, eyebrows, and even eyelashes onto the bear’s face if desired.
- Feel free to get creative and add any details you want to include on your adorable, crocheted teddy bear.
PIN for Later!


Hi, I think I may be missing something in the pattern between rows 15 and 16 I don’t know how we get to 40 stitches. Can somebody help?
Hi Darlene,
Thank you for your comment. I’m sorry for the confusion, let me see if I can help you out. I think you may need to look back a little farther than rows 15 and 16. Before you create the body, you will make the two legs, then create a bridge of 4 chain spaces between the two legs. Each leg has 16 sts, so 16+16=32 then we add the chain 4 bridge in round 13. In round 14 we will make stitches on both sides of the legs, bringing the total stitch count up to 40 stitches in the round.
Your question about round 15, I understand why it is a little confusing. We are adding and subtracting stitches by way of increase and decrease stitches. This is to give the bear’s belly more shape. We are forming his hips with the decrease stitches, and making a little belly for him with the increase stitches. You can skip these, and make a single crochet in each step, and it just won’t have the prominent little belly.
I hope this helps! Please let me know if I can be of further assistance!
Sincerely,
Faith
Hi Faith,
What stitch are we supposed to attach the ch4 to on the other leg? I am also having difficulties with the stitch count around rounds 13-16. I somehow end up with too many stitches!
Hi Rosie,
Yes, the ch4 is to bridge the gap between the two legs, to get you from one side to the other. You will then make your stitches in these chains to start creating the body. I hope this helps! Please let me know if I can assist further 🙂